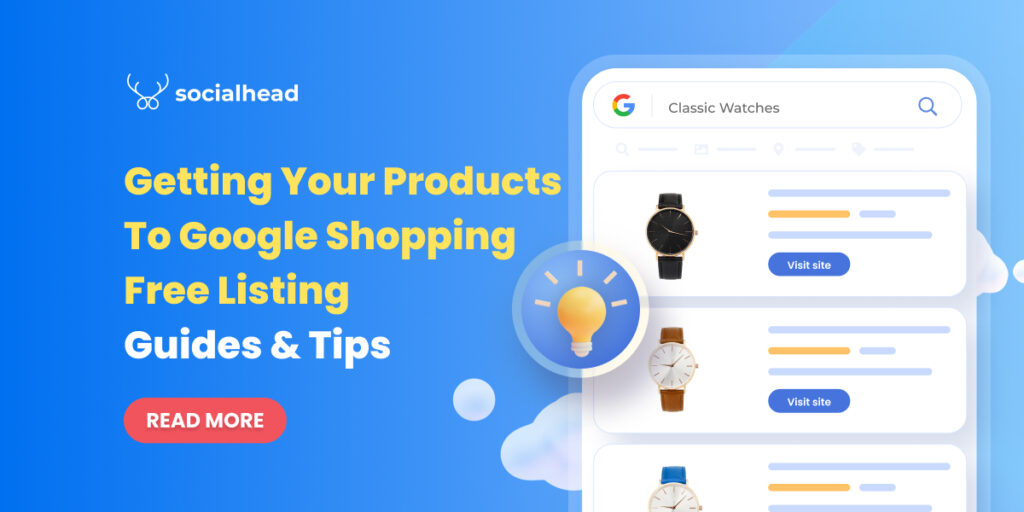
Since 2018, there have been 1.8 billion online buyers worldwide; and the number is expected to grow more. As a result, online store owners have to adapt to the flow and make their products visible to as many customers as possible. This is when Google offers Google Shopping free listing.
Table of Contents
What is Google Shopping?
This is a tool from Google to find products, browse options and compare offers among online sellers. Based on how you set up your product listing, customers may buy your products on this Google Shopping page. Besides, they can also click through to your store’s website and make a purchase.
When searching for a specific product on Google, there will always be a Shopping tag right under the searching box. After clicking on this tag, customers will be taken to the Google Shopping page where there are many products offered from different retailers.
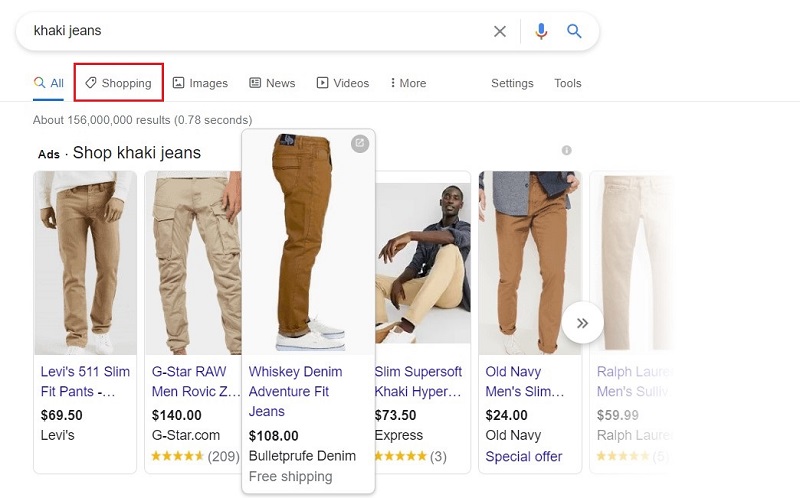
Click the Shopping tab to see Google Shopping listings
On this page, the Google Shopping free listing locates in the zone we have marked in the below picture.
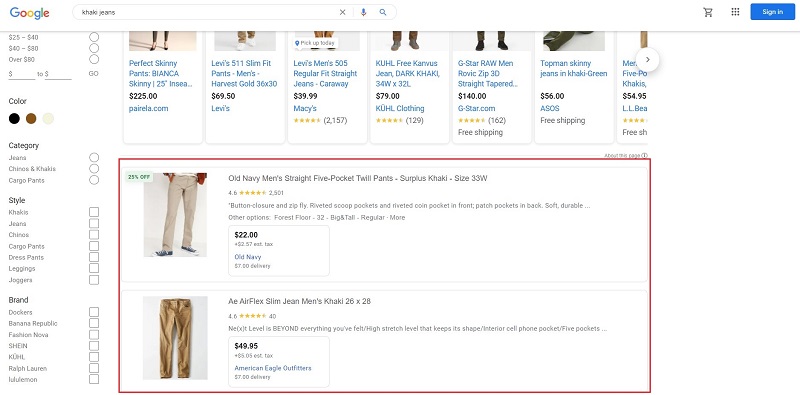
Highlighted zone for Google Shopping free Listing
Does Google Shopping cost money?
The answer is yes and no. As mentioned above, the free listing on Google Shopping is located after Google Shopping Ads or known as Paid Listing which catches customers’ attention more easily.
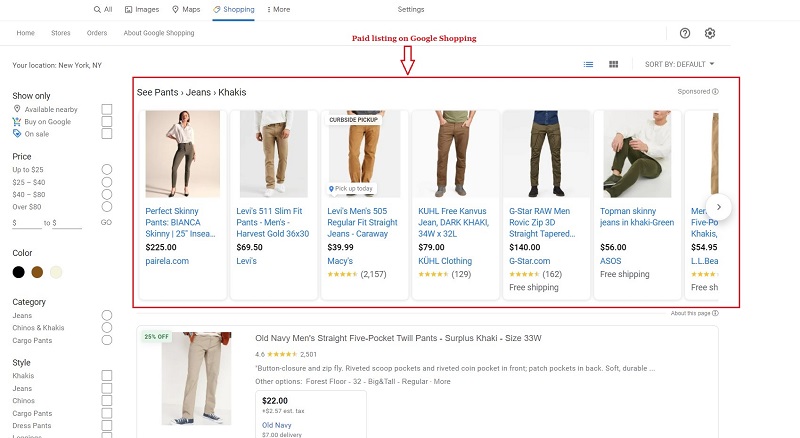
The paid listings or Google Ads are at the top of the page
Still, even without such an advantage, you can get the same benefits when you list your product on Google Shopping for free. Scroll down this article and I will show you how.
How to get your products to Google Shopping Free Listing?
Since you have known what Google Shopping is, you probably own one or many eCommerce stores. First thing first, it’s time for you to start listing your products across all these platforms.
Sign up for your Google Merchant Center account
In order to sign up for a Google Merchant account. You should link your own Google account to the Google Merchant Center. This helps keep track of any detail that is Google-related.
Tip: using the same account for other properties, such as Google Analytics or Google My Business, will make your work easier.
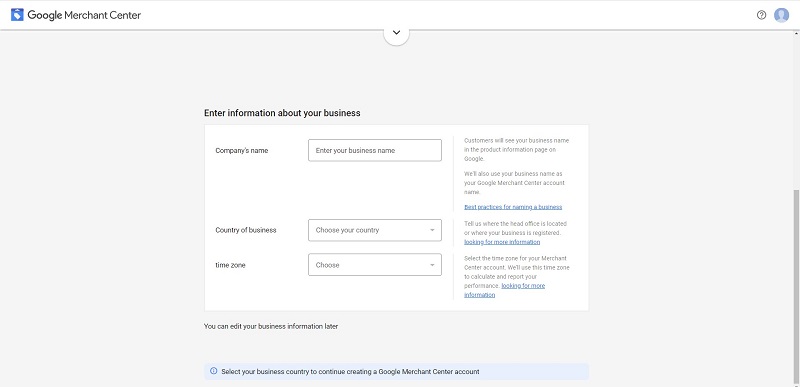
Enter your business’s information
Then, you will have to enter your business information. These will allow Google to decide practices for your product listings.
Choose your program and tools for your Google Shopping free listing
There are 2 options of customers’ paying methods for you to decide. One is On my website, and the other is At my local store. Both options are free. If they are applicable to your business, choose all of them.
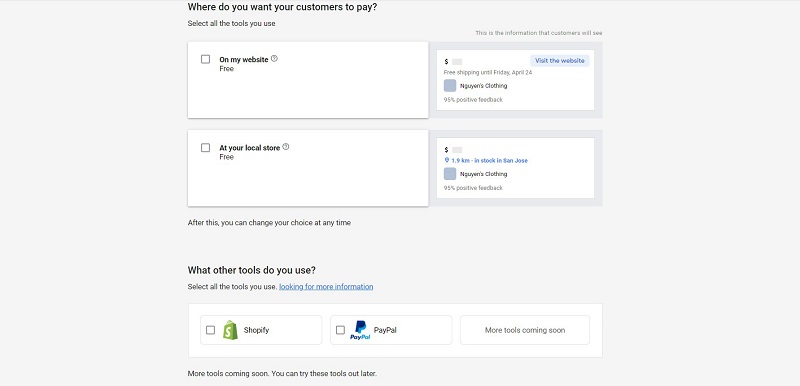
Decide the methods you want to use
Moreover, Google Merchant Center provides tools that help with checking out as well. At the moment, only Shopify and Paypal are available, but you can expect more in the future.
Once you have finished setting up, you will be taken to your new Google Merchant Center account.
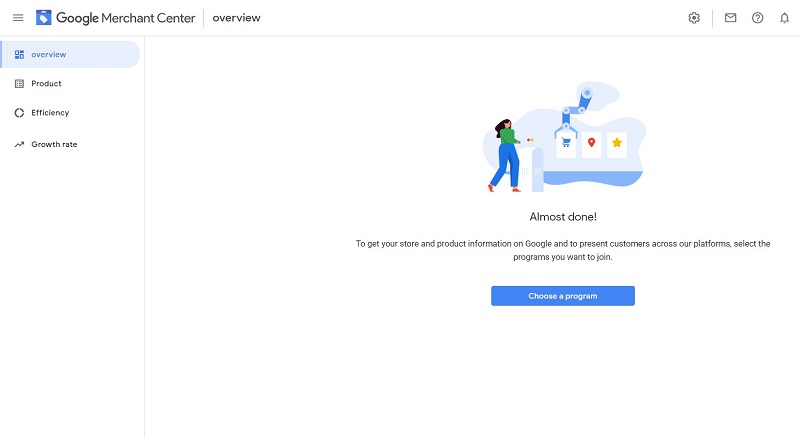
Welcome to your newly created Google Merchant Center account
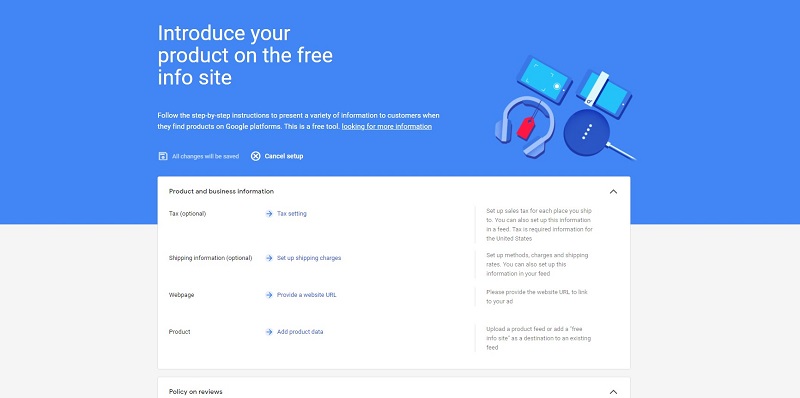
Finish up your Google Shopping free listing tasks
You should opt for a program named “Free product information page” in your Google Merchant Center. In this program, you’ll need to finish filling in necessary data such as tax, your website URL…
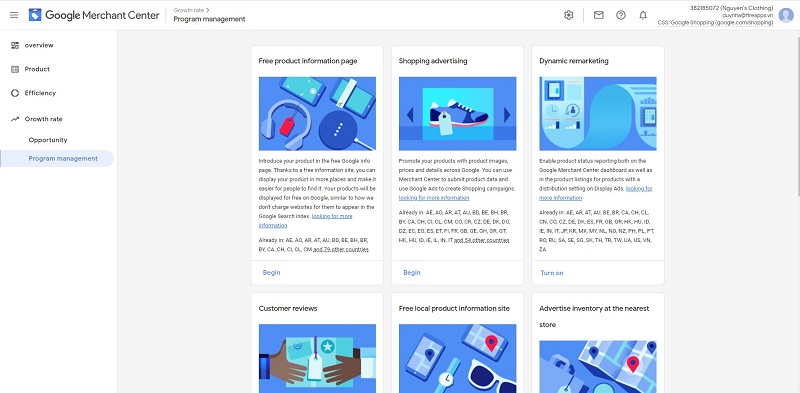
Choose the Free product information page program
Although tax and shipping are optional fields, you should fill them in for a complete listing. Next, add products you want to list on Google Shopping Listing.
Fill in your business information
Add your products’ data
Now, you have reached the trickiest stage of this guide. Adding your products’ data can take you a lot of time because it requires carefulness and precision. For some stores, it can be straightforward while for others, you’ll have to put more effort.
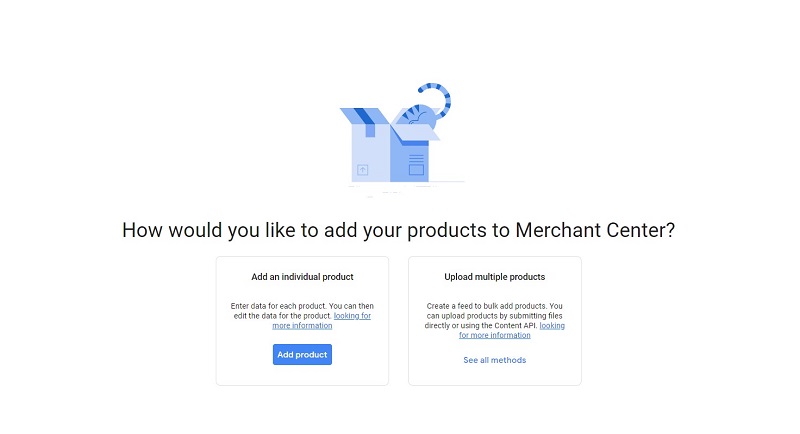
Choose how to add your products’ information to Google Shopping listing for free
When you start adding the data, you can choose between adding individual products and adding multiple products by creating a product feed.
Add your individual product
If you decide to use this method, you will have to provide the following data:
- Country of sale
- Language
- Destination
- ID or SKU of the product
- Subject of the product
- Brand of the product
- Description
Besides those, you still need to provide a product’s identification codes such as GTIN, UPC, EAN, JAN, or ISBN. You can learn more about the details of each code by visiting this page https://support.geekseller.com/knowledgebase/upc-ean-gtin-isbn/.

Fill in your product’s details
As you can see, it‘s quite a bit of hard work. Especially when you are owning hundreds of products, you would be far from done with your listing.
Add multiple products by creating a product feed
To save you time and effort, Google Merchant Center also allows you to add multiple products at the same time. All you need to do is make a product feed for your Google Shopping free listing.
This is easily the better option for many merchants as most of them have their own online stores. Additionally, this feature also allows your product feed to update automatically when you update your website.
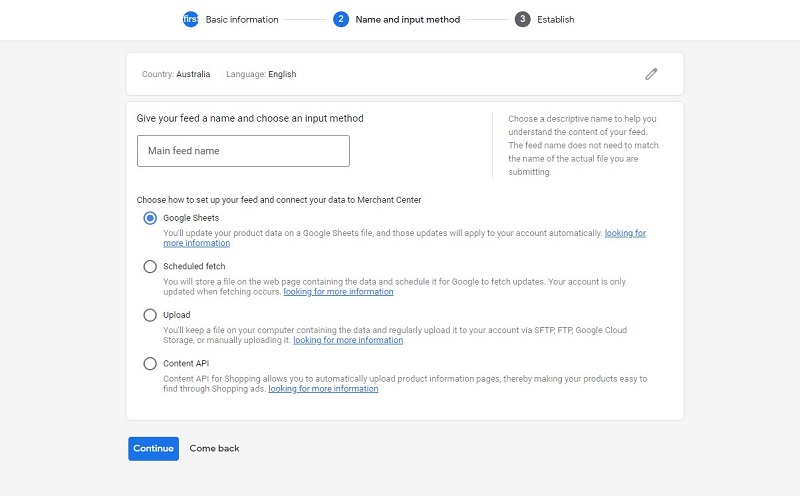
Make a product feed to add multiple products to Google Shopping listing
There are 4 ways of adding multiple products via your product feed which are Google Sheets, Schedule Fetch, Upload, and Content API. “Schedule Fetch” and “Content API” are commonly used because they can automatically update your Google Shopping listing.
Some product feed tips for your better experience:
- If you are having a Shopify store for your business, it will be much easier to add a product feed. Shopify has provided everything that you might need for the job. Under “Sales channels” in your admin section, you will see “Google” and within this section, it’ll guide you thoroughly to the end.
- You can also use some supported applications to add multiple products. Some apps even support multi-platform of eCommerce, such as Socialshop. This tool not only adds your product feed from your website but also updates your feed by schedule. The best thing is that this Shopify app does everything automatically with free installation.
It would usually take a few hours for your listing to go live if you have more than 100 SKUs. Its initial status will be “under review” and then change to “eligible”.
Check how your Google Shopping free listing is working
Once you have finished uploading your products and following the steps, your products are ready to be shown in the Google Shopping listing. Then, you should log into your Google Merchant Center account and see if there are any problems in the product section. You can check further in the “Diagnostics” tab.
If nothing goes wrong, you can now see the result and search for your product in Google Shopping free listing.
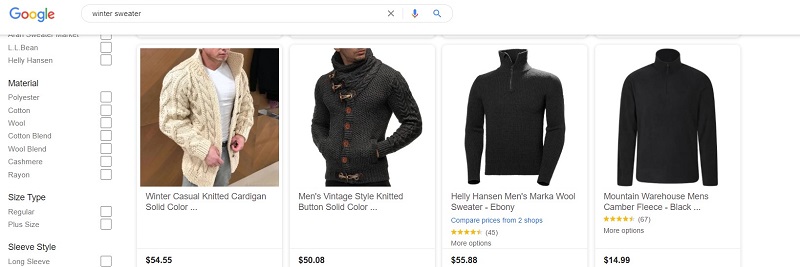
Check and see how your listing is working
Final thought
It can be stressful when you’re an online store owner and trying to make a profit. That’s why getting your products to Google Shopping free listing can be a lifesaver. Not only help you target the right customers but also increase organic traffic to your store, therefore boosting sales for free.
By following these guides and tips, you can quickly get more customers to your store and sell more products. Good luck!


 socialshop
 socialpublish
 socialreply
 socialwidget