

In order to leverage Shopping ads for your business, you first need to create a stunning Google Merchant product feed.
Google allows you to create your own feed in many different ways. Each method has its own pros and cons which makes it suitable for specific business types.
In today’s article, I’ll thoroughly evaluate 2 of the most common and easy to follow methods, helping you to choose the optimal ones for your business.
Table of Contents
What is product feed in Google Merchant Center?
According to Google’s onboarding guide, a feed is an up-to-date list of information about all of your products.
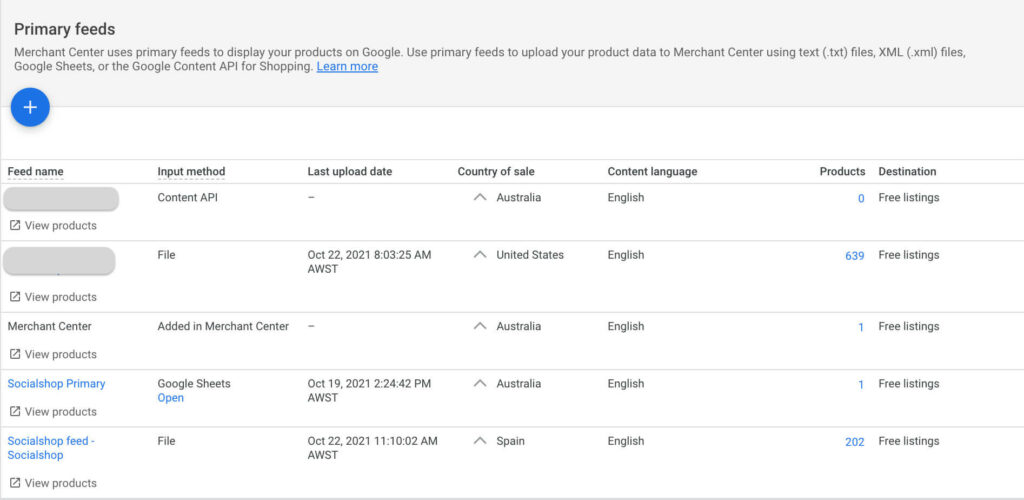
Product feeds in Google Merchant Center
Depending on what works best for your business, you can choose how you want to submit your product information to Google.
Easiest ways to upload Google Merchant product feed
Using Google Sheets
The first method is manually uploading your product feed using Google sheets. To be more specific, you need to fill all your products information in a Google sheet and allow Google to fetch that sheet to upload your products.
Luckily, the Merchant Center is thoughtful enough to prepare a template for you, you just need to fill in the required attributes of the products you want to sell. Then schedule a time for Google to fetch your spreadsheet to update the data.
To be fair, this method has some pros and cons:
Pros & cons
In terms of pros:
- Firstly, this is hands-down the most straightforward method. There’s no need to install any 3rd party apps or hire a team of developers to get all the coding tasks done, you can definitely carry out the whole process from beginning to end right in the Merchant Center.
- The second advantage of this method is budget-friendliness. Since no apps or developer is involved, you won’t have to pay any extra costs.
- And of course, no coding is required to work with Google sheets.
- Last but not least, if you filled in all the attributes that Google requires in the template spreadsheet, it is very likely that your products could get approval after the initial review phase.
Cons:
- It is very time-consuming if you have hundreds or thousands of items to sell. If that’s the case, you’ll have to spend days and weeks just to edit the Google sheet let alone other shop setup tasks. Therefore, I don’t recommend this method for medium or large online store owners.
- Moreover, it doesn’t allow you to set conditions or rules for your product information. In case you want to change an attribute of a specific group of products, you’ll have to edit them one by one. This could not be the most optimal way to run your business when you start selling a wide range of products.
That said, if you still want to upload your Google Merchant product manually, follow my step-by-step instructions below:
Step-by-step instructions
#1. From your Google Merchant Center dashboard, navigate to Products > Feeds > Add primary feed.
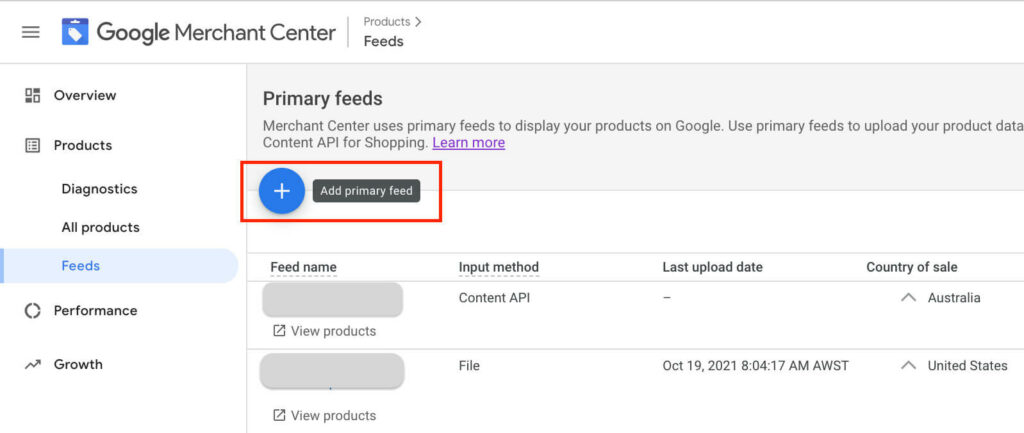
Add primary feed in Google Merchant Center
#2. Select your country of sale, language, and destination (free listings or shopping ads). Click Next.
#3. Choose the feed name of your choice and the input method as Google Sheets. Then Continue.
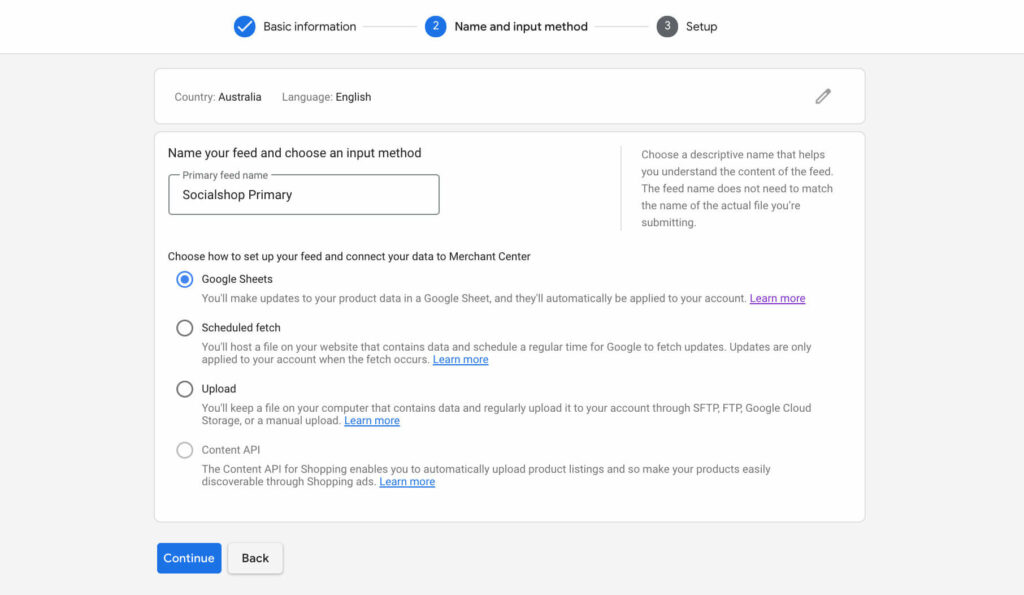
Choose feed name and input method in Google Merchant center
#4. Now, Google will ask you if you want to select an existing spreadsheet or generate a new sheet with its template. I recommend you to go for the latter option since following the format of Google could increase your chance of products being approved. Then click Create feed.
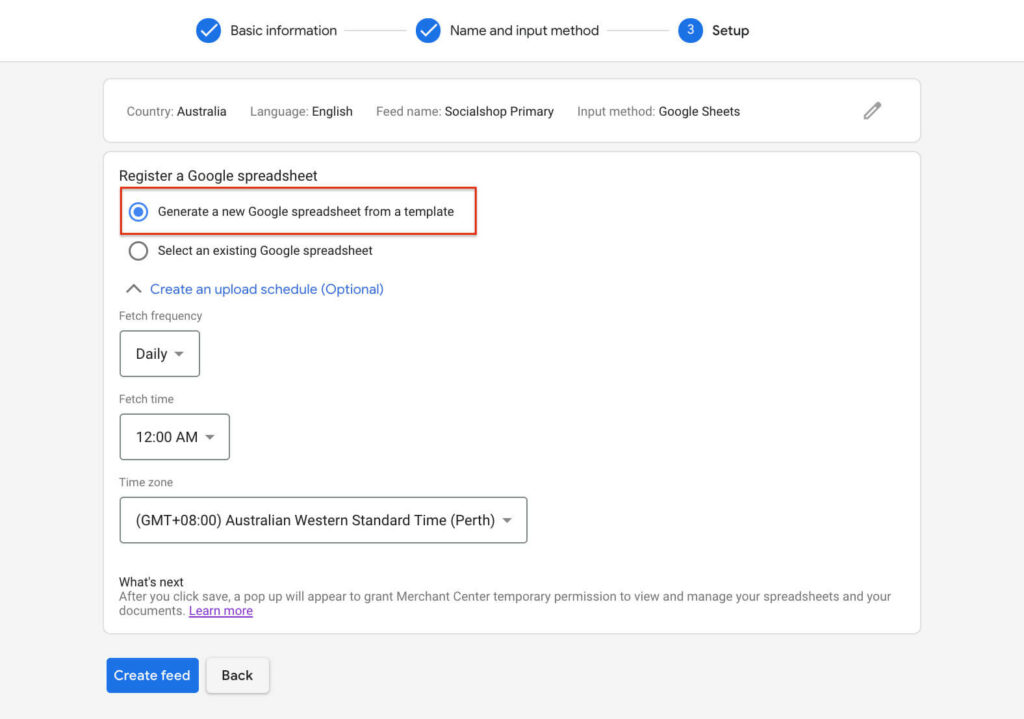
Generate a new Google spreadsheet from a template
#5. It will take Google about a minute to create the sheet template. After that you can easily access the sheet here.
Access the spreadsheet
#6. Once you open the sheet, you’ll see all the required attributes are displayed in the first row.
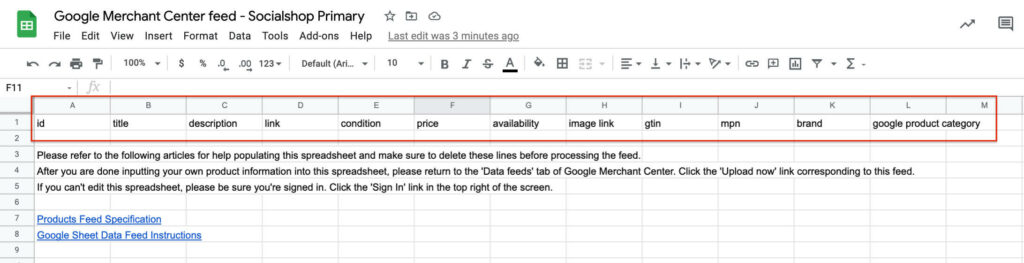
Google Merchant Center Feed template
Now you have 2 options:
- Option 1: Manually add in your product information one by one.
- Option 2: If you are having an eCommerce store such as Shopify, you can easily export product data to a CSV file from the backend of your website. Then copy that file and paste it into this template by Google. After that, all you need to do is rearrange the attributes into the appropriate column.
For example: Supposing you have a Shopify store, here is what you need to do:
#7. First, go to your Shopify store backend, click All products > Export > All products > Export products.
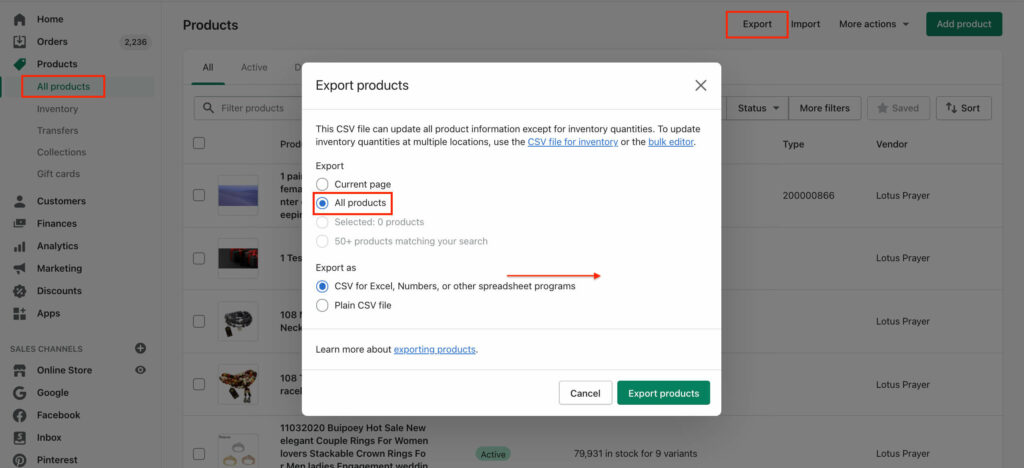
Export all products from Shopify
#8. Next, copy and paste the file you’ve just downloaded to the Google spreadsheet. Then put the attributes in the correct columns like this:

Rearrange product attributes in suitable columns
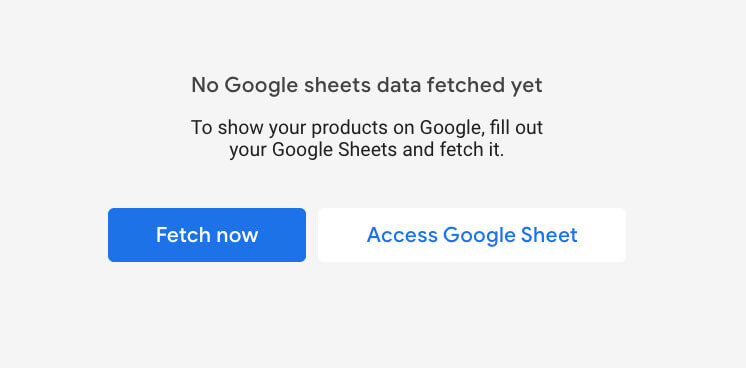
#9. Delete product data exported from Shopify. After that, go back to your Merchant Center account, click Fetch Now, and wait for Google to process the feed.
Keep in mind that your product information needs to meet Google’s standard for data quality and Shopping ads policies. Otherwise, Google won’t approve the products and in the worst cases, they can suspend your account immediately.
Using data feed management software (DFMs)
Let’s say you don’t have a lot of time or a dedicated team of developers but you can still afford a decent budget, data feed management software or DFMs can be your lifesaver.
Pros & cons
There are numerous advantages of using DFMs:
1. Create and modify feed with ease.
In general, feed creation is one of the many pain points of online sellers. Manually filling in the data is never an option for medium to large store owners with thousands of SKUs. With data feed management applications, merchants are able to import data from a source feed, a file, or an eCommerce platform, or even a website to create a feed easily.
2. In-app functions for feed optimization.
Each marketplace has its own formatting rules which you have to strictly follow in order to get your product listed. Otherwise, it will soon be taken down due to policy violations.
A data feed management software not only knows the algorithm very well but also comes with several functions to automatically apply the optimized rules to all feeds to ensure the successful product listings process.
3. Real-time data updates with schedules.
Any discrepancies between your product data on marketplaces and your website could create an unpleasant experience for buyers and also Google Merchant account suspension. Therefore, keeping the feed up to the minute is crucial to the success of your stores.
Knowing this, top DFM vendors enable users to schedule the feed updates ranging from every 30 minutes to once per day.
4. Require no coding skills.
Similar to the first method, using feed management software doesn’t require any coding or other technical knowledge.
Therefore, uploading Google Merchant product feed with DFMs will be as easy as pie even for non-techies. All you need to do is follow the on-screen instructions of the app and the buttons they set up for you.
5. Support various marketplaces and eCommerce platforms.
Merchants can easily sync and list their products on multiple platforms with these DFMs. For instance, if you’re having a WooCommerce store and you want to list your products on Facebook or Google Shopping, you can use the data management software that supports WooCommere, Facebook, and Google shopping to optimize the whole process.
As regards the disadvantages, you have to pay an amount of money for DFMs providers in order to use them. Some providers have subscription plans, the more money you pay, the more features you unlock. Other providers charge you based on what features you need.
All things considered, let’s see how the two methods compare side by side:
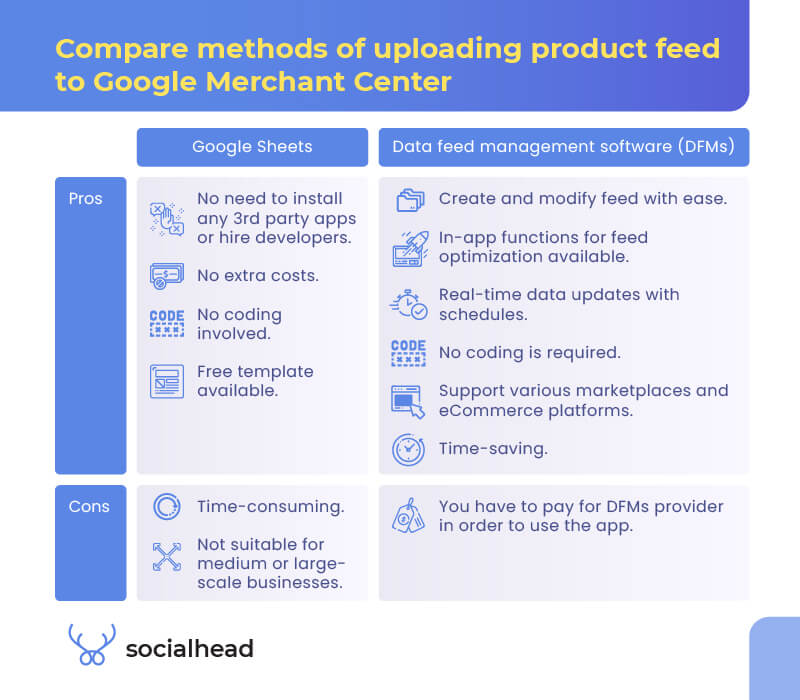
Compare methods of uploading product feed to Google Merchant Center
There are a wide variety of applications on the market for you to choose from, each comes with different characteristics and pricing plans. Hence, it totally depends on what functions you need to manage your product feed and how much you are willing to pay for them.
If you haven’t had any idea of which app to choose, let me introduce to you Socialshop. With Socialshop, it’s never been easier to start leveraging Facebook shop or Google Shopping if you are having an eCommerce store on Shopify, BigCommerce or WooCommerce.
And here is how you can seamlessly synchronize the product feed of your eCommerce store with Google Merchant Center.
Step-by-step instructions
To begin with, register an account on Socialhead with your email address. You can also shorten the process by directly logging in with your Google or Facebook account.
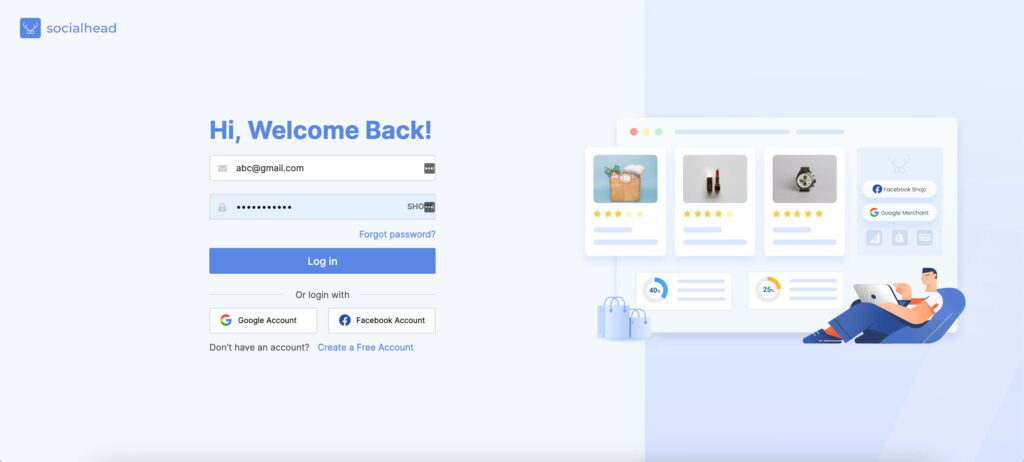
Register_ log in to Socialhead
Next, click on Socialshop in the header. Then choose the platform that you’re using and hit Install app now.
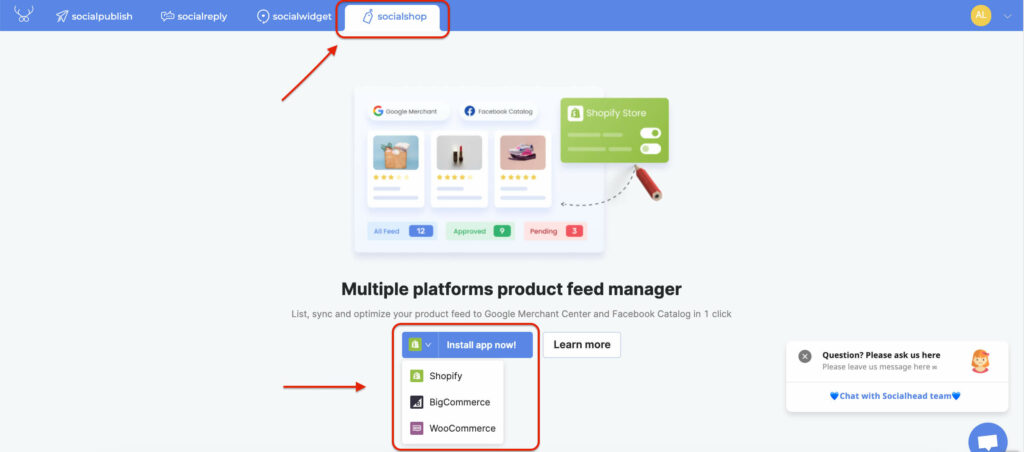
Integrate Socialshop with Shopify
At this point, you’ll be redirected to the Shopify app store to install the app. Choose Add App.
Now that your Shopify store is connected to Socialshop, you can easily create a new feed and sync products to your Google Merchant account right from the Socialshop dashboard.
From the Feed center, click Add Feed > Create feed template > Connect with Google Merchant Center. Enter your Feed name, Merchant ID, target market and language.
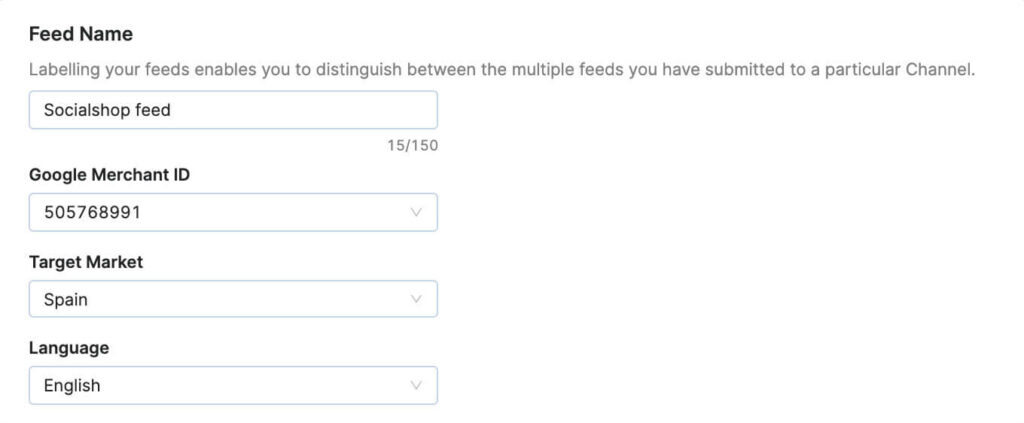
Set up product feed in Socialshop
After that, you must set up your product source. Socialshop allows you to choose to sync all products from Shopify or only include specific collections/products manually or by rules.

Set up product source in Socialshop
Once you click Create Feed, the app will automatically sync products from your Shopify store according to the rules you’ve just set and create a feed in-app. You can always access this feed and set up field mapping, category mapping, and so on.
Now your items data are undergoing the review process by Google. During this time the product status will appear as Pending.
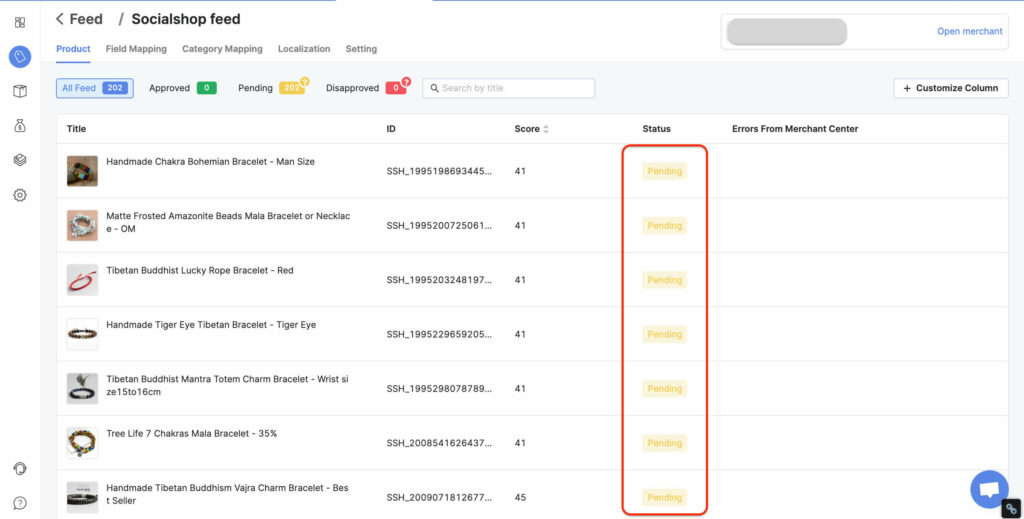
Set up product source in Socialshop
After 30 minutes, your feed will appear in Google Merchant Center like this.
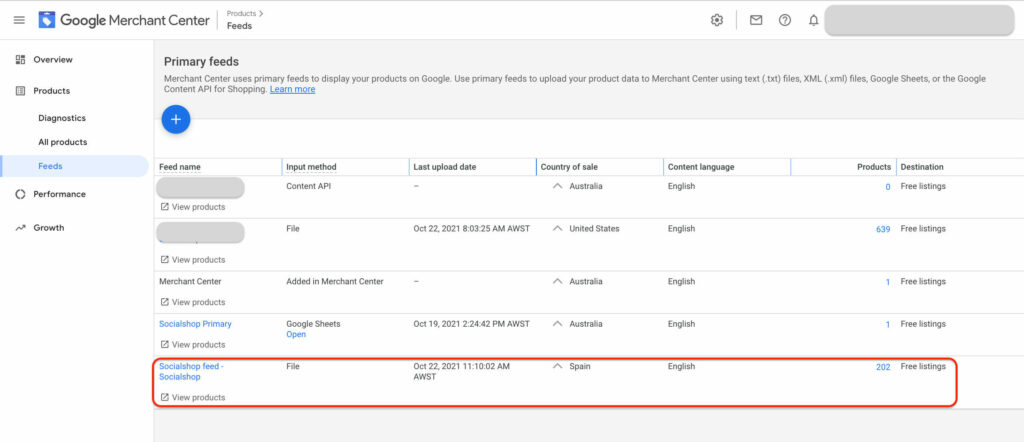
Product feed in Google Merchant Center
And that’s how easy it is to upload your Google Merchant product feed with Socialshop. But we’re only halfway through.
Now your products are going through the initial review process by Google which might take up to 3 business days. If you got lucky, all of your items would be successfully listed.
But if you don’t, if Google notices any of the submitted product data violate its policies, those items would move to the disapprove columns.
Don’t panic because Socialshop’s got your back! The app tells you exactly what policies you have violated that lead to your product’s disapproval.
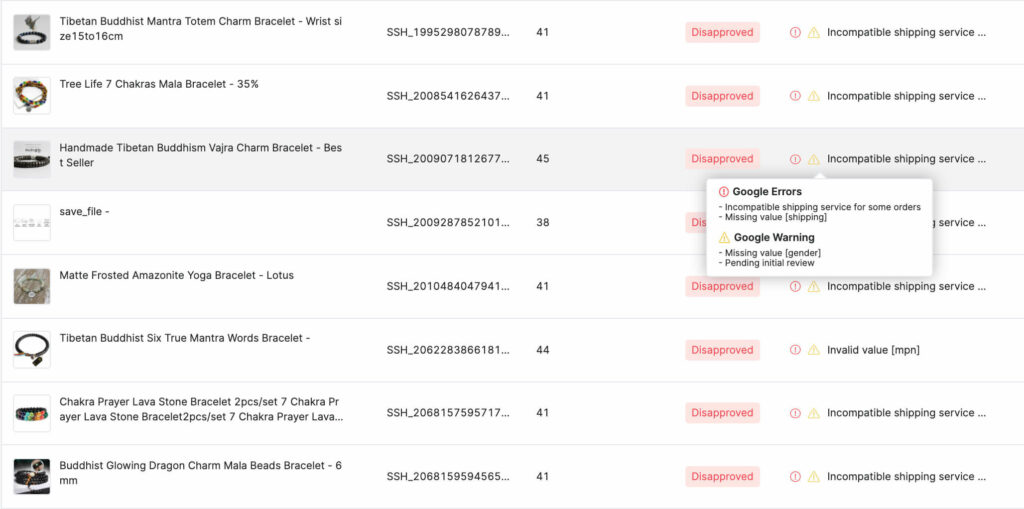
Disapproved items
It’s now time to edit those fields, resubmit your data and wait for Google to process the new updates.
In addition, Socialshop comes with a bunch of outstanding features to assist store owners:
- Fully customizable Google Shopping feeds for higher conversions.
- Filter products collections by rules or conditions.
- Schedule the Shopping feeds update up to every 3 hours.
Final thoughts
All in all, both using Google sheets and data management software to upload Google Merchant product feed have positives and negatives. It totally depends on your demands and how you want to operate your online business.
Just make sure you thoroughly consider all the pros and cons of each method before coming up with the final decision.
We wish you the best of luck on your journey and we hope Socialshop can be your partner this time.


 socialshop
 socialpublish
 socialreply
 socialwidget