The new updated version of Socialreply will be released on March 29th, 2021. In this version, Socialhead’s developers will focus on reforming the Growth Tool feature to offer users a full-forced tool to grow subscribers in multiple ways.
We highly expect that Socialreply V2.0 can help merchants handle most of the current obstacles of selling via Facebook Messenger live chat.
Chat Widget and Growth Tool are two typical features that merchants must be aware of in this release.
Let’s unbox Socialreply V2.0!
Table of Contents
Messenger Chat Widget
This is one of the most expected features when users can now create a Facebook chat plugin. Users can display the messenger chat widget on their websites. By adding this new feature of Socialreply V2.0, you will be capable of immediately connecting with your customers via live chat.
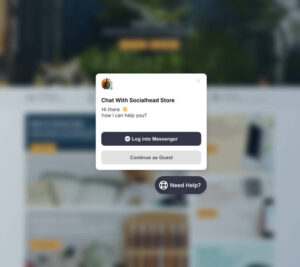
Onsite chat widgets help businesses connect with customers immediately
In Socialreply V2.0, the chat widget will be merged with the growth tool; therefore, you can create and customize your chat widget when setting the growth tool. Follow the instruction to create a growth tool below for more information.
Updated Growth Tool in Socialreply V2.0
Different from the previous version, users are now enabled to create their own growth tools in Socialreply V2.0.
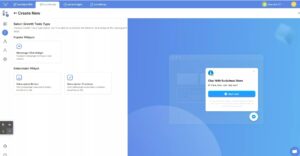
There are growth tool categories and types in Socialreply V2.0
With the 2 categories of Growth Tool added to this version, users can have more flexibility in creating and customizing their own growth tools. Each category will include one or several types.
- Popular Widget: Include all the common tools (Messenger Chat Widget, Get Started Mode, Comment, Ads, etc).
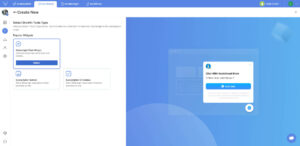
Messenger Chat Widget is a growth tool type
- Embeddable Widget: Comprise growth tools that can be embedded on your store sites (Subscription Button, Subscription Check Box).
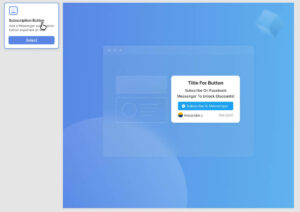
Subscription Button
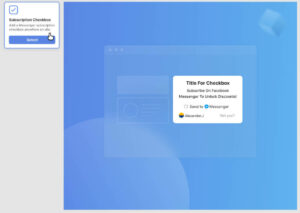
Subscription Checkbox
In Socialreply V2.0, each growth tool category should be validated with different rules while setting.
Create A Growth Tool
As mentioned above, users can design their own growth tools by following the 2 steps:
Step 1: Setting
Go to Growth Tool > Create > Connect your Facebook account> Select a growth tool category & type > Setting
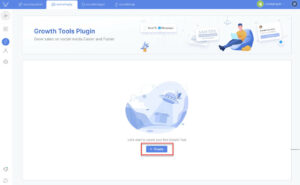
Create a growth tool with Socialreply V2.0

Connect your Facebook account if you haven’t done it yet

Select a category and a type for your growth tool
In Setting, you have to select one growth tool type in categories to proceed to the next stage:
Create Messenger Chat Widget (One Step Only)
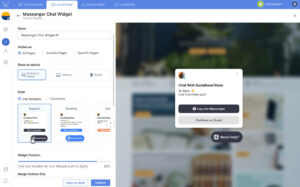
This is where your Messenger Chat Widget setting begins
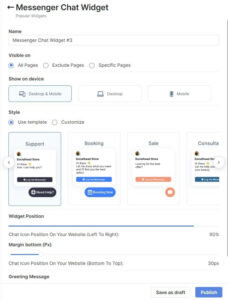
Go through these sections to set up your Messenger chat widget
- Name your Messenger chat widget
- Visible on All Pages/ Specific Pages/ Exclude Pages
Add Specific Pages
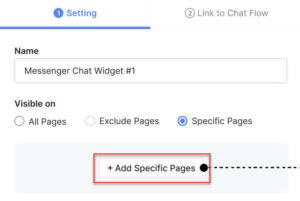
Socialreply V2.0 let you pick exactly which pages you want to display chat widgets
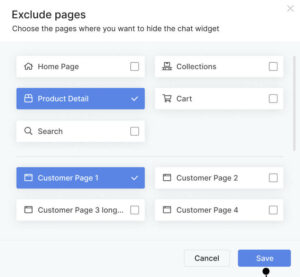
Tick on all the pages you want to choose
Exclude Pages
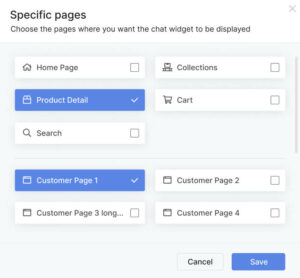
Tick on the pages you don’t want to display chat widgets on
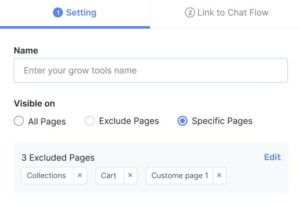
Once you select, all the pages you choose to exclude will be showed like this
- Show on Desktop/ Mobile or Both
- Pick an available Style or customize one on your own
Available Style
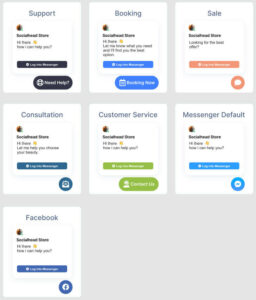
There are 7 available styles to choose from
Customize Style
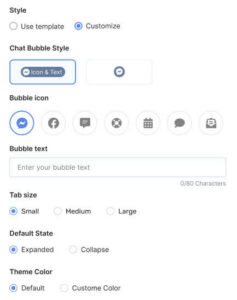
If you choose to customize the widget style, then you can make adjustments to Chat Bubble Style, Bubble Icon, Bubble Text, Tab Size, Default State, Theme Color.
- Decide the Widget Position by adjusting the Left-Right and Top-Bottom balance
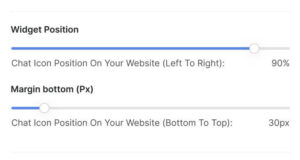
Adjust the position easily
⭐Note: There is only one step for creating Messenger Chat Widget.
Create Subscription Button
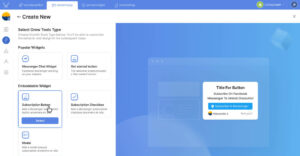
Subscription Button
With this type, we give users tools to create the subscription button in their own way (both content and design). You need to go through some sections to finalize your subscription button:
- Name
- Initial State: Design the default widget box
- Submitted State: Design the widget box after being clicked
- Button Text: Decide the content shown on the button. (Eg: Send to Messenger)
- Visible on: Choose the position your subscription button will be displayed. (Available or custom positions)
If you want to customize the position, then you can Embed HTML:
You will display the button on your page manually by adding the given snippet to your HTML.
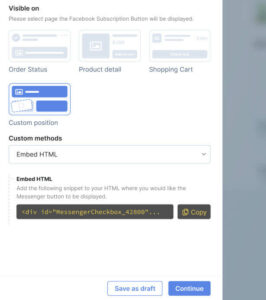
Just copy this snippet and paste it to your HTML
⭐If you’ve done it here, proceed to step 2👇.
Create Subscription Checkbox
Similar to the categories mentioned above, you go through these sections:
- Name
- Confirm Subscription Method: According to Facebook policy, users need to confirm the subscription by clicking on a button. There are two options for you to pick:
Include Confirm Button
You can customize the button as you want with our tools.
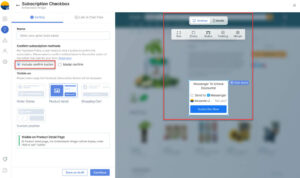
Choose the method and customize your button as you want
Modal Confirm
You can create content for subscription confirmation with a maximum of 250 characters.
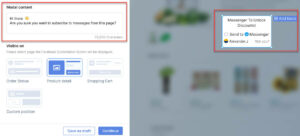
Users can craft confirmation content
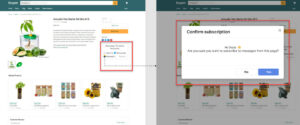
Your customers will be asked to confirm when they hit subscribe
⭐If you’ve done it here, proceed to step 2.
Step 2: Link to Chat Flow (Optional)
Once you finish setting, proceed to the second step:
Link to chat flow > Add a Chat Flow > Publish > Done
⭐⭐⭐However, this step is optional, you can publish your Growth Tool without linking to a chat flow.
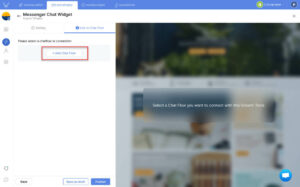
Connect to a chat flow
You should craft your chat flows before you create a growth tool. However, if you haven’t done it, you can save the process (Save as draft) and come back with your chat flows later.
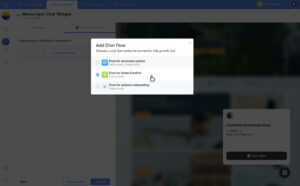
Choose a chat flow to continue
Once you select a chat flow, you can preview it on the right screen.
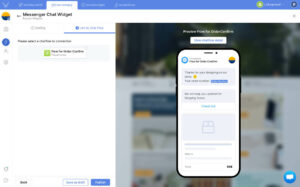
You can preview the chat flow you pick on the right screen
Here, you can choose to Publish to finish creating your growth tool. However, if you are not sure and want to consider it later, then you can Save As Draft. By doing this, your crafting growth tool won’t be lost and you can continue to adjust it later.

This is an example of a complete growth tool you can create on Socialreply V2.0
You can activate or deactivate your growth tool anytime you want as well as you can edit or delete a growth tool easily by clicking on it and choosing edit/delete.
NOTE: During the updating process, you will see a maintenance page and you won’t be able to get Socialreply V2.0 on Shopify App Store until it is finished. If you have any questions, please feel free to contact our Customer Support team via live chat or email support@socialhead.io.
 socialhead
