
If you’re selling your items on one of the most competitive marketplaces – Google Shopping, you might not want to miss out on this!
Socialpixel is now renamed into OnePixel – One App, Multiple Pixels, All the channels you need!
In this version, we now support tracking Google Ads Conversion, run ads on Google Shopping has never been easier!
Without further ado, let’s dig right into what OnePixel V1.6 has to offer.
Table of Contents
What is Google Ads Conversion?
“In Google Ads, a conversion occurs when a person takes a certain action after clicking on an ad or watching a Display Network ad, such as buying a product, downloading a mobile app, or joining an email list.”
Conversion tracking reveals important information about what happens after a user views or clicks on an advertisement. You can track who calls, buys a product, downloads a mobile app, and so on.
With that, merchants who know how to leverage Google Ads Conversions stand a higher chance of running highly targeted campaigns with better ROI.
Say hello to Google Ads Conversion tracking!
With OnePixel V1.6, you’re able to add Google Ads Conversion tracking both automatically and manually.
1. Connect Automatically
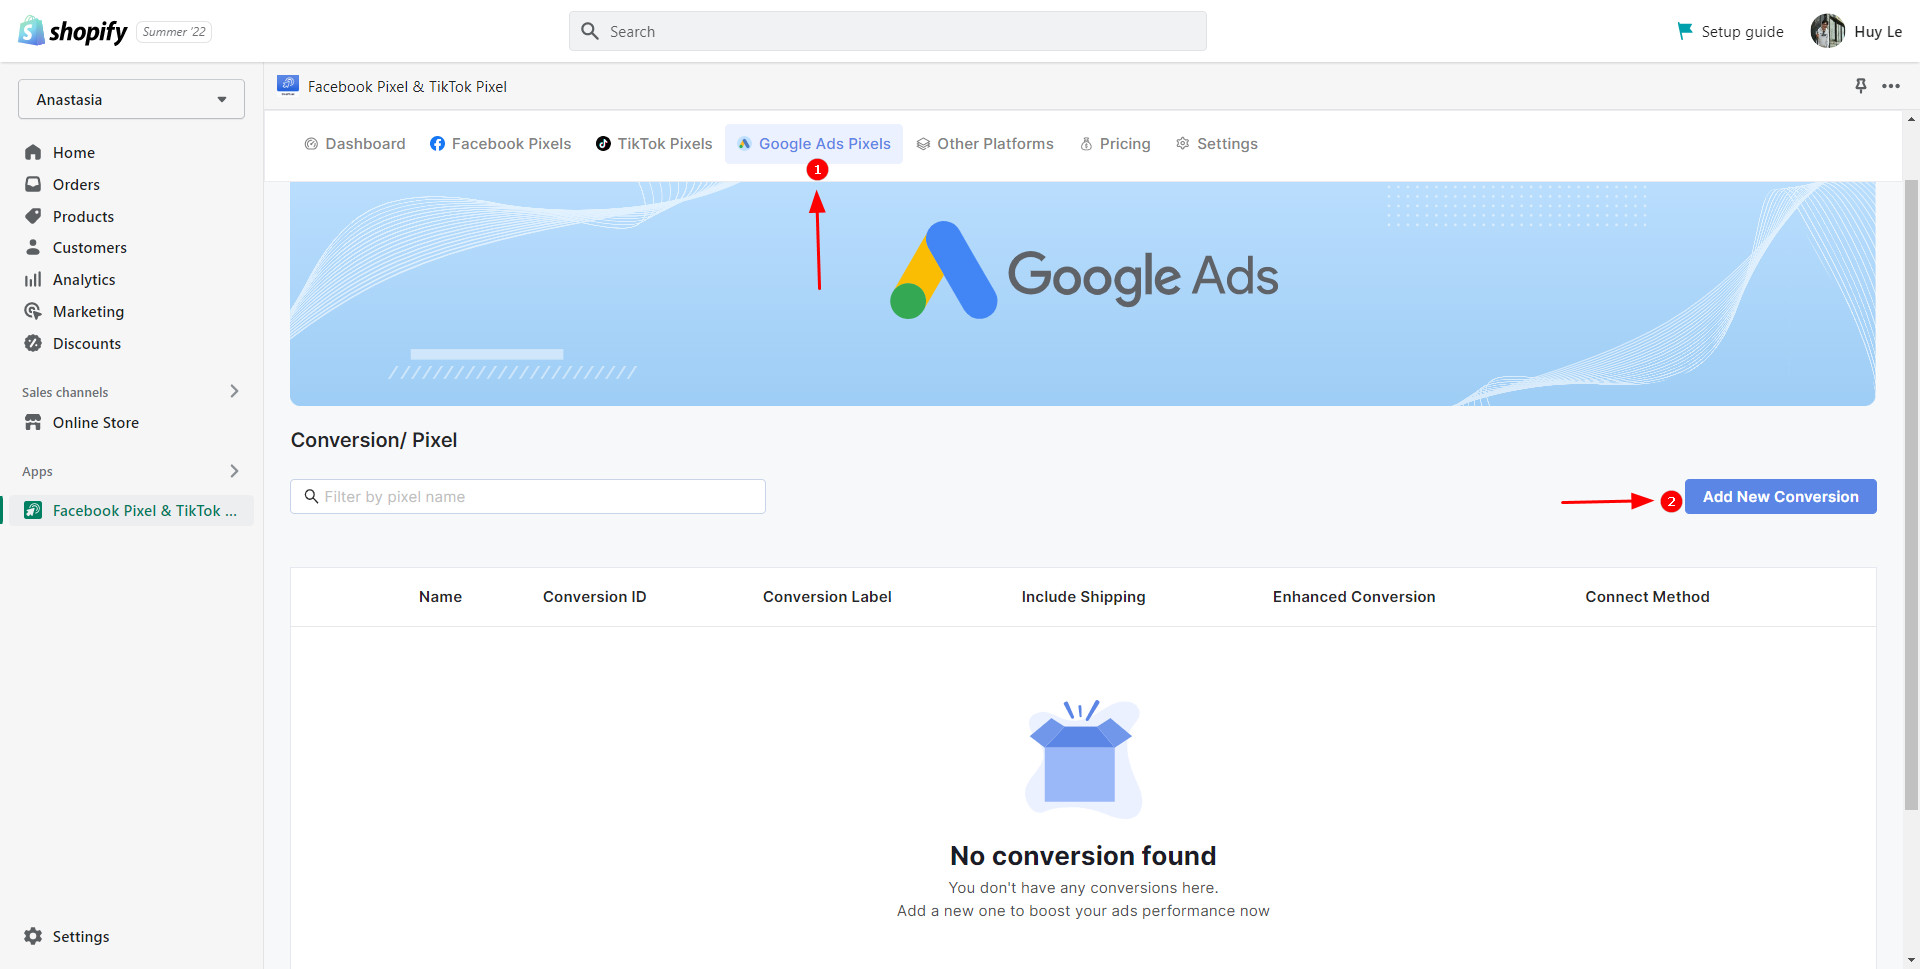
On your main dashboard, select the Google Ads Pixels we’ve just added for you > Click Add New Conversion.
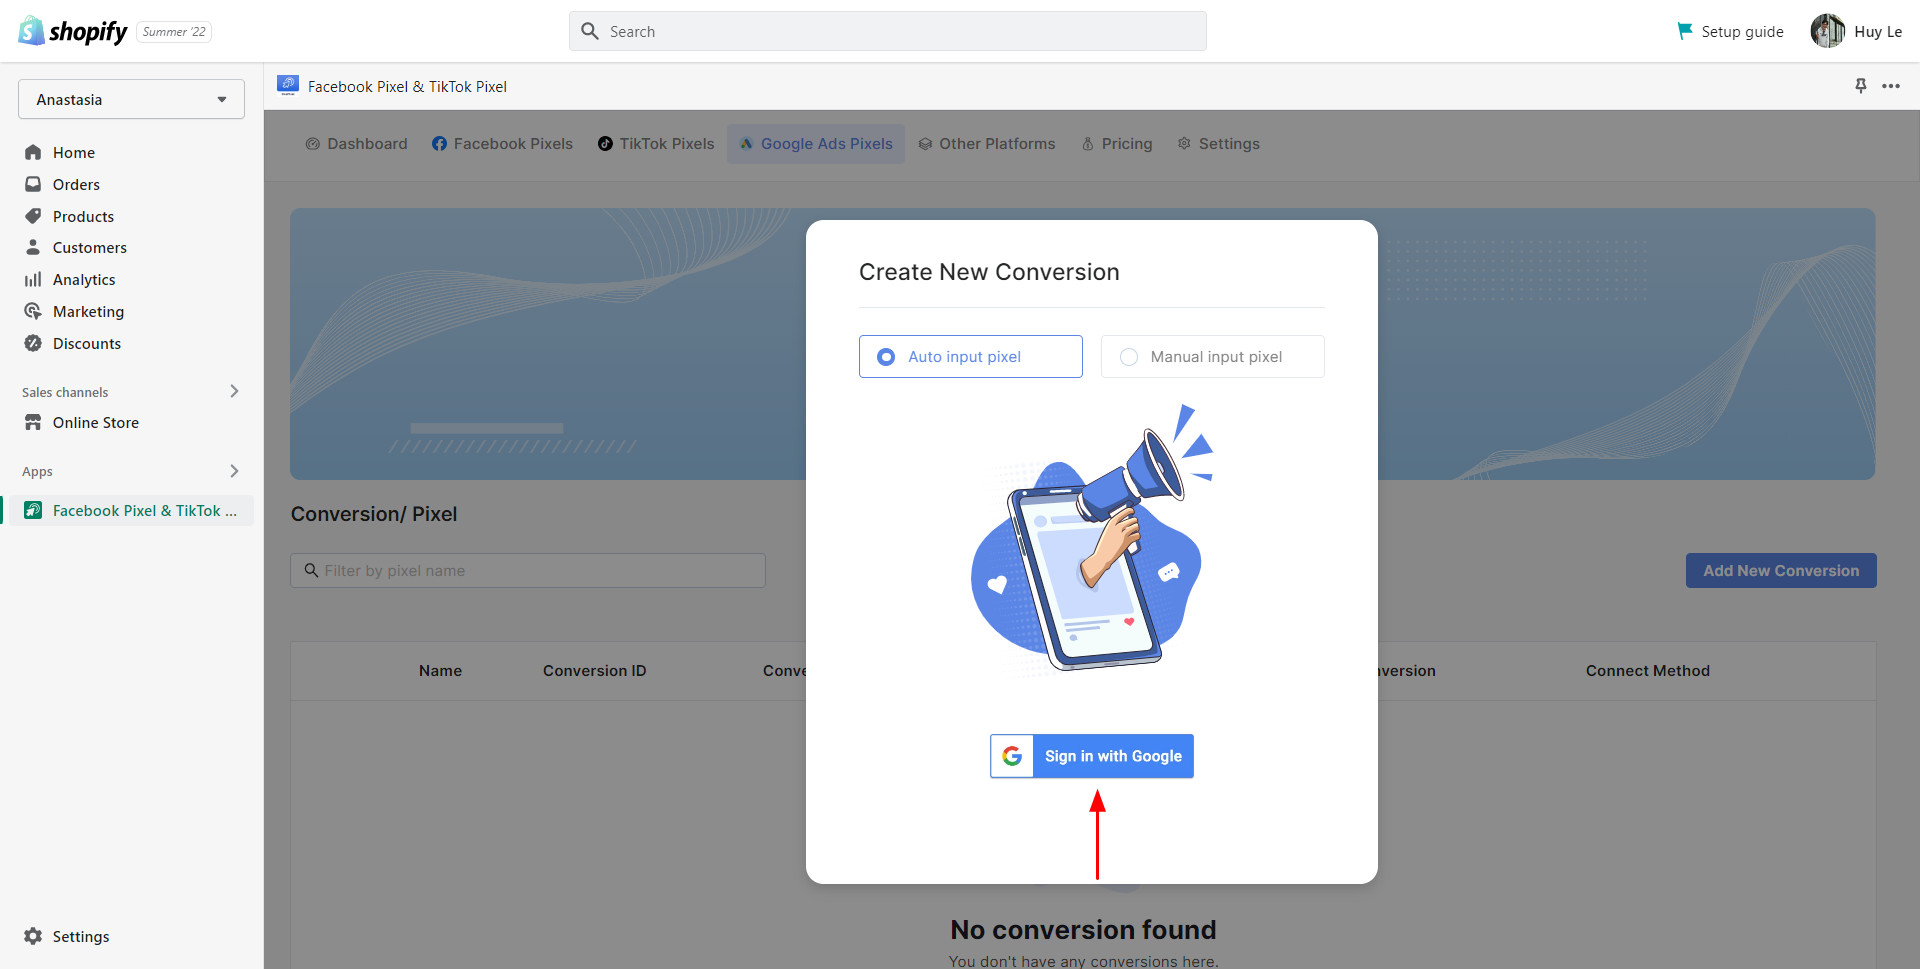
Choose Auto input pixel tab > Hit Sign in with Google.
Choose the account that you use to run paid campaigns on Google.
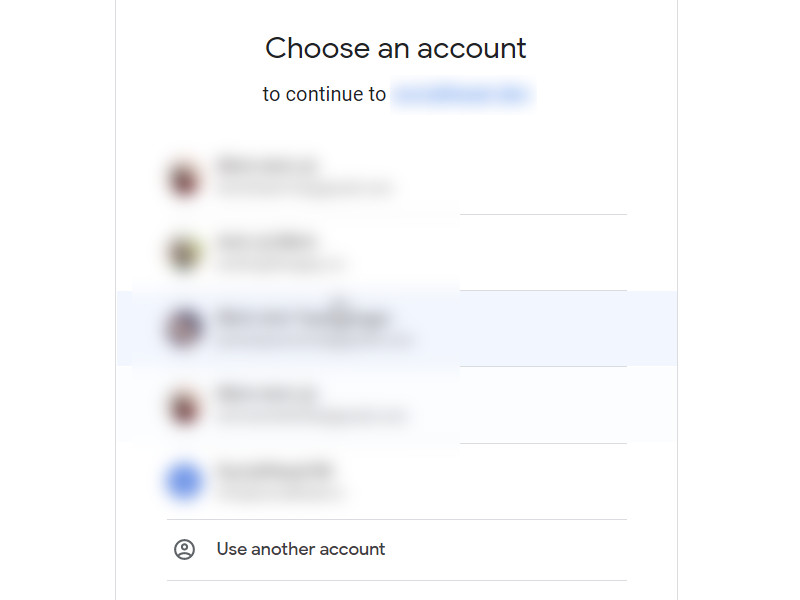
Choose your Google account
At this point, you have to allow OnePixel to access your Google account. Tap on “Allow”.
Allow OnePixel to access your Google account
After successfully connecting to your Google account, go back to your OnePixel dashboard, and choose “Add New Conversion”.
Unlike other channels, Google API does not allow us to get access to the existing conversions. Therefore, OnePixel can only help you track newly created pixels.
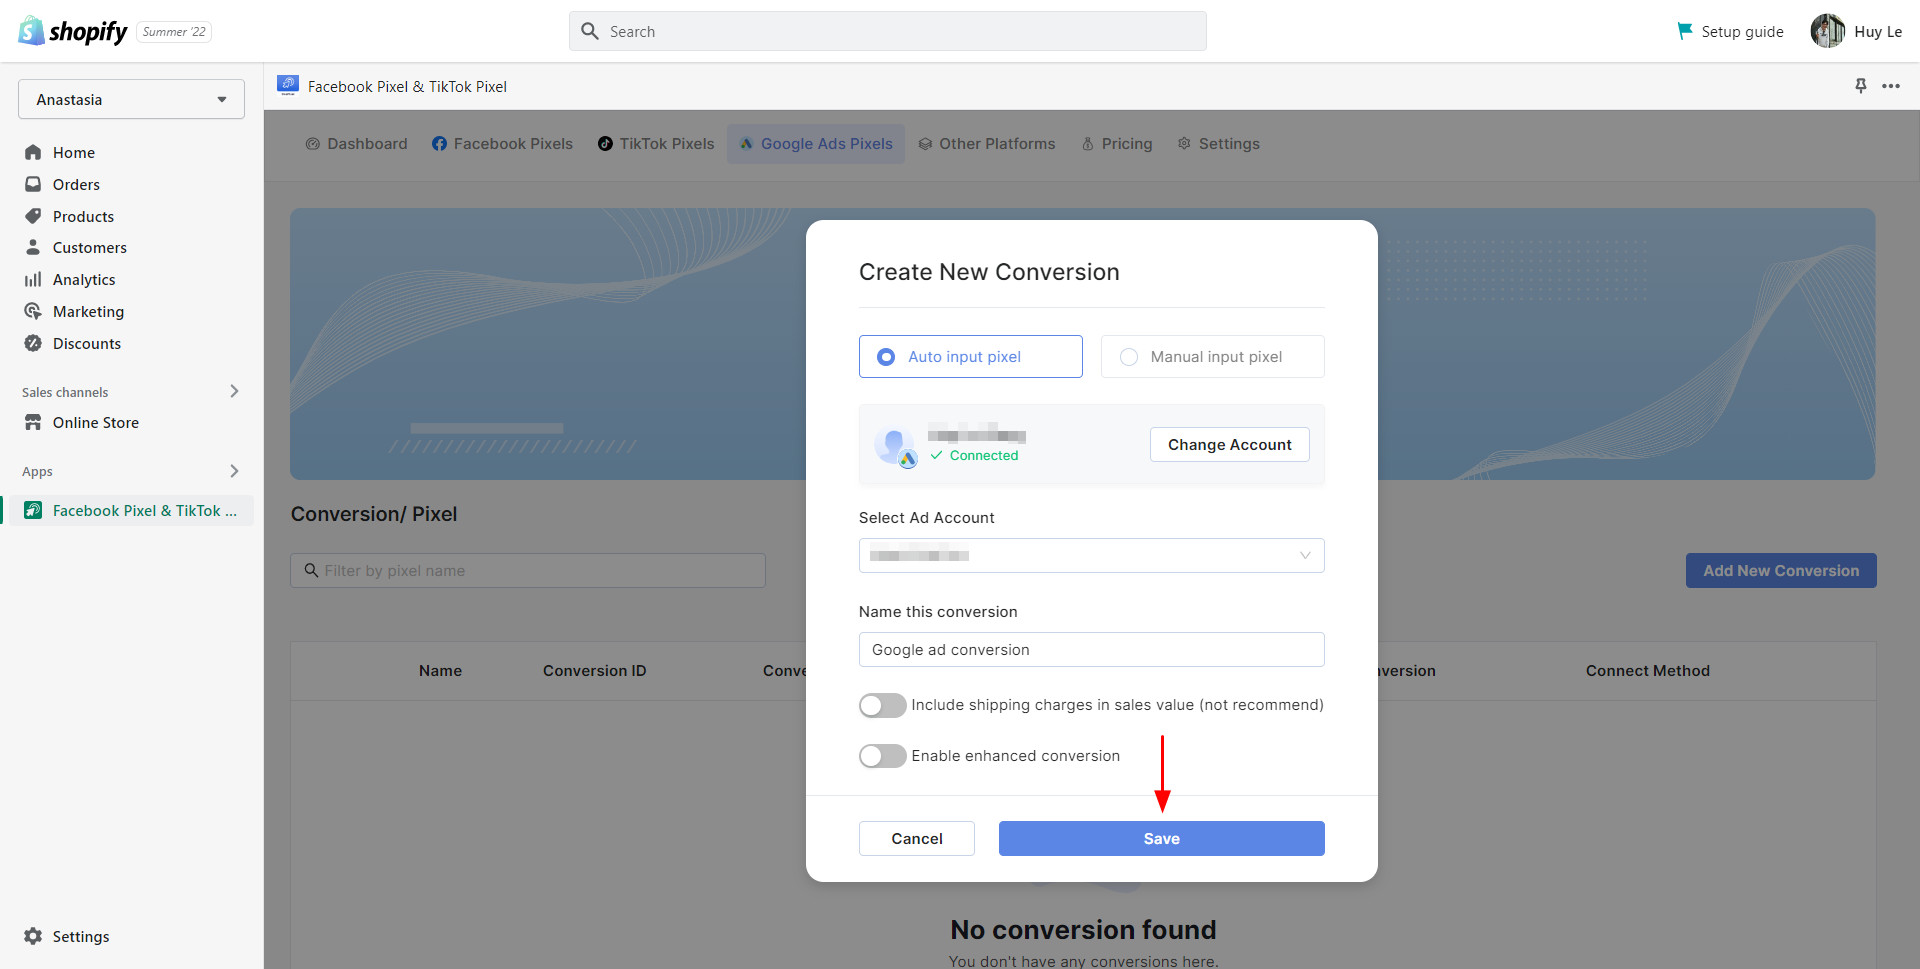
From here, simply fill in the blank and choose your desired options.
Select Ad Account
Pick the one you want to place your conversion in.
Name this conversion
It’s totally okay to fill in whichever name you prefer.
However, keep in mind that every time you name a new conversion, the name has to be unique. In case you created a conversion named “Google Ads Conversion 1” and later deleted it. You still cannot create another one with the same name.
Include shipping charges in sales value
If you tick this box, the final price you get will be the final total price of the product including the original product price, tax, and shipping fees, and vice versa. However, this is not recommended by Google.
Enable enhanced conversion
“Enhanced conversions is essentially a feature that can improve the accuracy of your Google ads conversion measurement and allow you to bid more effectively.”
It works in conjunction with your existing conversion tags by securely delivering hashed first-party conversion data from your website to Google.
In short, if you enable OnePixel to get enhanced conversion, the app will help you track additional customer information such as:
- Phone number
- Address
- Full name
- City
- Postal & country code
With that, we highly recommend you take advantage of the enhanced conversion feature to run highly target Google campaigns.
Click “Save”.
Alright, that’s how easy it is to create new Google Ads conversion automatically with OnePixel. Let’s move on to the manual input method.
2. Connect manually
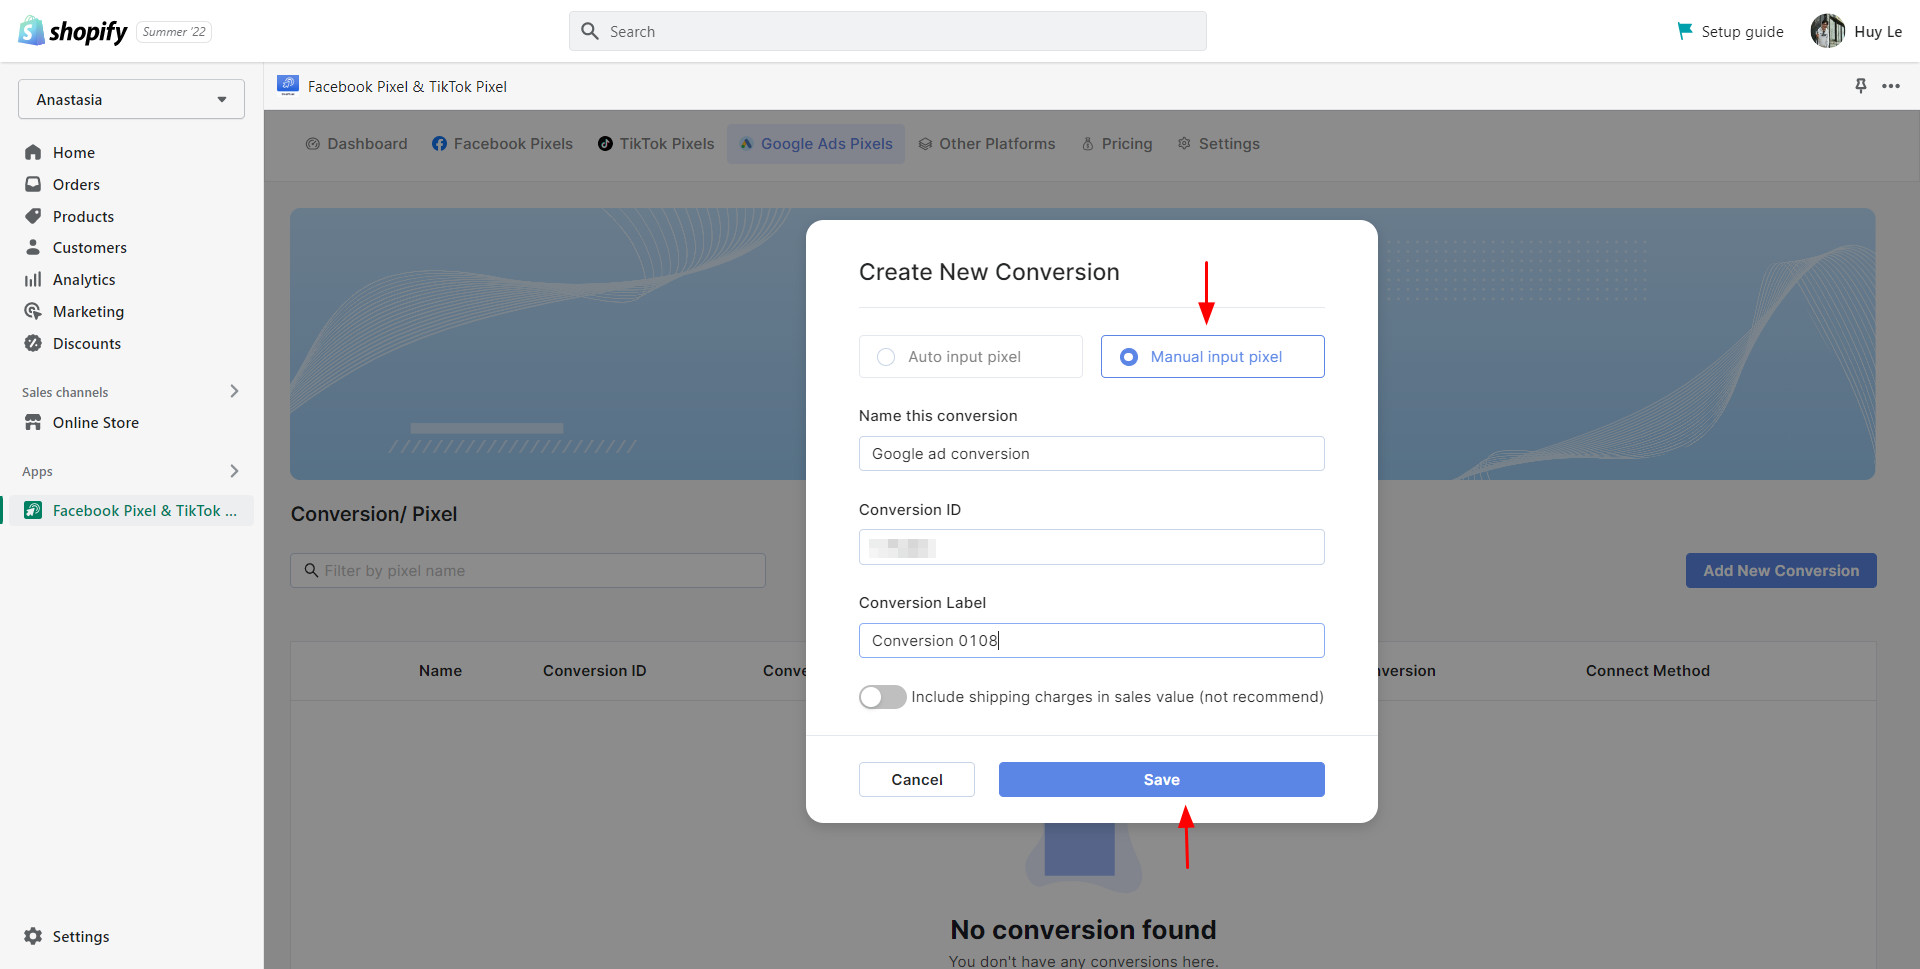
Follow the first same steps as adding pixel automatically: select Google Ads Pixels > Click Add New Conversion > Choose Manual input pixel mode.
From here, enter your Conversion Name, ID, and Label. After you’ve done, click Save to add Google Ad Conversion to your website.
Where can I get my Google ads conversion ID and Label? From your Google ads dashboard, go to “Tools and Settings” > “Measurement” > “Conversions”.
In the “Conversion action” column, choose “Purchase”.
From here, choose “Tag setup” > “Install the tag yourself” > “Event snippet” and copy the text below. These are Conversion ID and Conversion Label respectively.
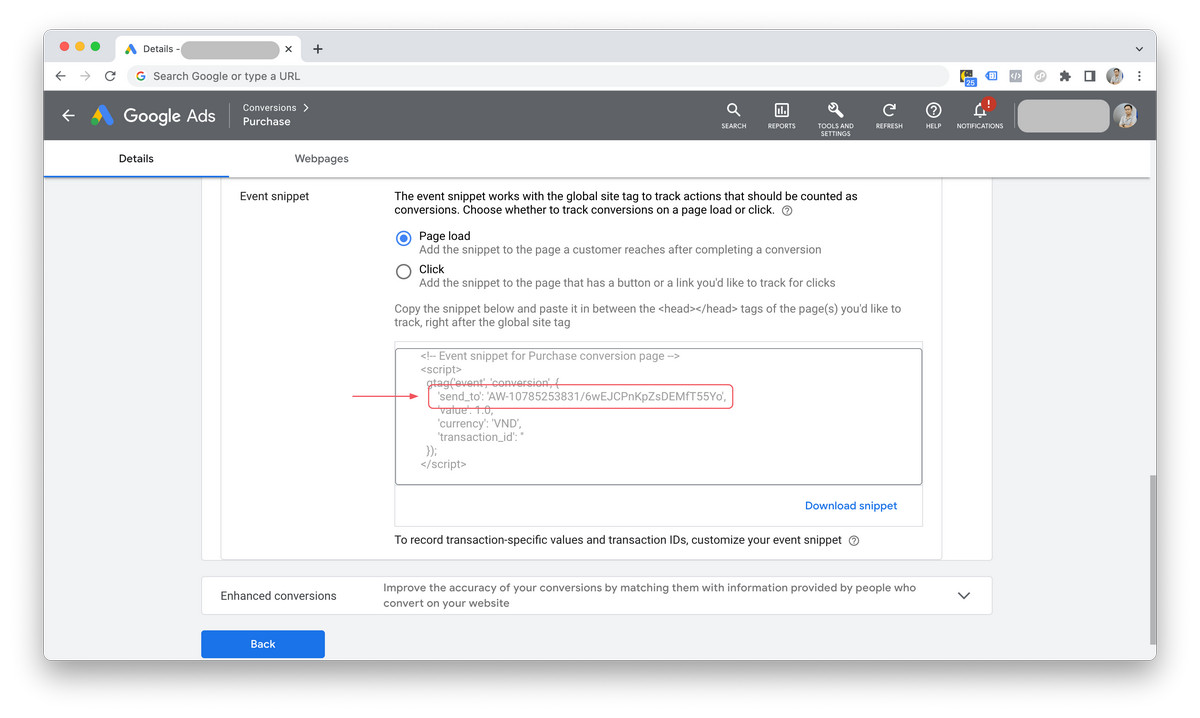
Conversion ID and Label in Google Ads


 socialshop
 socialpublish
 socialreply
 socialwidget