
Do you want to increase brand loyalty & turn your customers into passionate fans? If that is the case, you’d love to learn how to grow your Facebook Group to fuel your business growth.
In this article, we’ll walk you through: What is Facebook Groups& their benefits + How to set up& nurture a Facebook community for your sake.
Table of Contents
What are Facebook Groups?
Do you want to build a fandom to stan Taylor Swift or create a playground to share the latest memes? Facebook Groups are an absolute life-saver then!
That’s because Facebook groups are created to gather people who share the same interests on a certain topic (whether it is global warming or meme sharing).
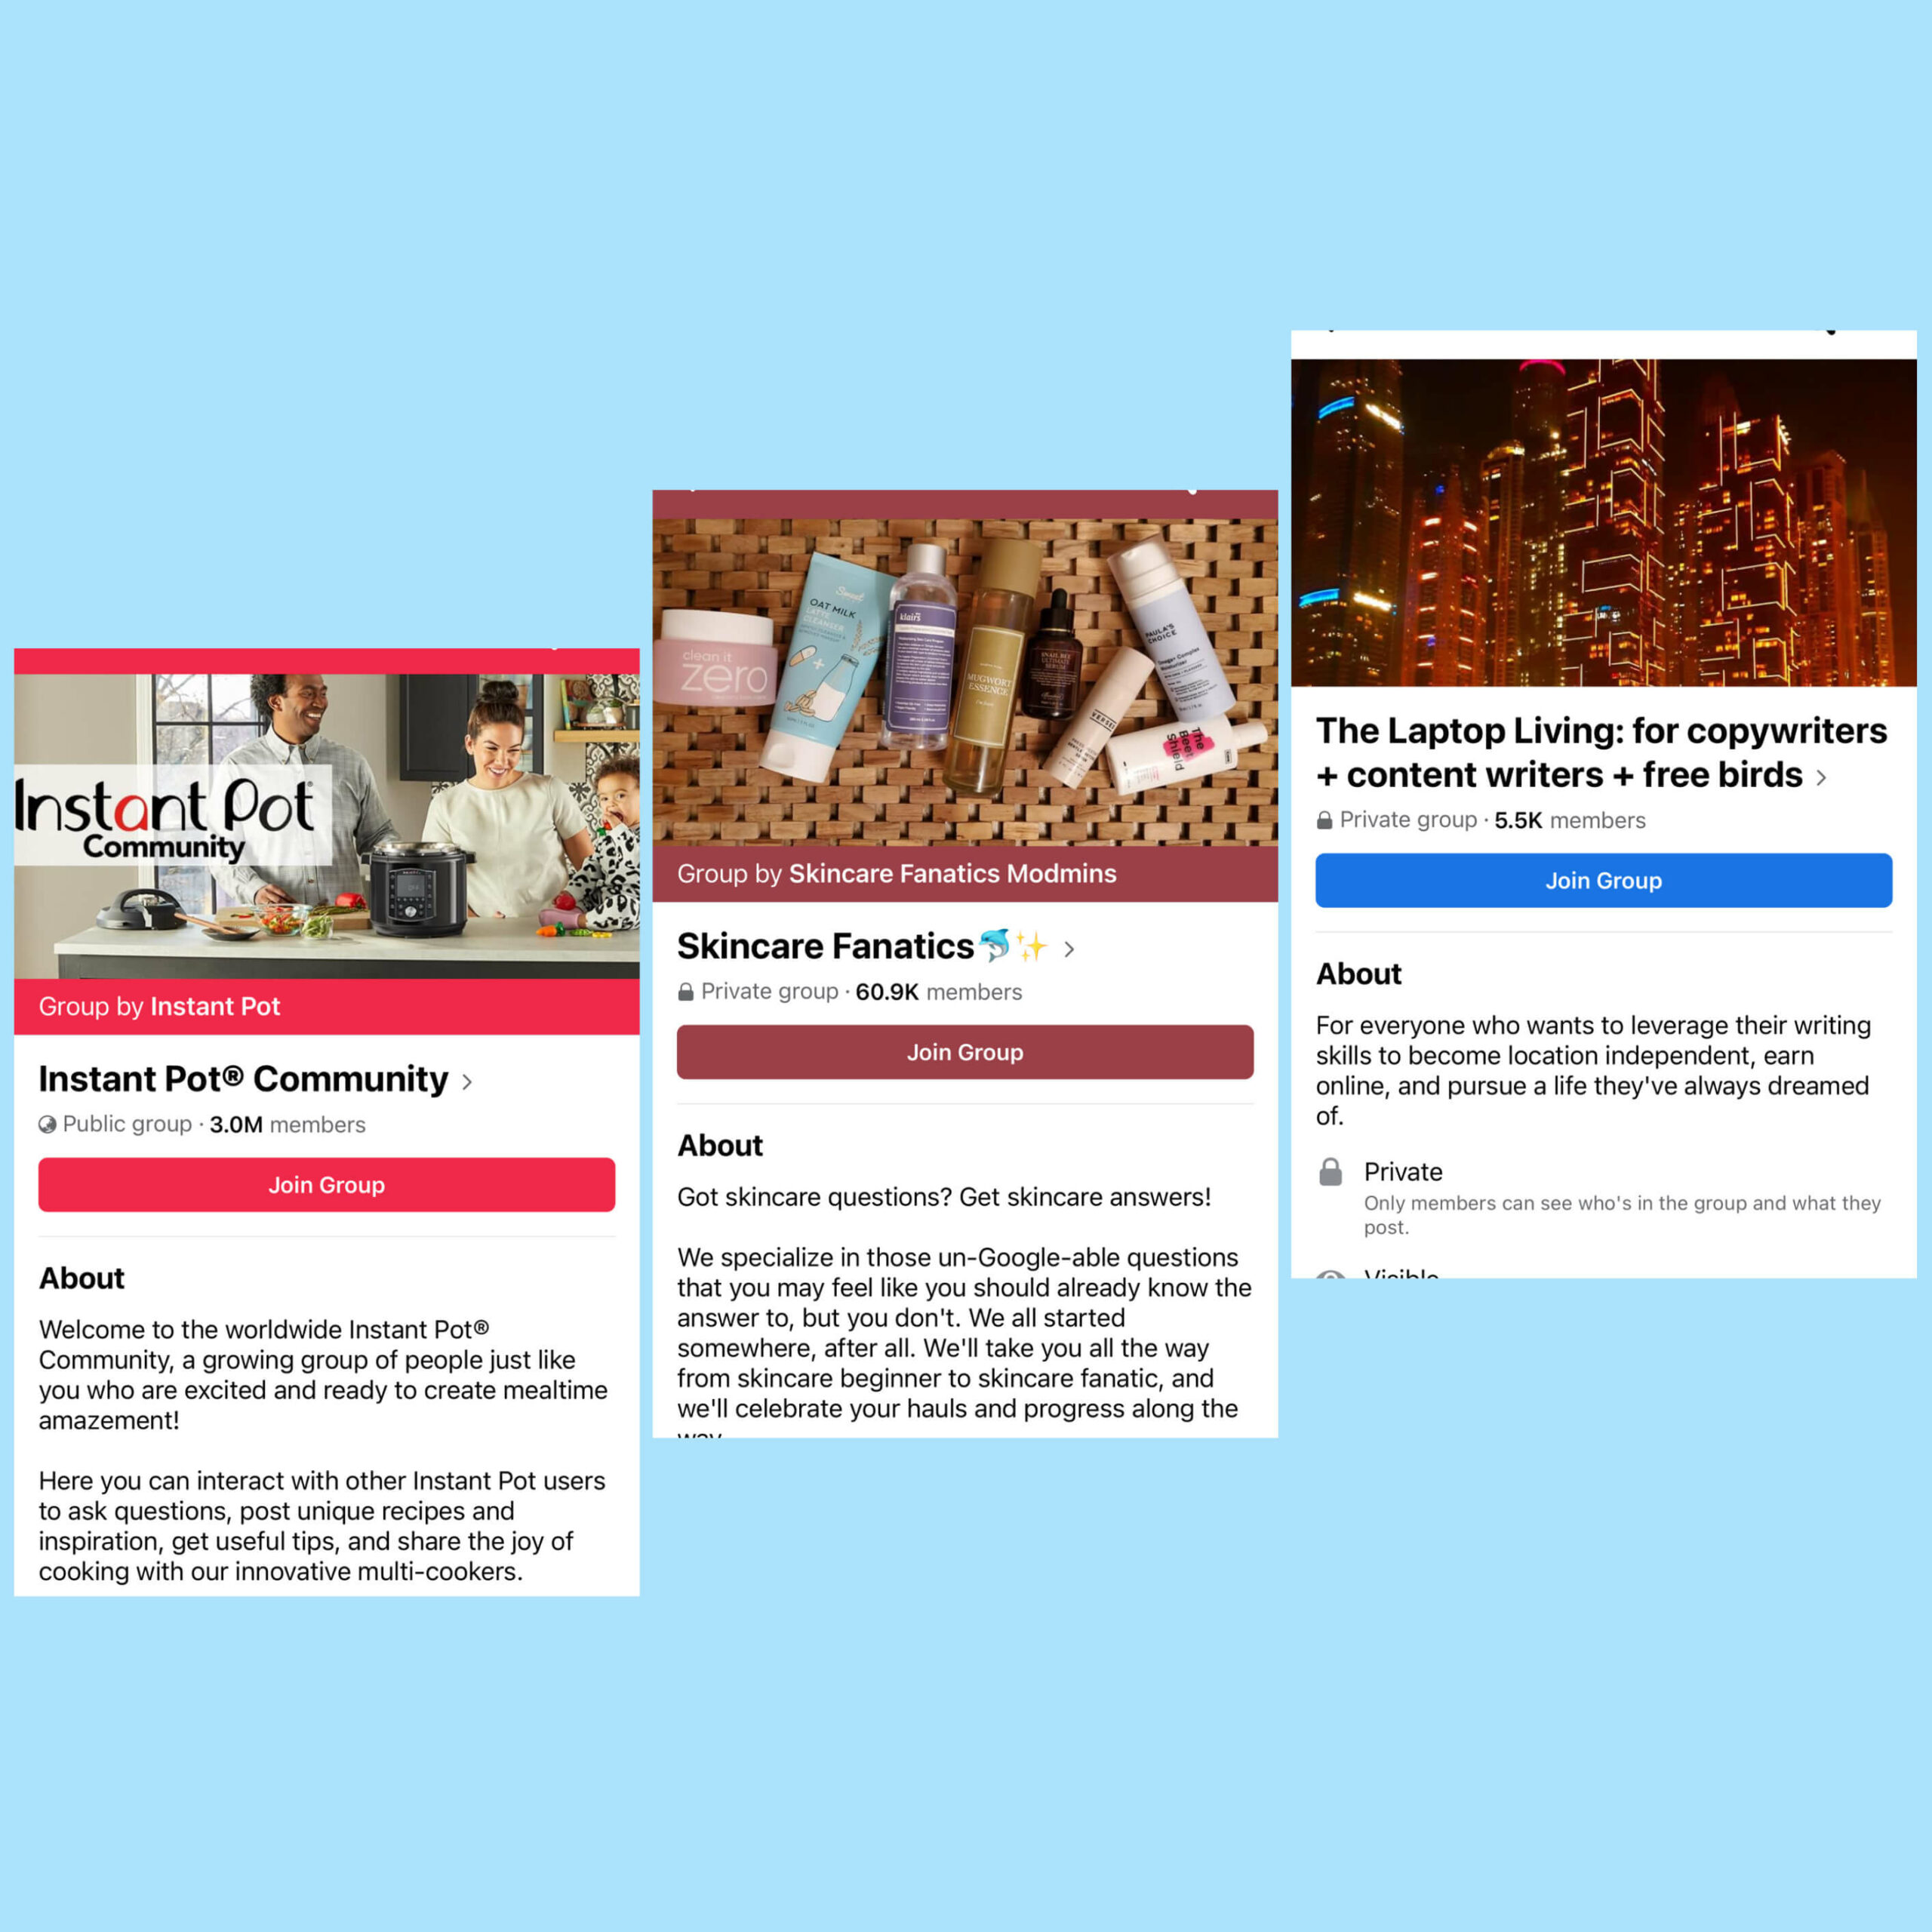
These are examples of Facebook Groups
While a Facebook page is a channel through which you state your presence, a Facebook group helps strengthen your influence on the platform.
But how can a Facebook Group do just that? Ladies and gentlemen, keep scrolling!
Why should you create a Facebook Group for your business?
Though you have to put more effort into taking care of your Facebook Groups, they open up new opportunities for you to build authentic relationships with your potential& existing customers.

Facebook Groups can help you build stronger relationships with your customers and gain more social trust
In short, here come the perks you receive from nurturing your Facebook Groups:
-
A direct line of communication
When someone joins your Facebook Group, they care about you (a whole lot indeed). Instead of binge-watching Bridgeton on Netflix, they spare their time talking about your business. In another word, those in your group are your most loyal customers.
That’s why you can take advantage of this to get deeper insights into your customers’ demands. For instance, you might want to make a poll and let them vote between two products to see which one they prefer more.
-
Building a more intimate relationship with your customers
Do you know that 56% of consumers said that customer service is of extreme importance? That’s why you can exploit Facebook Groups to build close-knit relationships with your customers.
While your Facebook page is where you hard-sell your products, your Facebook Group should be a place where you offer exclusively helpful content to show that you also care about your customers besides gaining profit.
-
Increase organic reach
For your information, since Facebook changed its algorithm in 2018, the social media platform now works in a way that pushes posts that “spark natural and meaningful conversations”? And that includes posts in the Facebook Groups you created for your business.
The more you stimulate conversations to keep your audience engaged, the more likely Facebook algorithms will prioritize your content further up in people’s news feed.
Note! Facebook declared that it will demote the so-called “bait-engagement post” in users’ new feeds. Thus, concentrating on quality, not quantity when you post something is one of the ways to learn how to grow your Facebook Group.
How to set up your Facebook Group?
Before you attract your aficionados to your group, you gotta create a Facebook Group first. And it takes you only a few minutes to do so. Let us show you how!
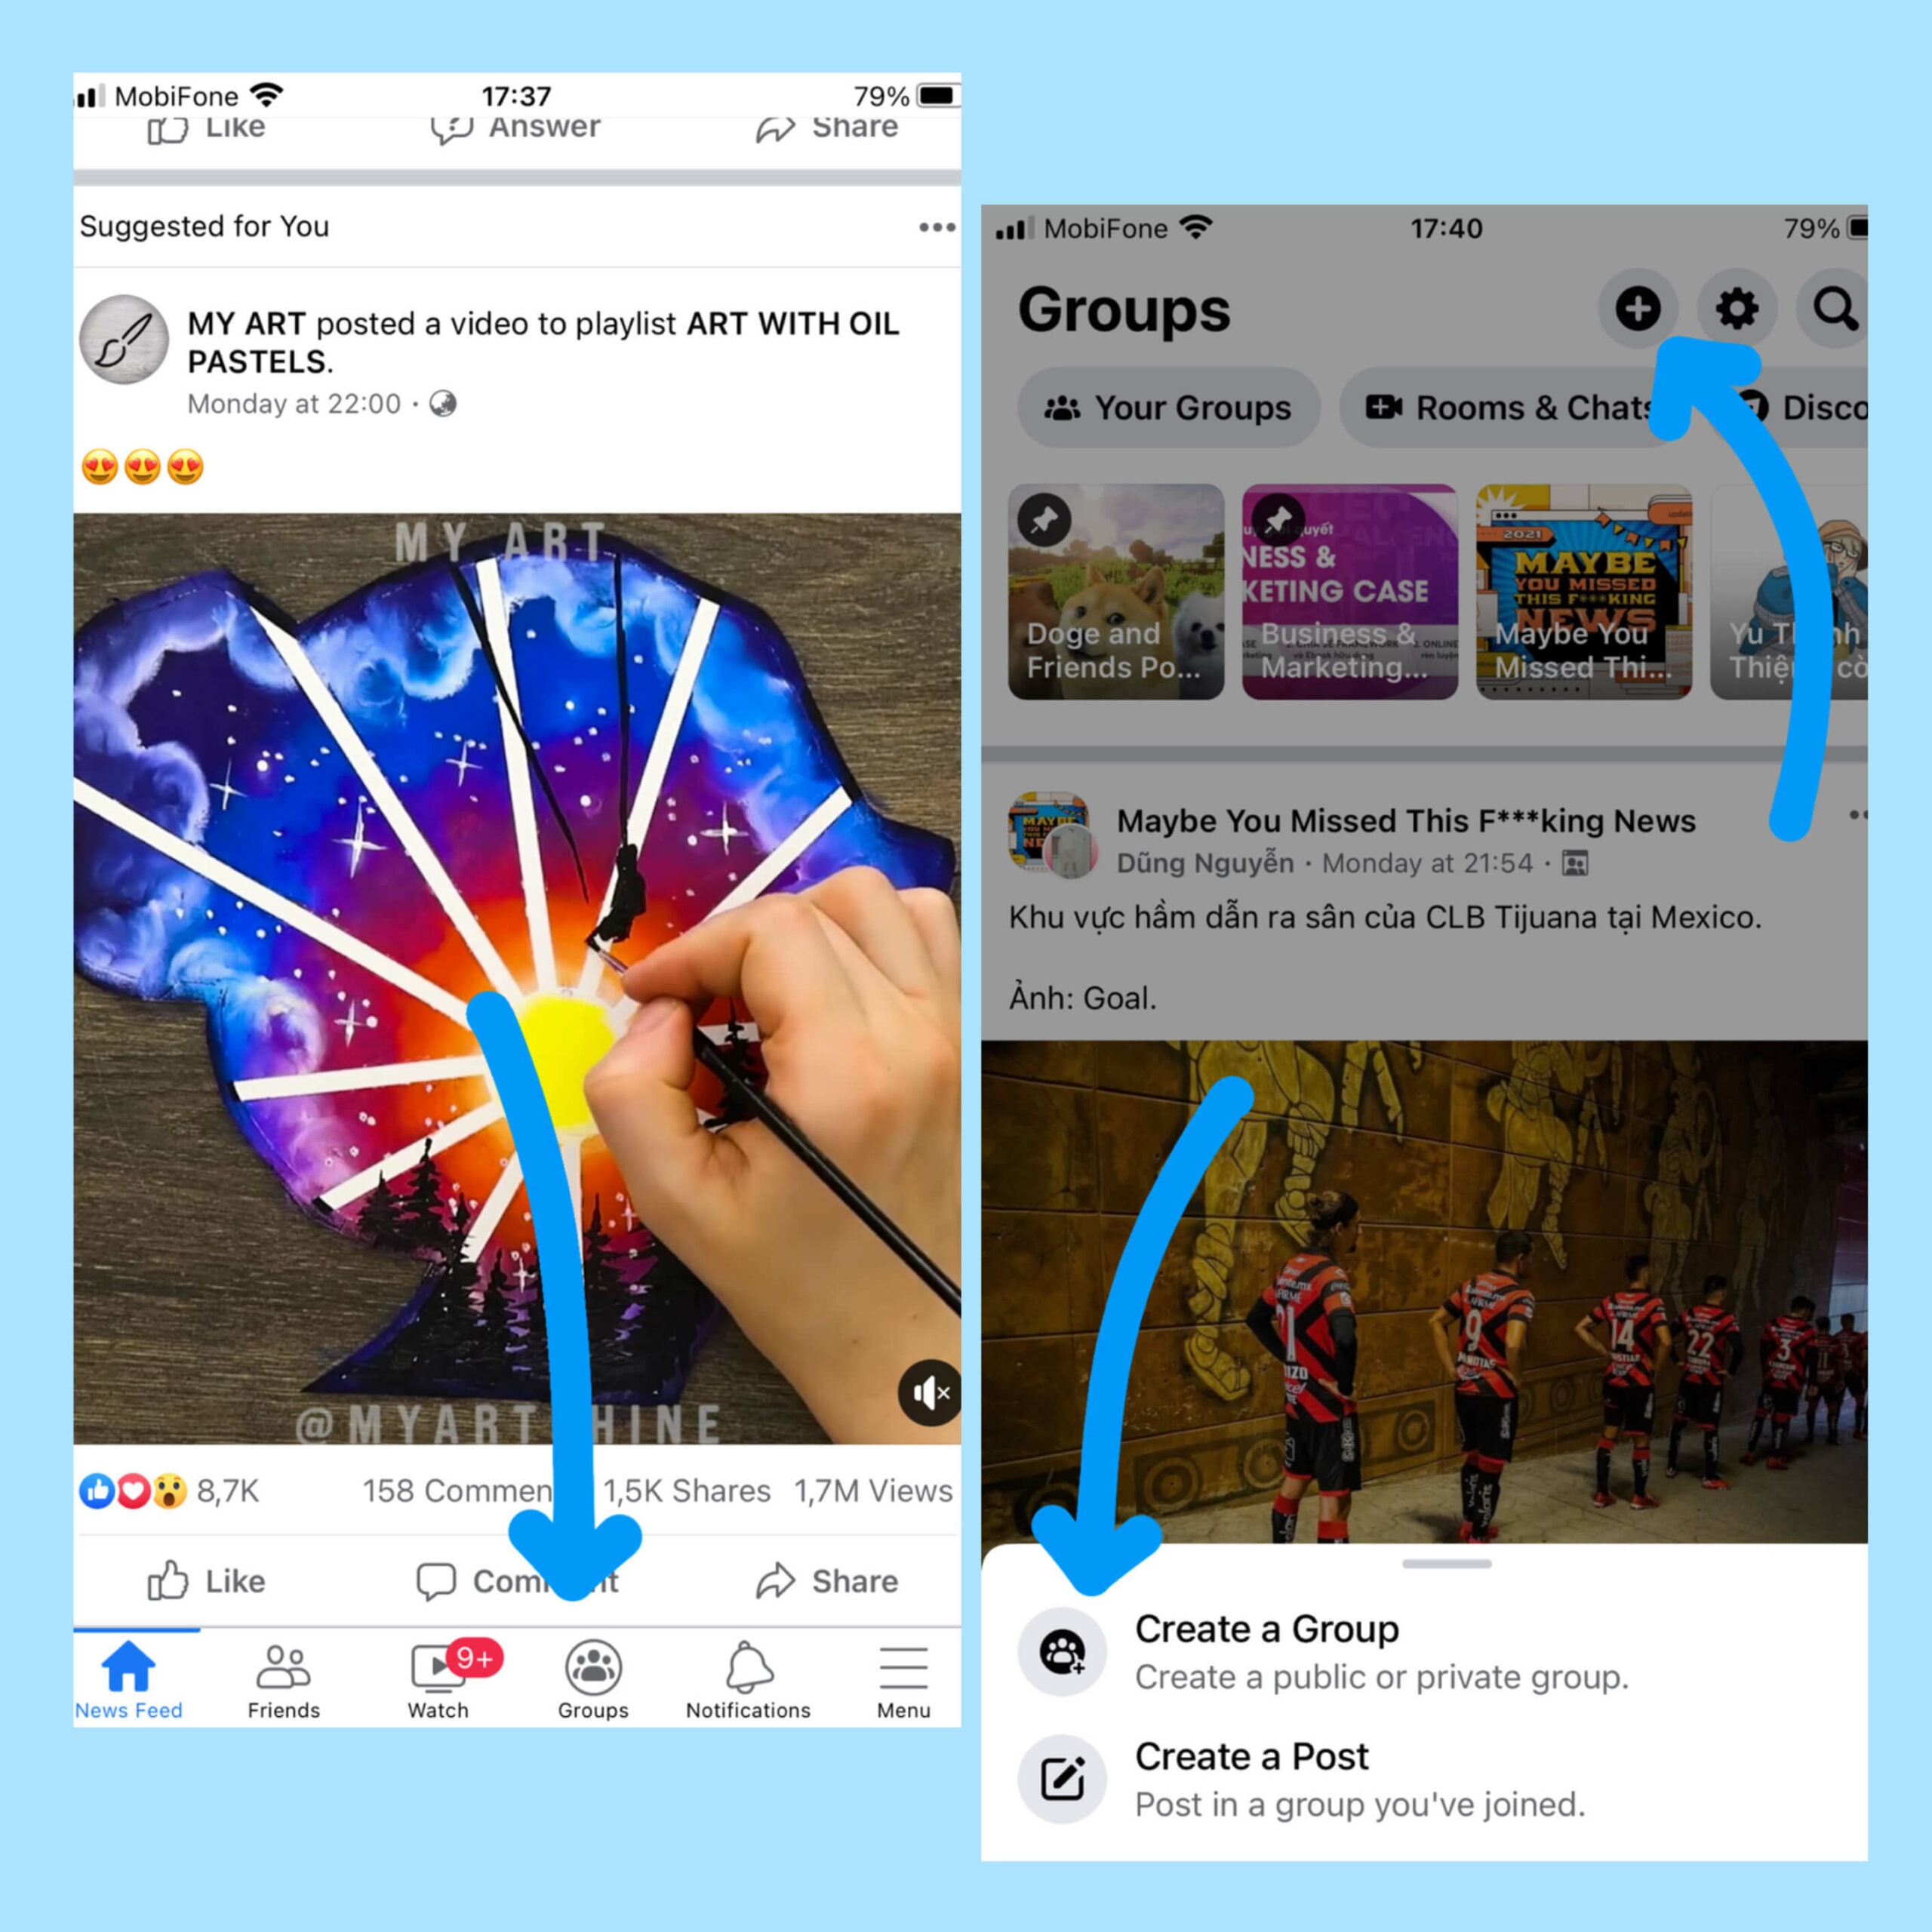
#Step 1: Create Facebook Group
After logging into your account, select the Groups icon on the navigation bar at the bottom of your screen > Click at the Plus icon on the top right corner (the first from left). Then choose “Create A Group”.
On computer? Find the navigation bar, click on the Groups icon > Select “Create New Group” on the top left corner of your screen. Period.
#Step 2: Name your Facebook Group
When choosing a name for your Facebook Group, opt for something that conveys clearly what the group is about the first time they look at it.
This is a typical way to name your Facebook Group
However, if you’re a newbie on Facebook, we suggest you name your group something search-friendly. For example, if you’re an electronics retailer based in Michigan, something like “Michigan Electronics Review” may work.
#Step 3: Make your Facebook Group Private or Public
When it comes to privacy for your Facebook Groups, you have 2 options: public or private. And choosing public or private actually depends on what you want from the group.
If your ultimate goal is to pull in an ocean of members, set public then. But suppose you want to create a sense of intimacy by delivering exclusive content to your audience, a private group is better.
-
Public Facebook Group
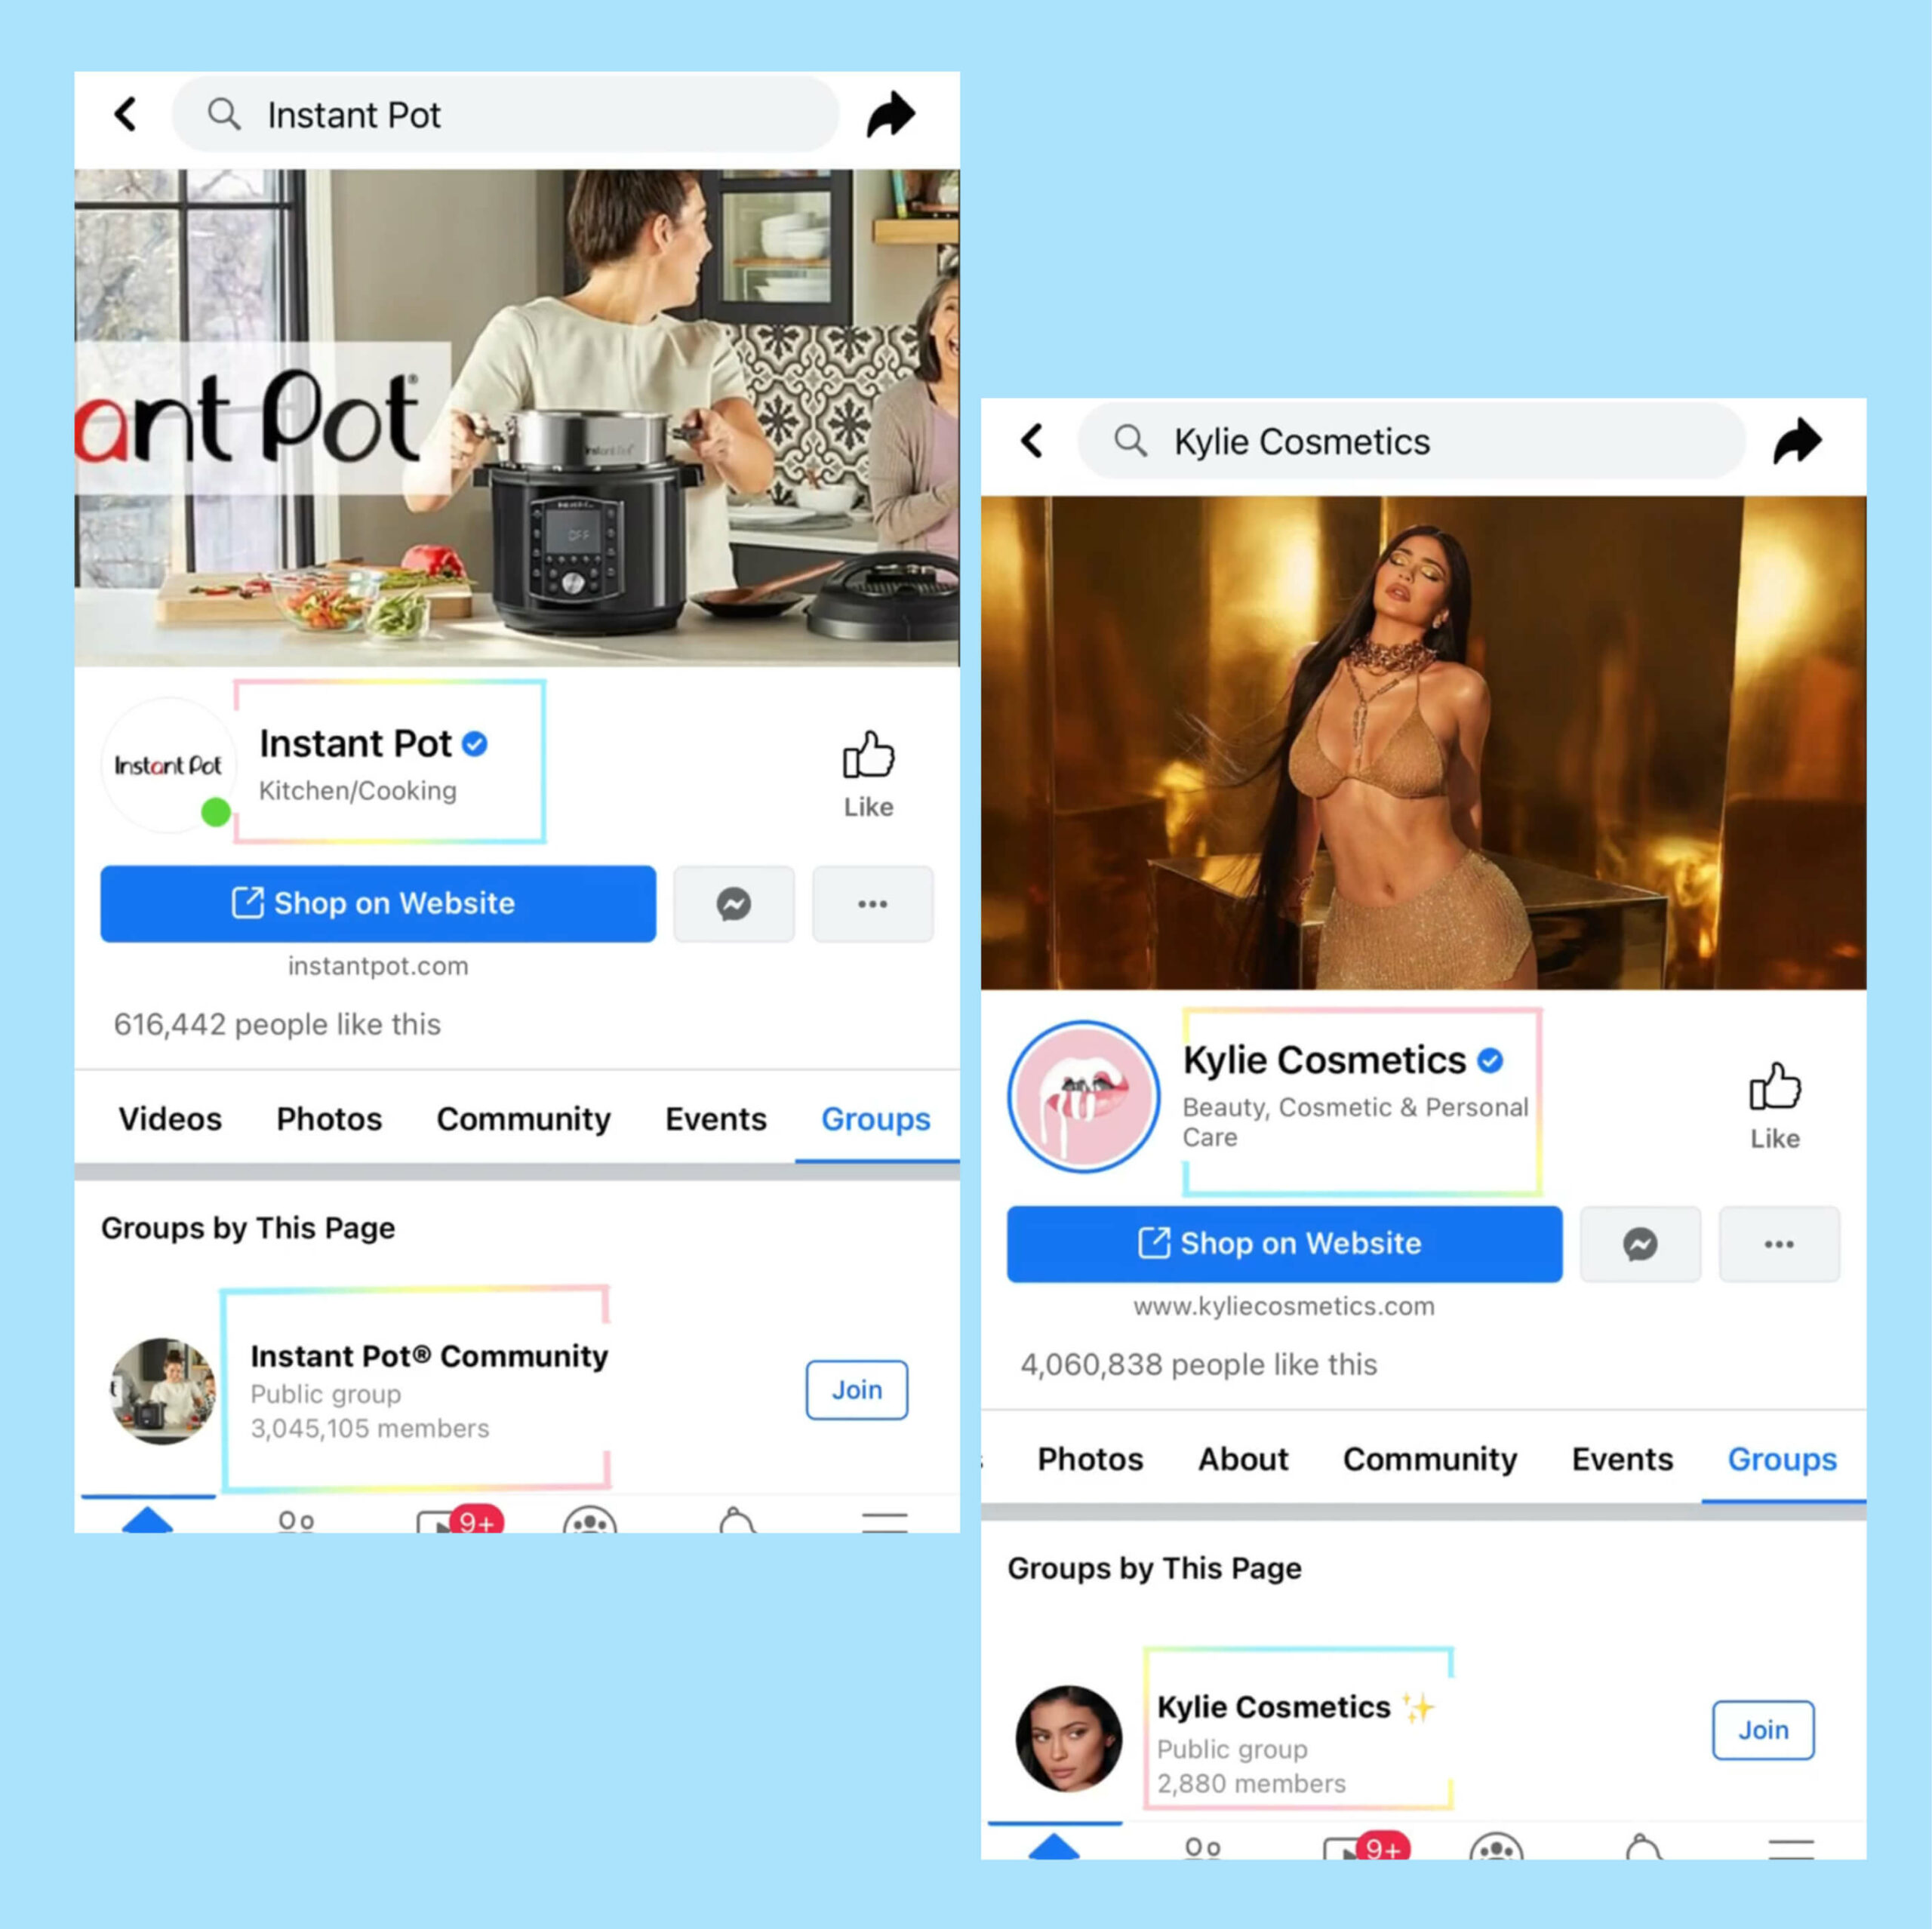
When your Facebook Group is public, that means you allow anyone to join without your permission. Take Kylie Cosmetics built by Kylie Cosmetics, for example:
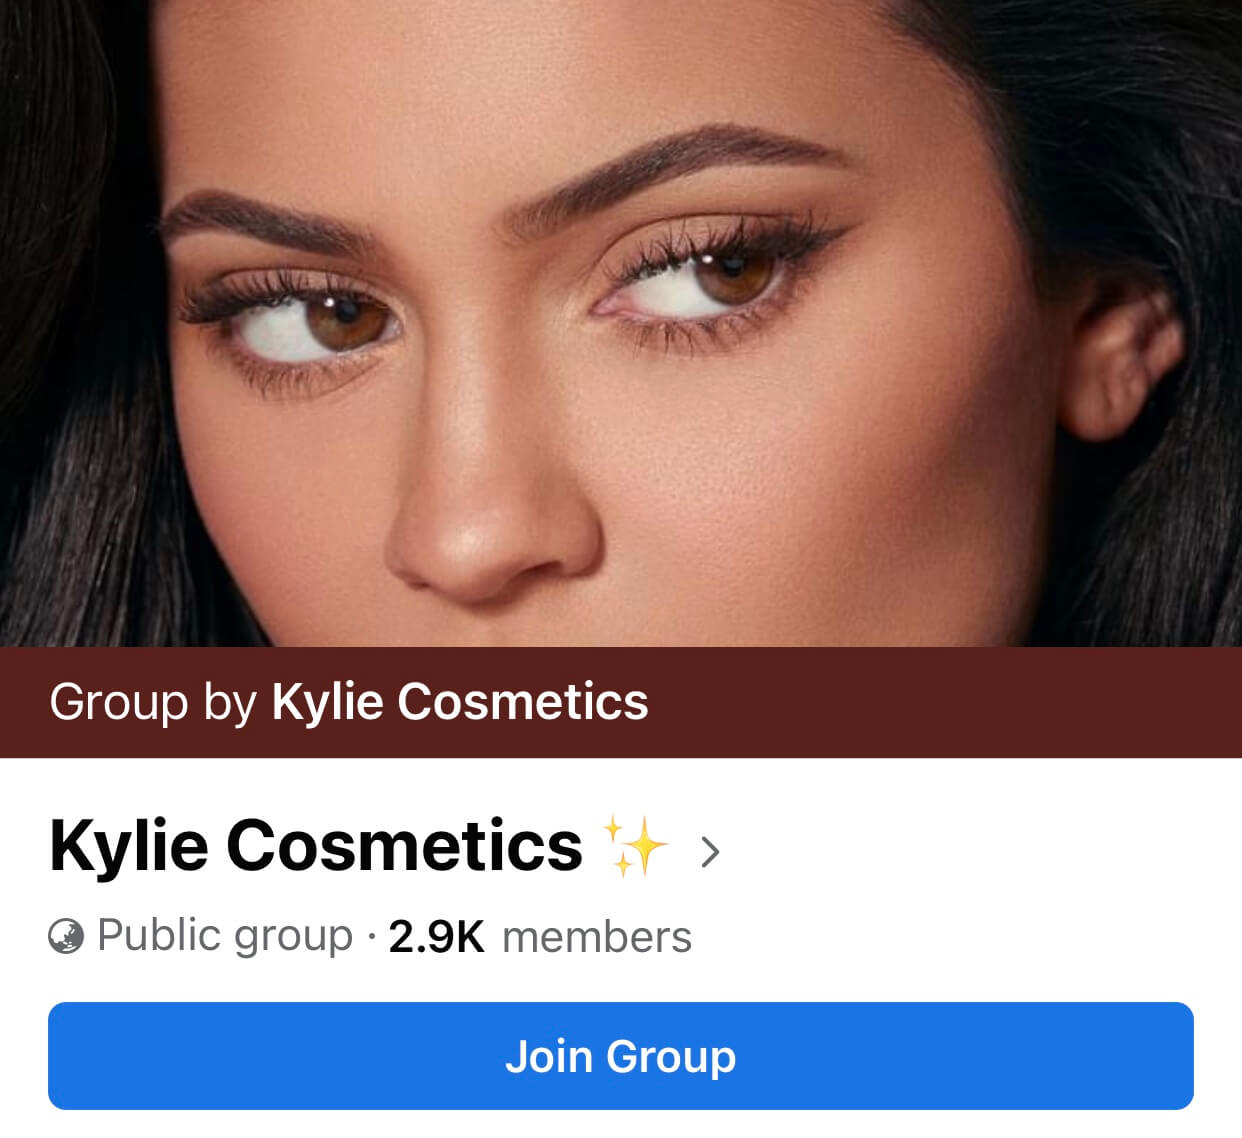
A Facebook public group allows people to take a sneak peek at the content in the group before they decide whether or not they want to join. Therefore, they tend to have more group members.
-
Private Facebook Group
On the other hand, you can only be a member of a private Facebook Group when you have permission from that group’s admin.
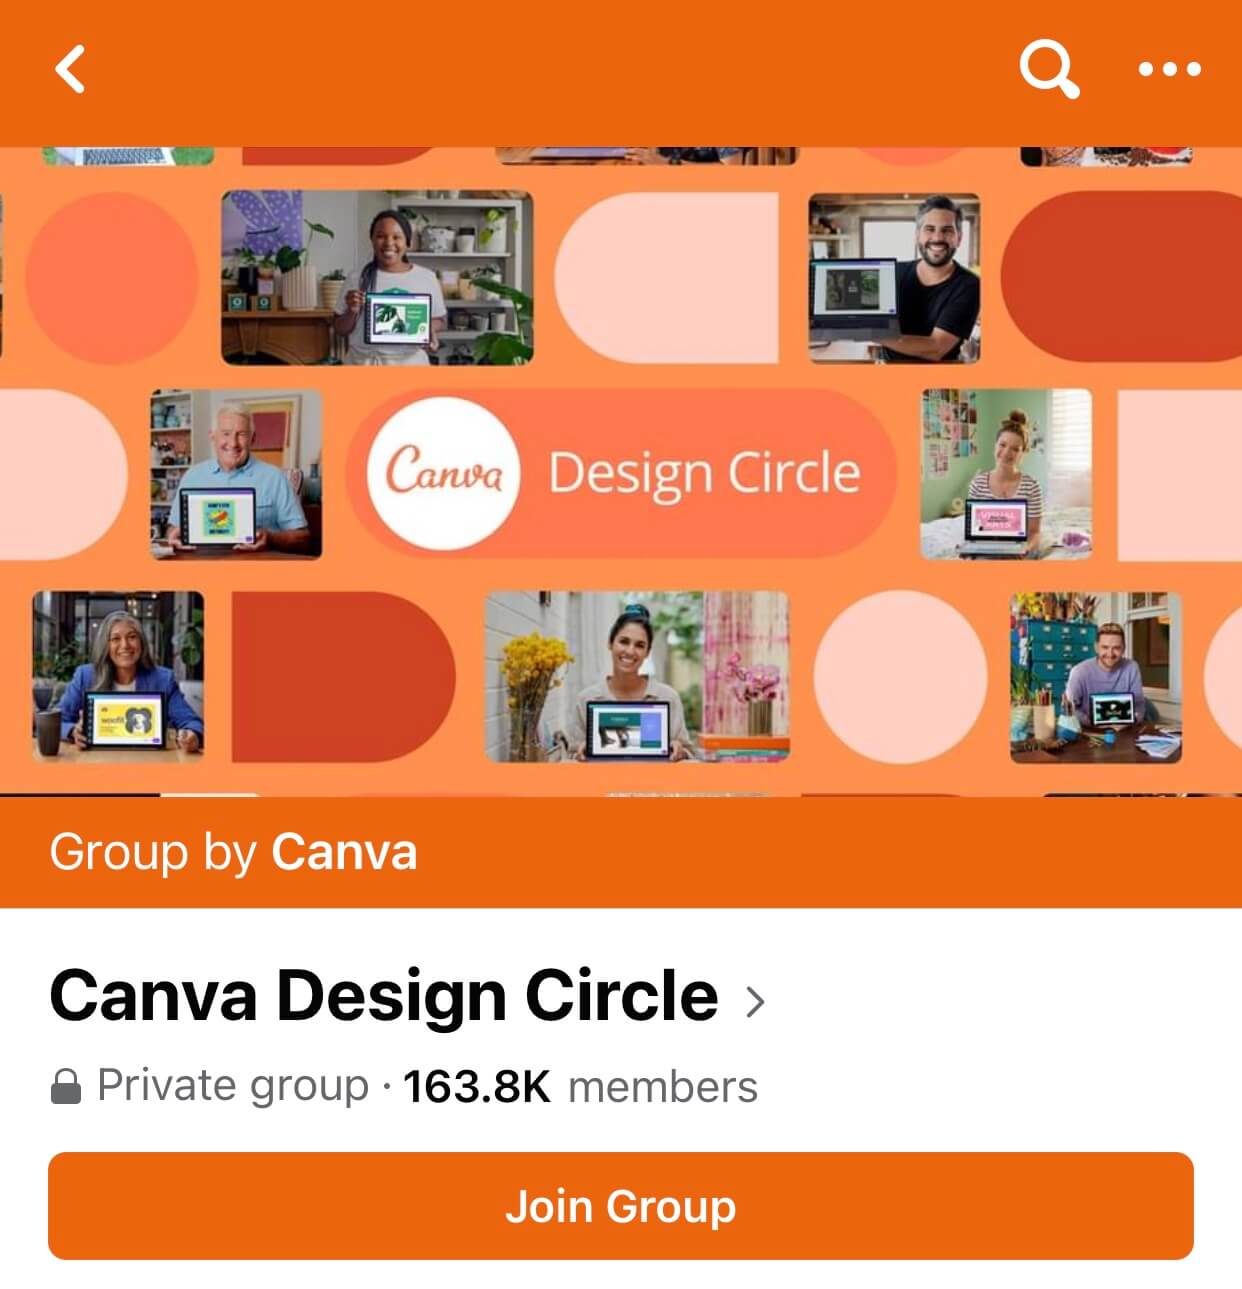
The Canva Design Circle created by Canva is an instance. Canva created this group not for promotional purposes only, here people can learn and share tips & tricks on anything that is related to design.
Facebook private group owners are usually very selective as they want participants to be really interested in what the group is about. For that reason, private groups tend to see a somehow higher engagement rate.
NOTE: Need more privacy for your group? You can choose to “Hide Group” in your privacy settings. After you do that, only your group members can see the group, and only Facebook users that are invited by the group members can have a chance to join.
#Step 4: Invite members
Now that you have created your group, it’s time to invite people to the party.
Add all of your friends and colleagues (of course), and perhaps, ask them to invite their friends whom they find suitable for your group.
Next, invite those who like your Facebook page and already engage with your posts.
And that’s still not enough! Probably you’d love to declare your Facebook Group existence on other social media platforms such as Instagram, Twitter, or Tiktok.
#Step 5: Customize your Facebook Group
At this stage, we’ll show you the very last things you need to do with your Facebook Group- add necessary details and pieces of information.
-
Add a cover photo
Though you can choose the Facebook default cover, don’t do that (because you can do much better?)
Your group cover is important because it’s the very first thing people see when they jump to your group. Therefore, ensure it’s high-resolution and relevant to what is going on in the group.

Remember to add a cover that reflects your group’s purpose!
NOTE: The recommended size for group cover photos is 1,640px by 856px (1.91:1 ratio)
-
Write a description
Your group description will be visible to everyone under the “About This Group” section. Thus, make sure you write a precise and concise description.
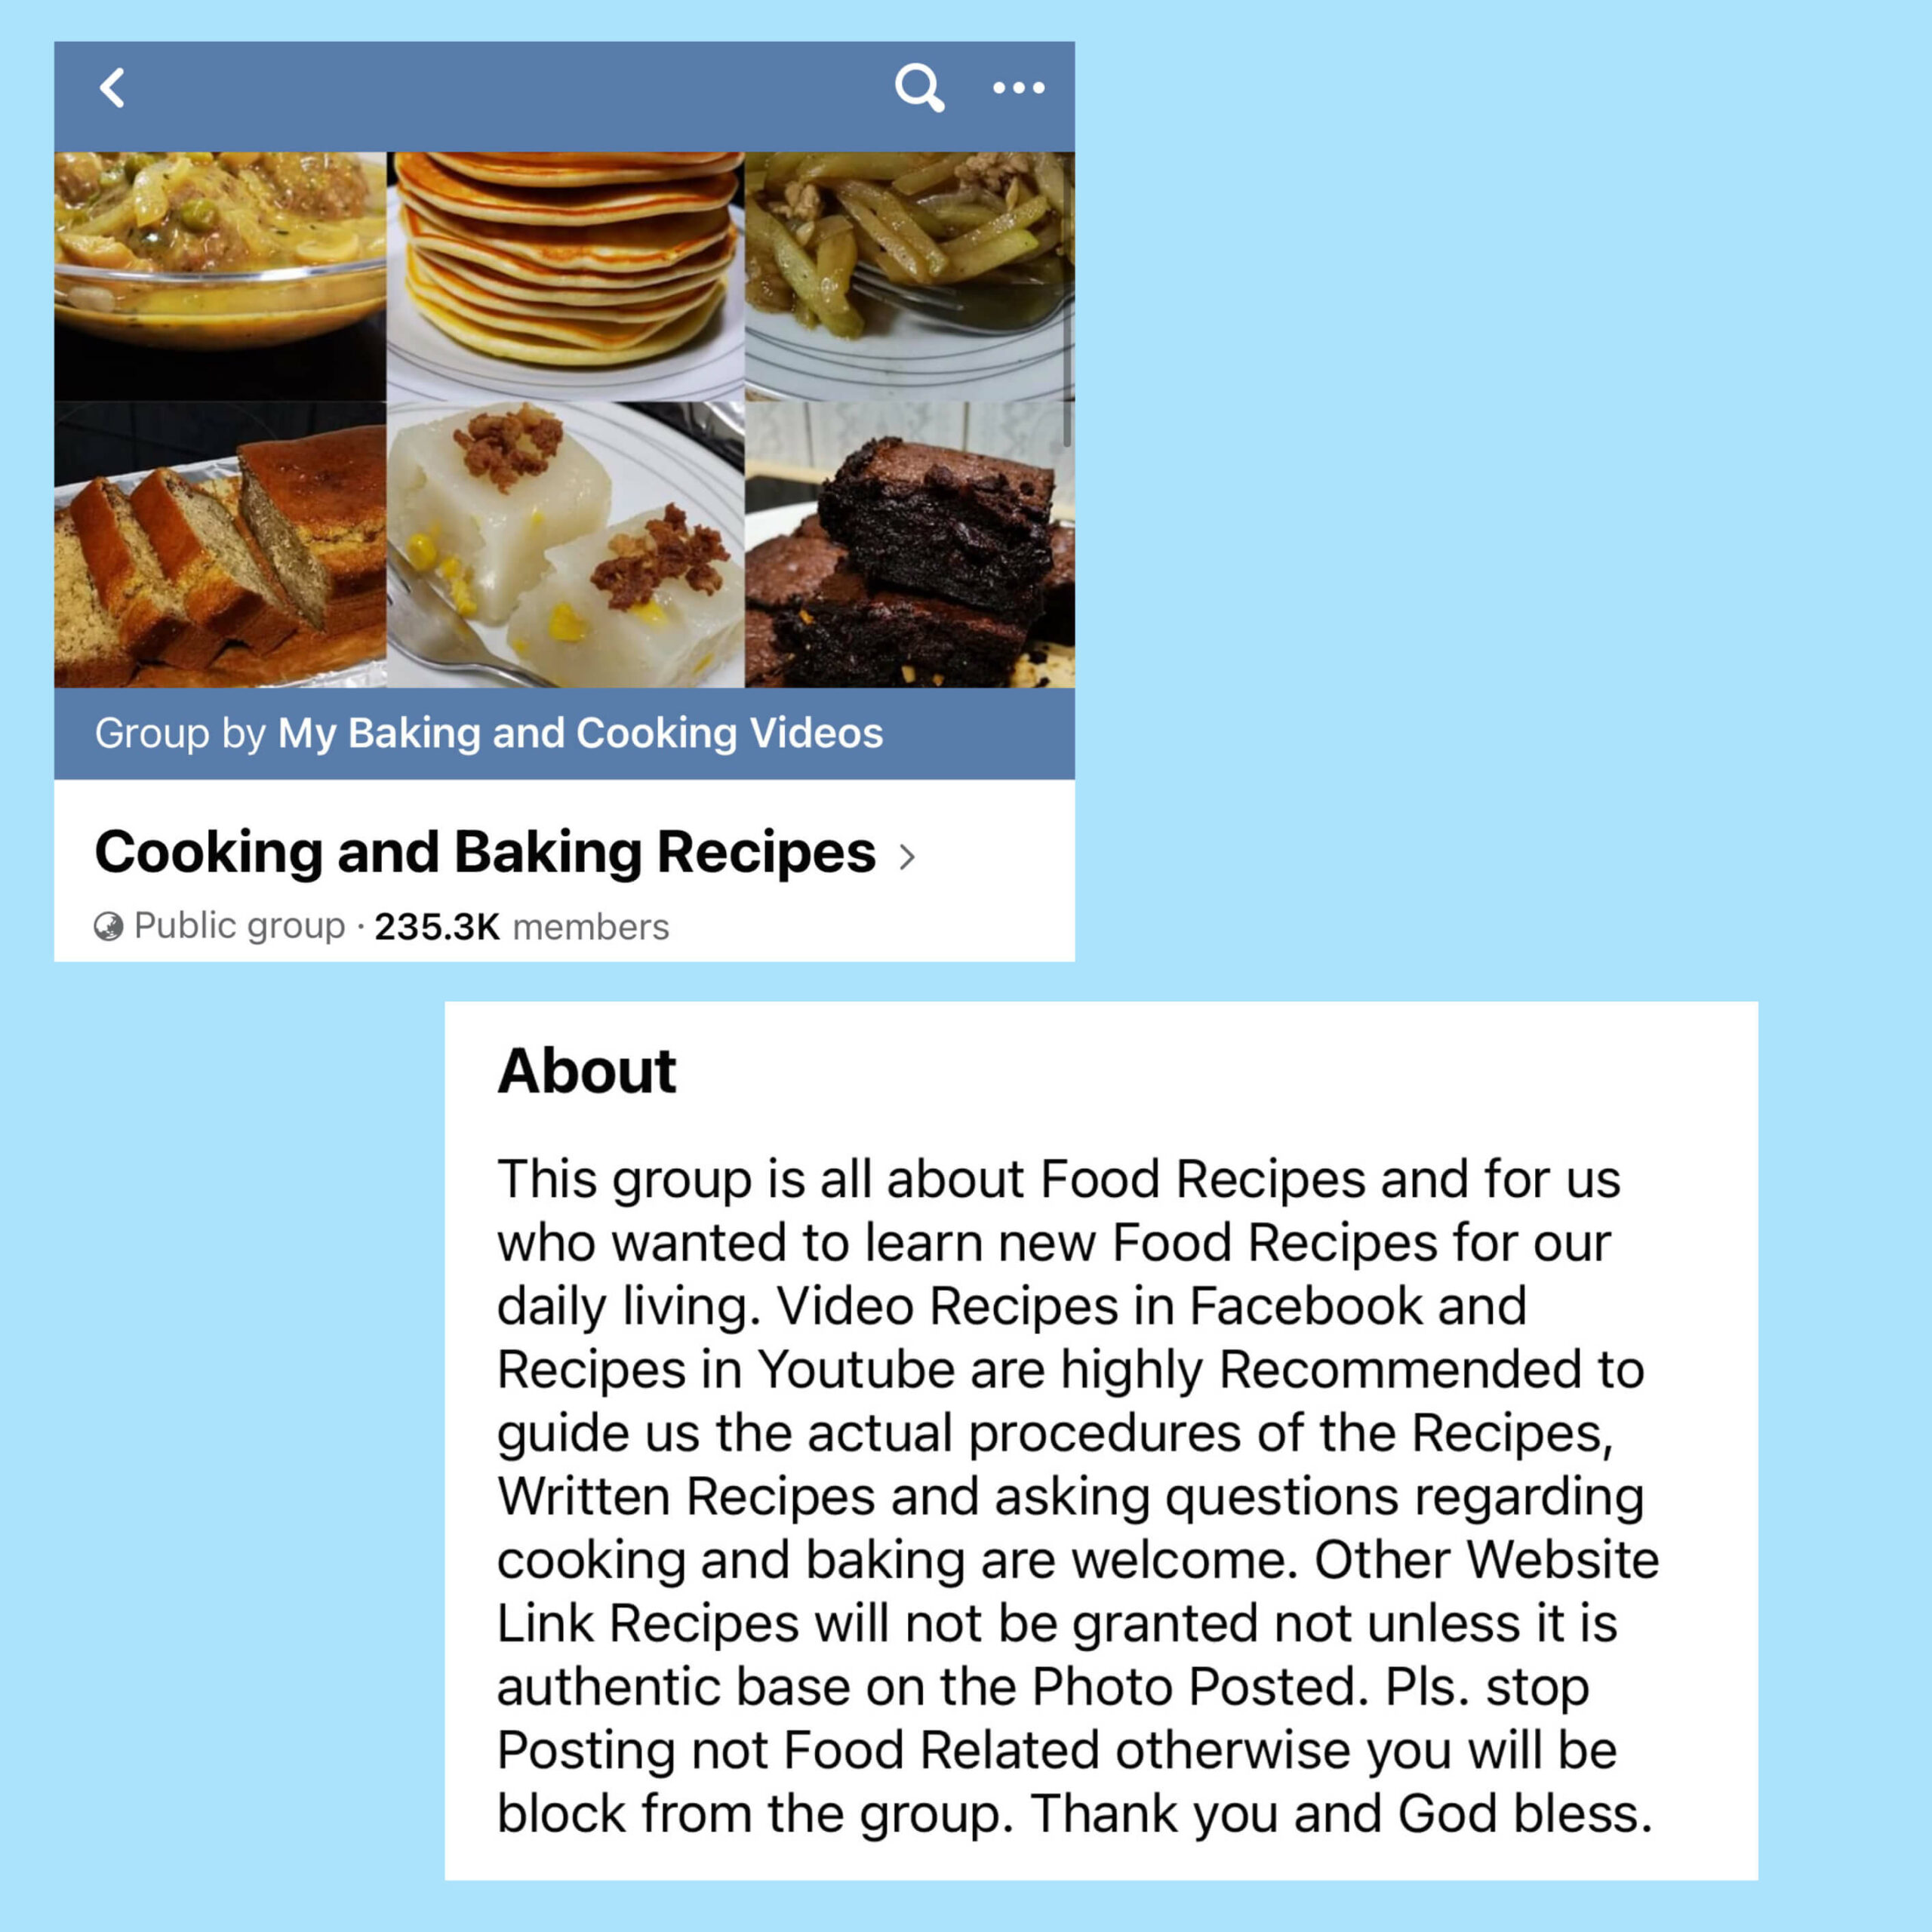
Ensure that you state clearly your group’s vision there
That means you should stay away from a lengthy essay or some vague words. Instead, make sure that people can know the group’s vision and mission after they read your description.
-
Include tags
Don’t forget to add tags for your Facebook Group. Your tags will act as keywords that help Facebook categorize your group into specific “Categories” and the “Suggested for you” in the Group Discover section.
-
Set location
If you want to attract members in a specific geographic area, remember to add a specific location.
5 Tips on how to grow your Facebook Group for business
The brands that developed a strong community within their Facebook Groups are usually much more attuned to their customers’ needs.
To squeeze the most out of the group you created is not an easy task. But don’t worry cause we got you covered with these tips to fuel your business growth!
#Tip 1: Set rules to nurture a healthy Facebook Group
Your Facebook group is a miniature world, it must be shaped by a set of rules so that things can function properly and keep the little society on the right track.
To set a transparent code of conduct to maintain your community, navigate to the “moderate group” settings. Therein, you can set up to 10 rules.
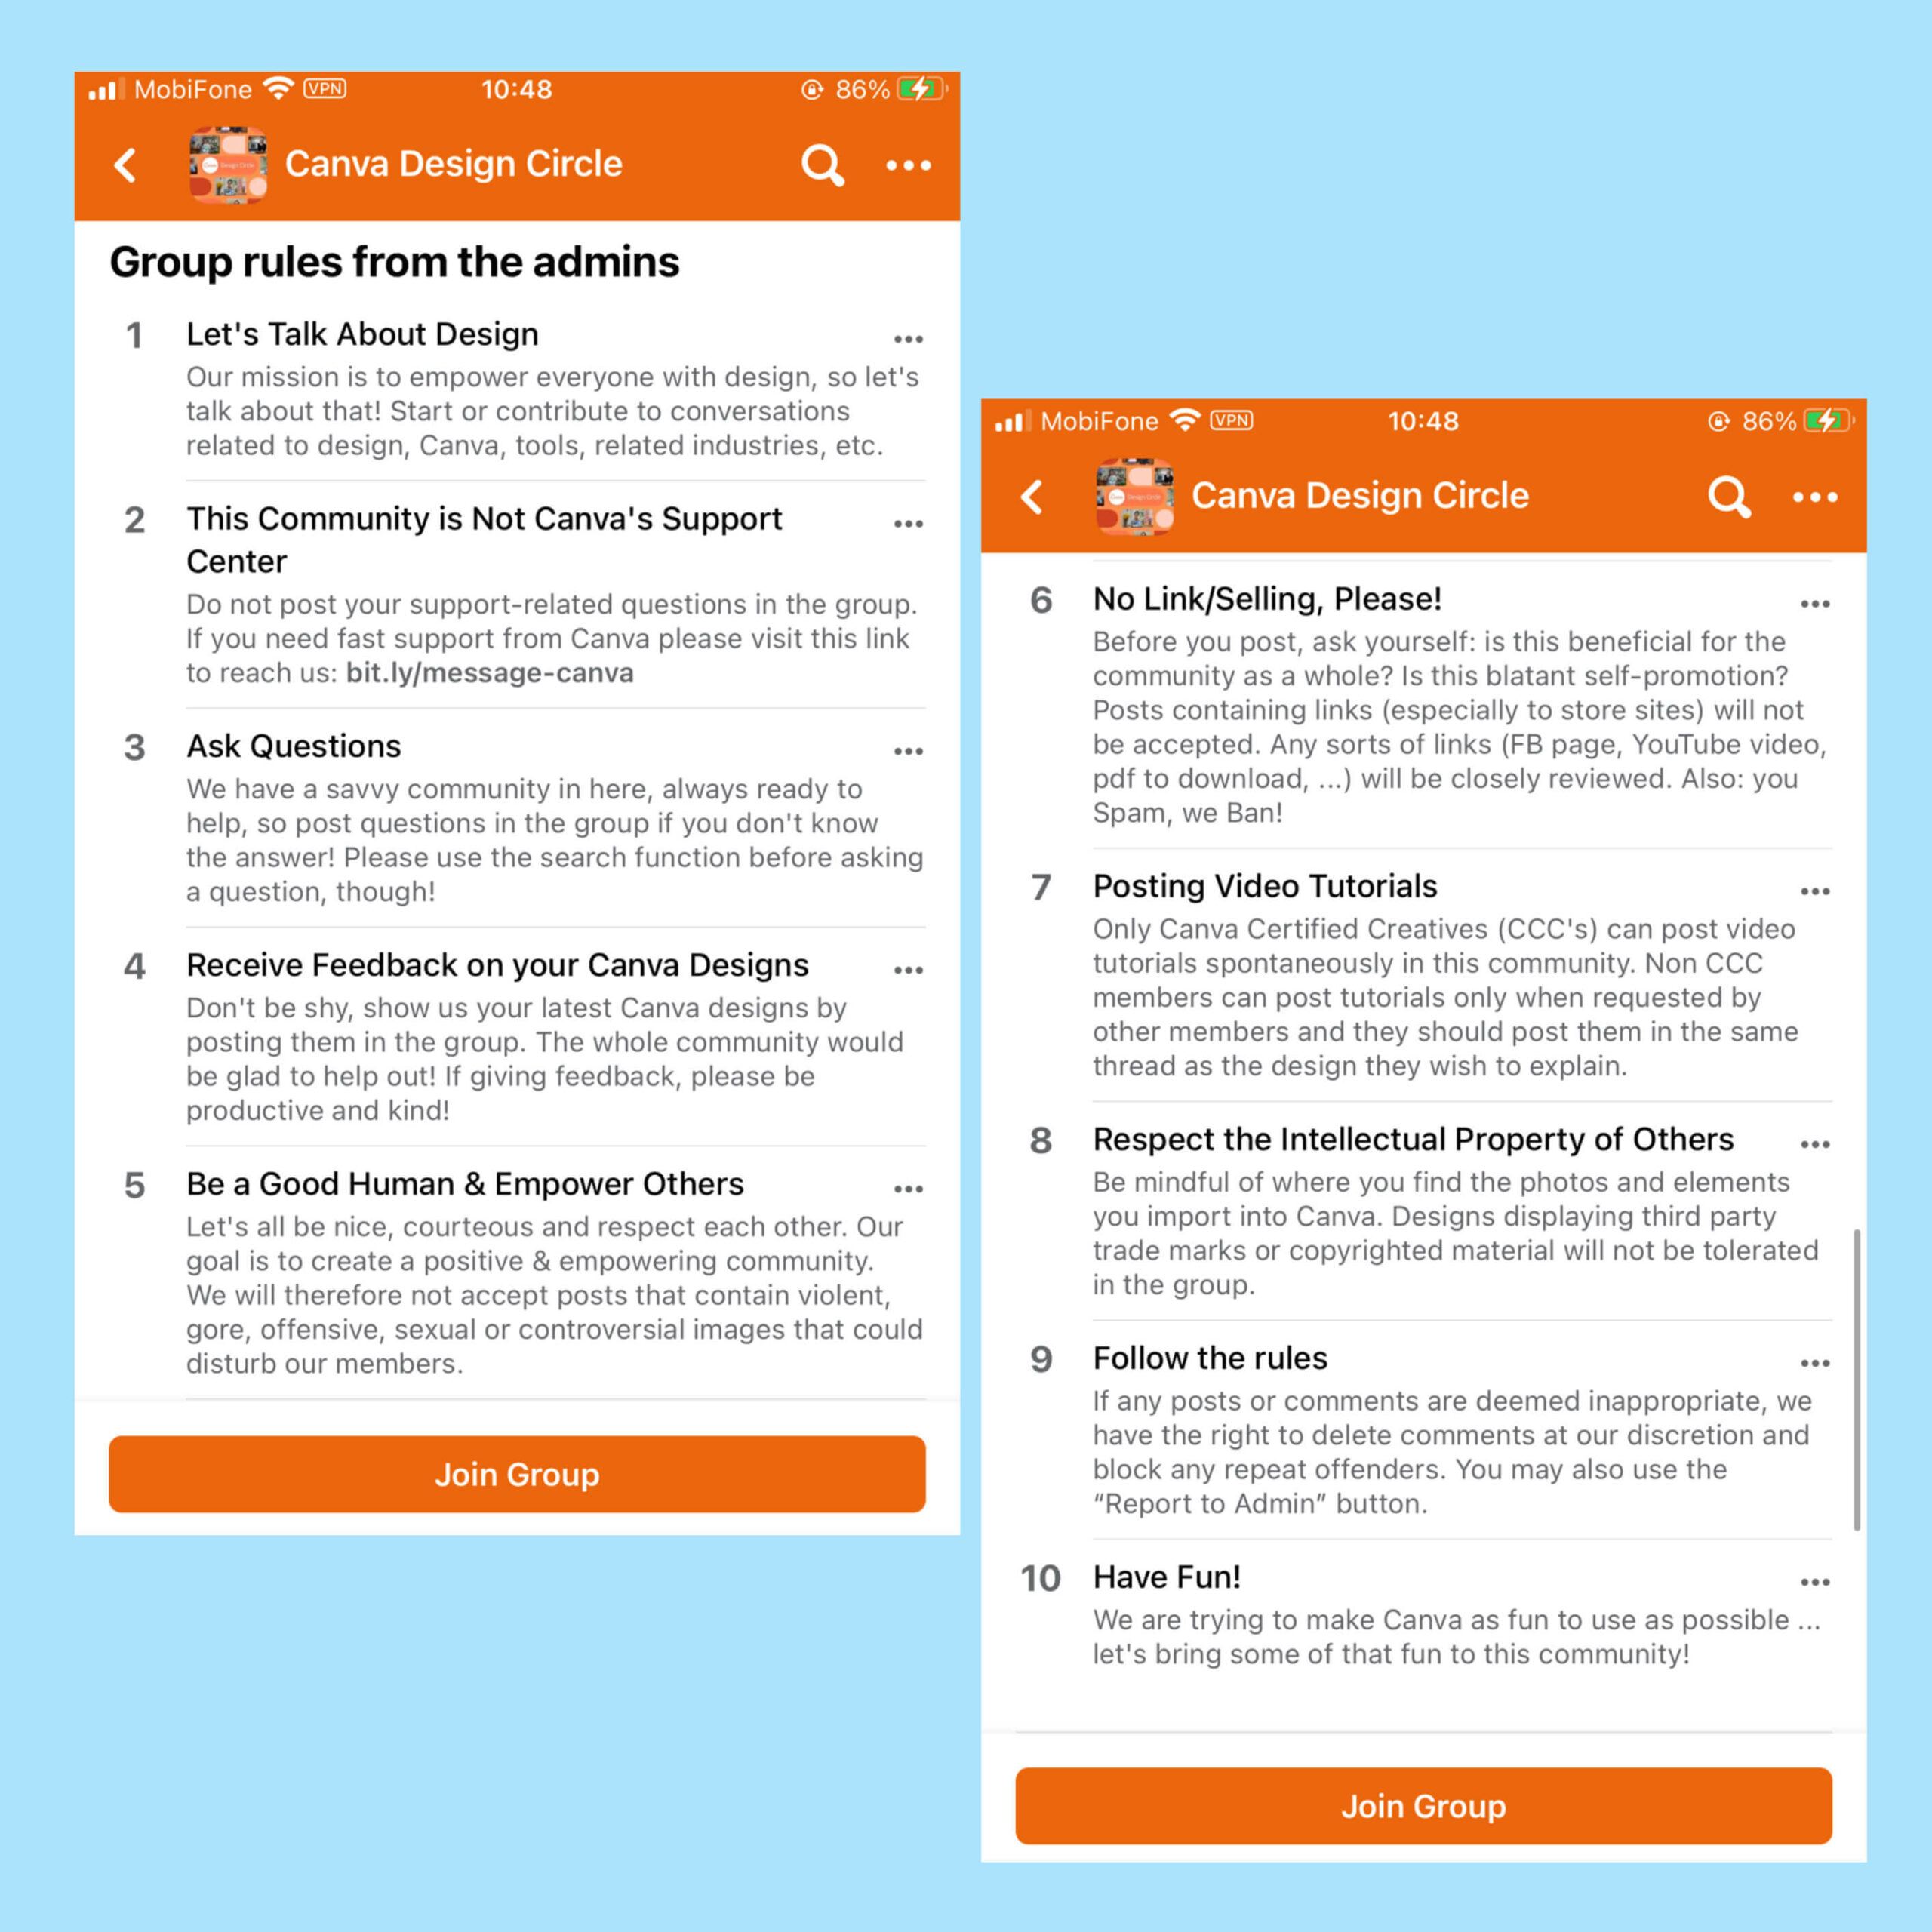
A good set of rules should tell your members What they should post & How they should behave
A crystal clear code of conduct is a good place to start because it will keep members’ experiences positive.
TIP: Not all members click at the rules section to read every word. That’s why a little tip here is to pin these rules under a post. It’s simple!
- Copy all the rules > paste them into a post > publish
- Click on the 3-dot icon at the top right corner of the post
- Select “Mark as announcement”
- Navigate to the “Announcements” section
- Find the post & click on the 3-dot icon and choose “Pin to top”.
#Tip 2: Give your group members something special
If you keep posting only promotional posts without bringing any value to your group members, there is a very high chance that they’ll quit very soon.
When you give your customers content they can hardly ever find anywhere else, they will stay, waiting to become your loyal fans.
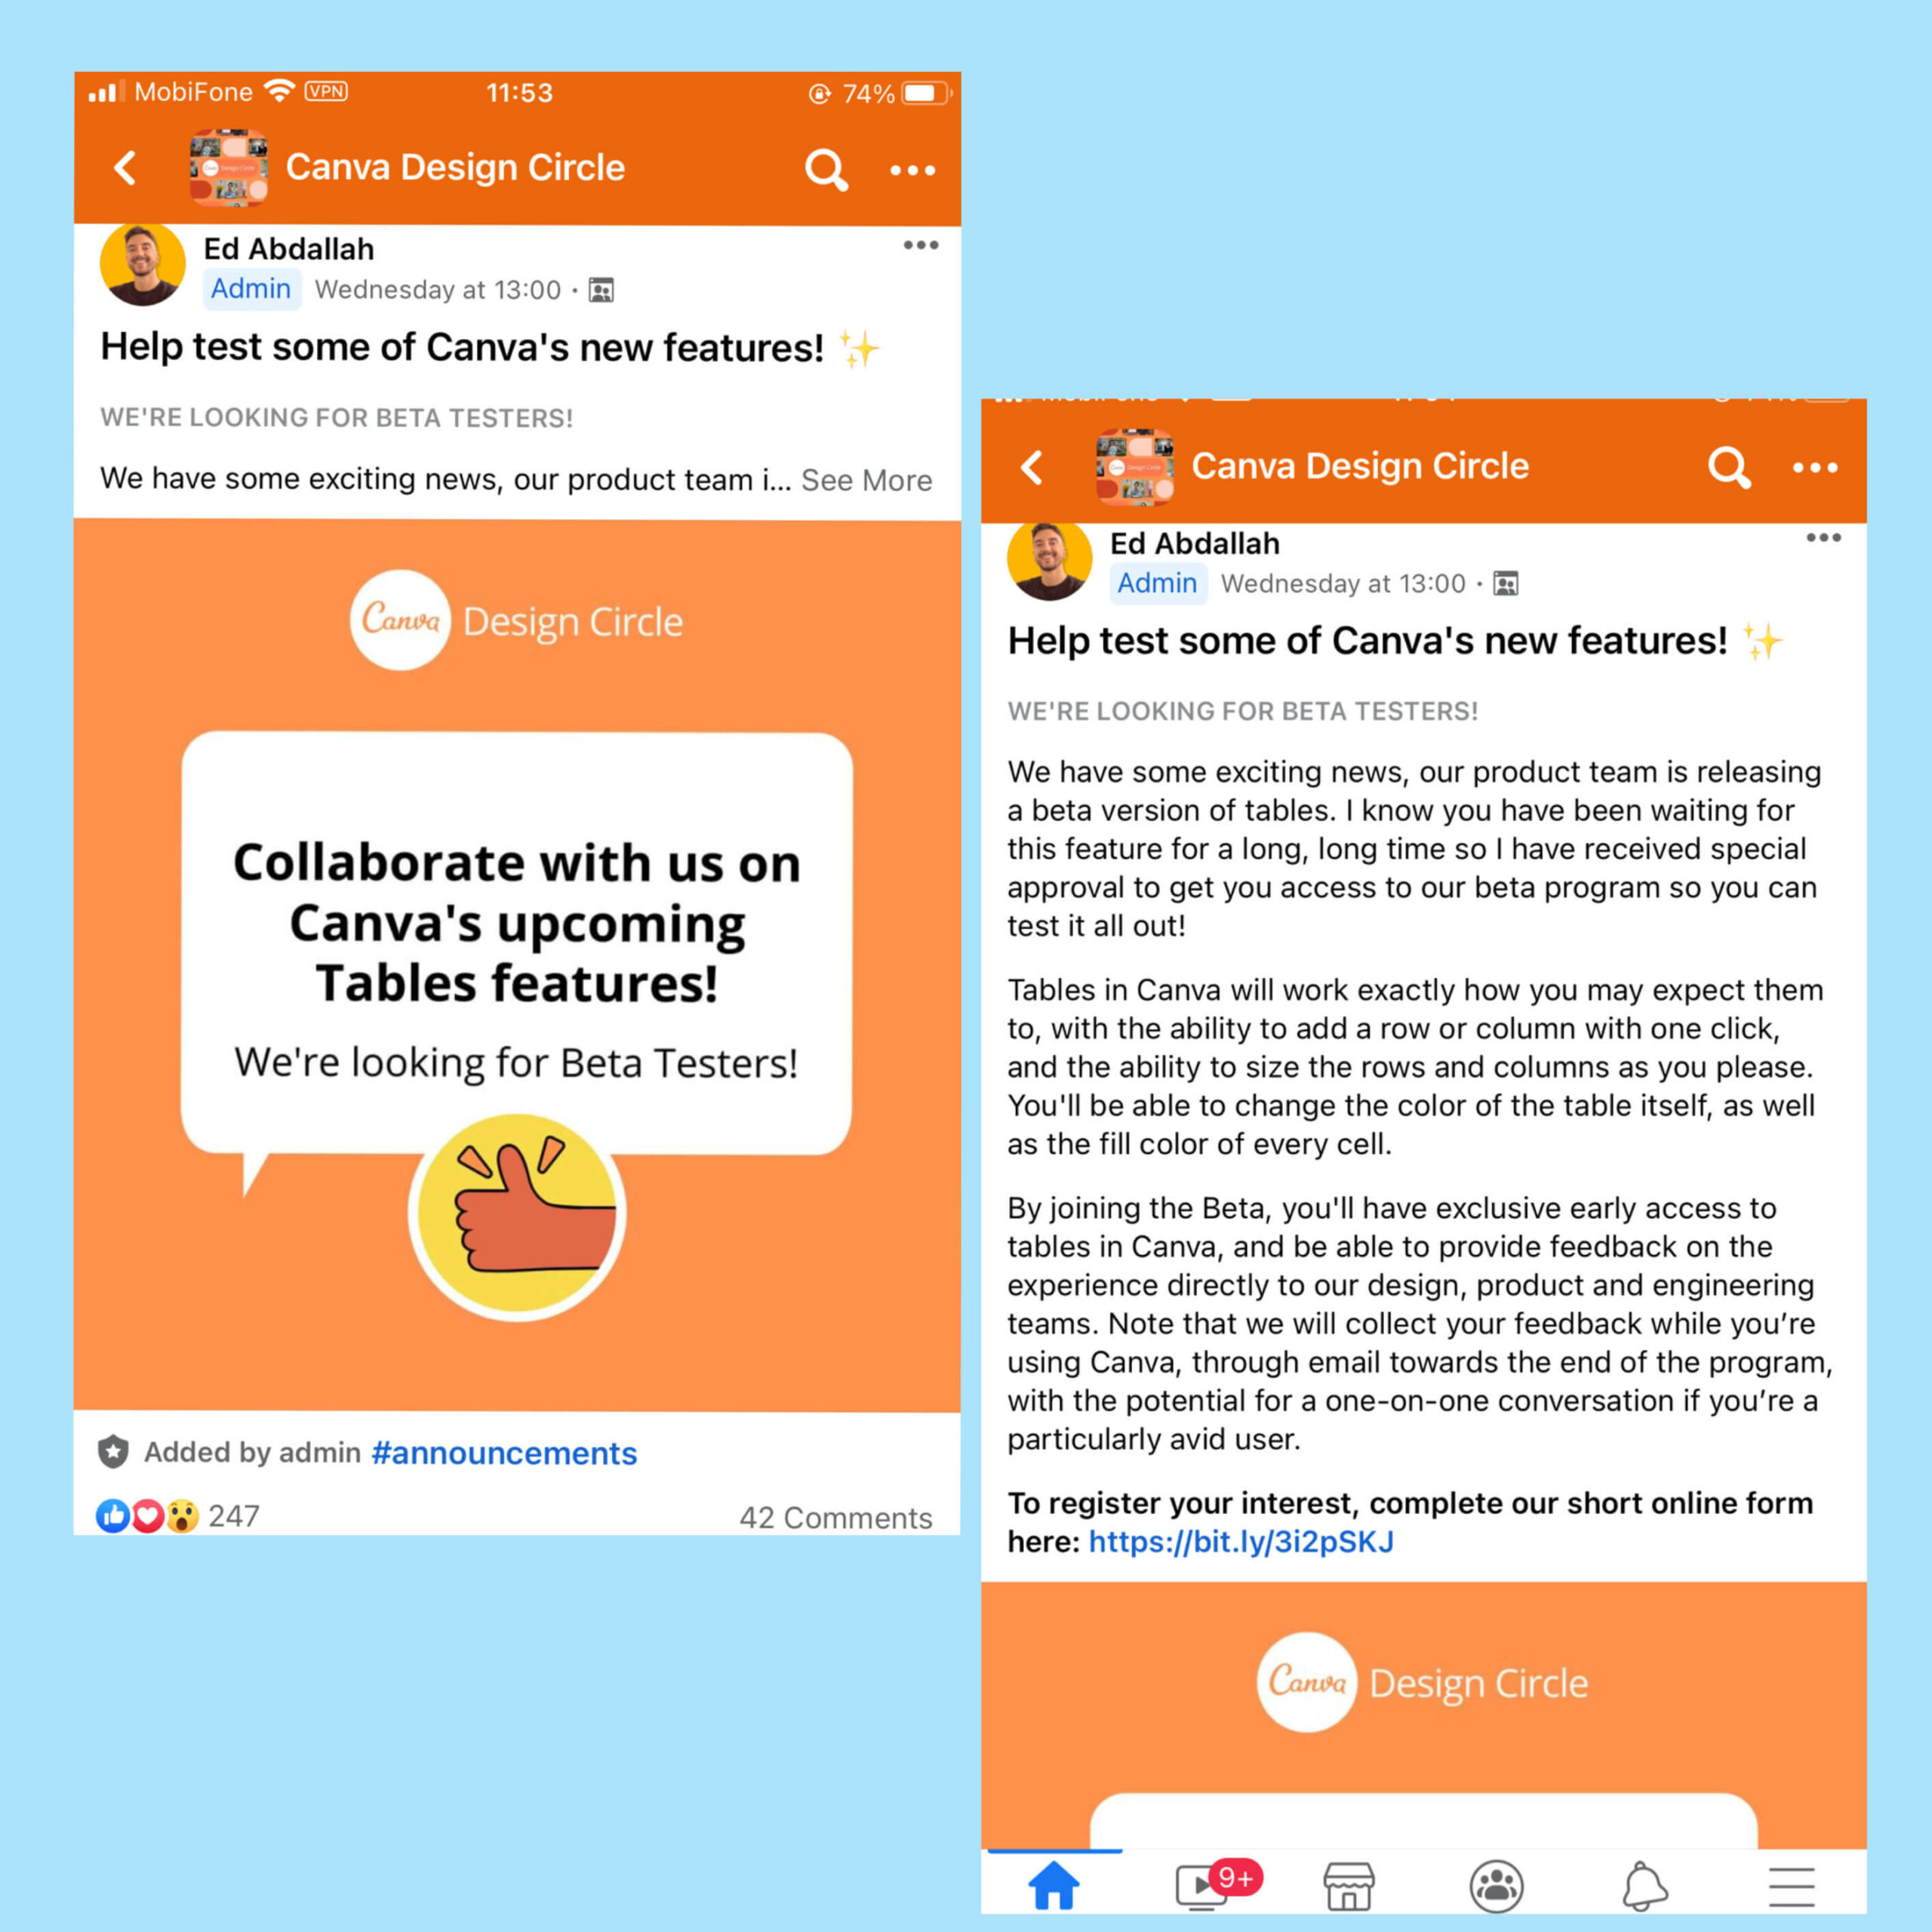
Delivering exclusive content to your members is an awesome way to keep them engaged and committed
Take Canva for example, by allowing their group members to test out their latest features, the graphic design platform gives their members an offer they could not find anywhere (even on Canva’s Facebook Page).
#Tip 3: Getting more insights with Polls is a great method in how to grow your Facebook Group
In case you are not sure which content is the most appealing to your group members. Creating a poll can be a great way to gain deeper insights into your audiences’ preferences.
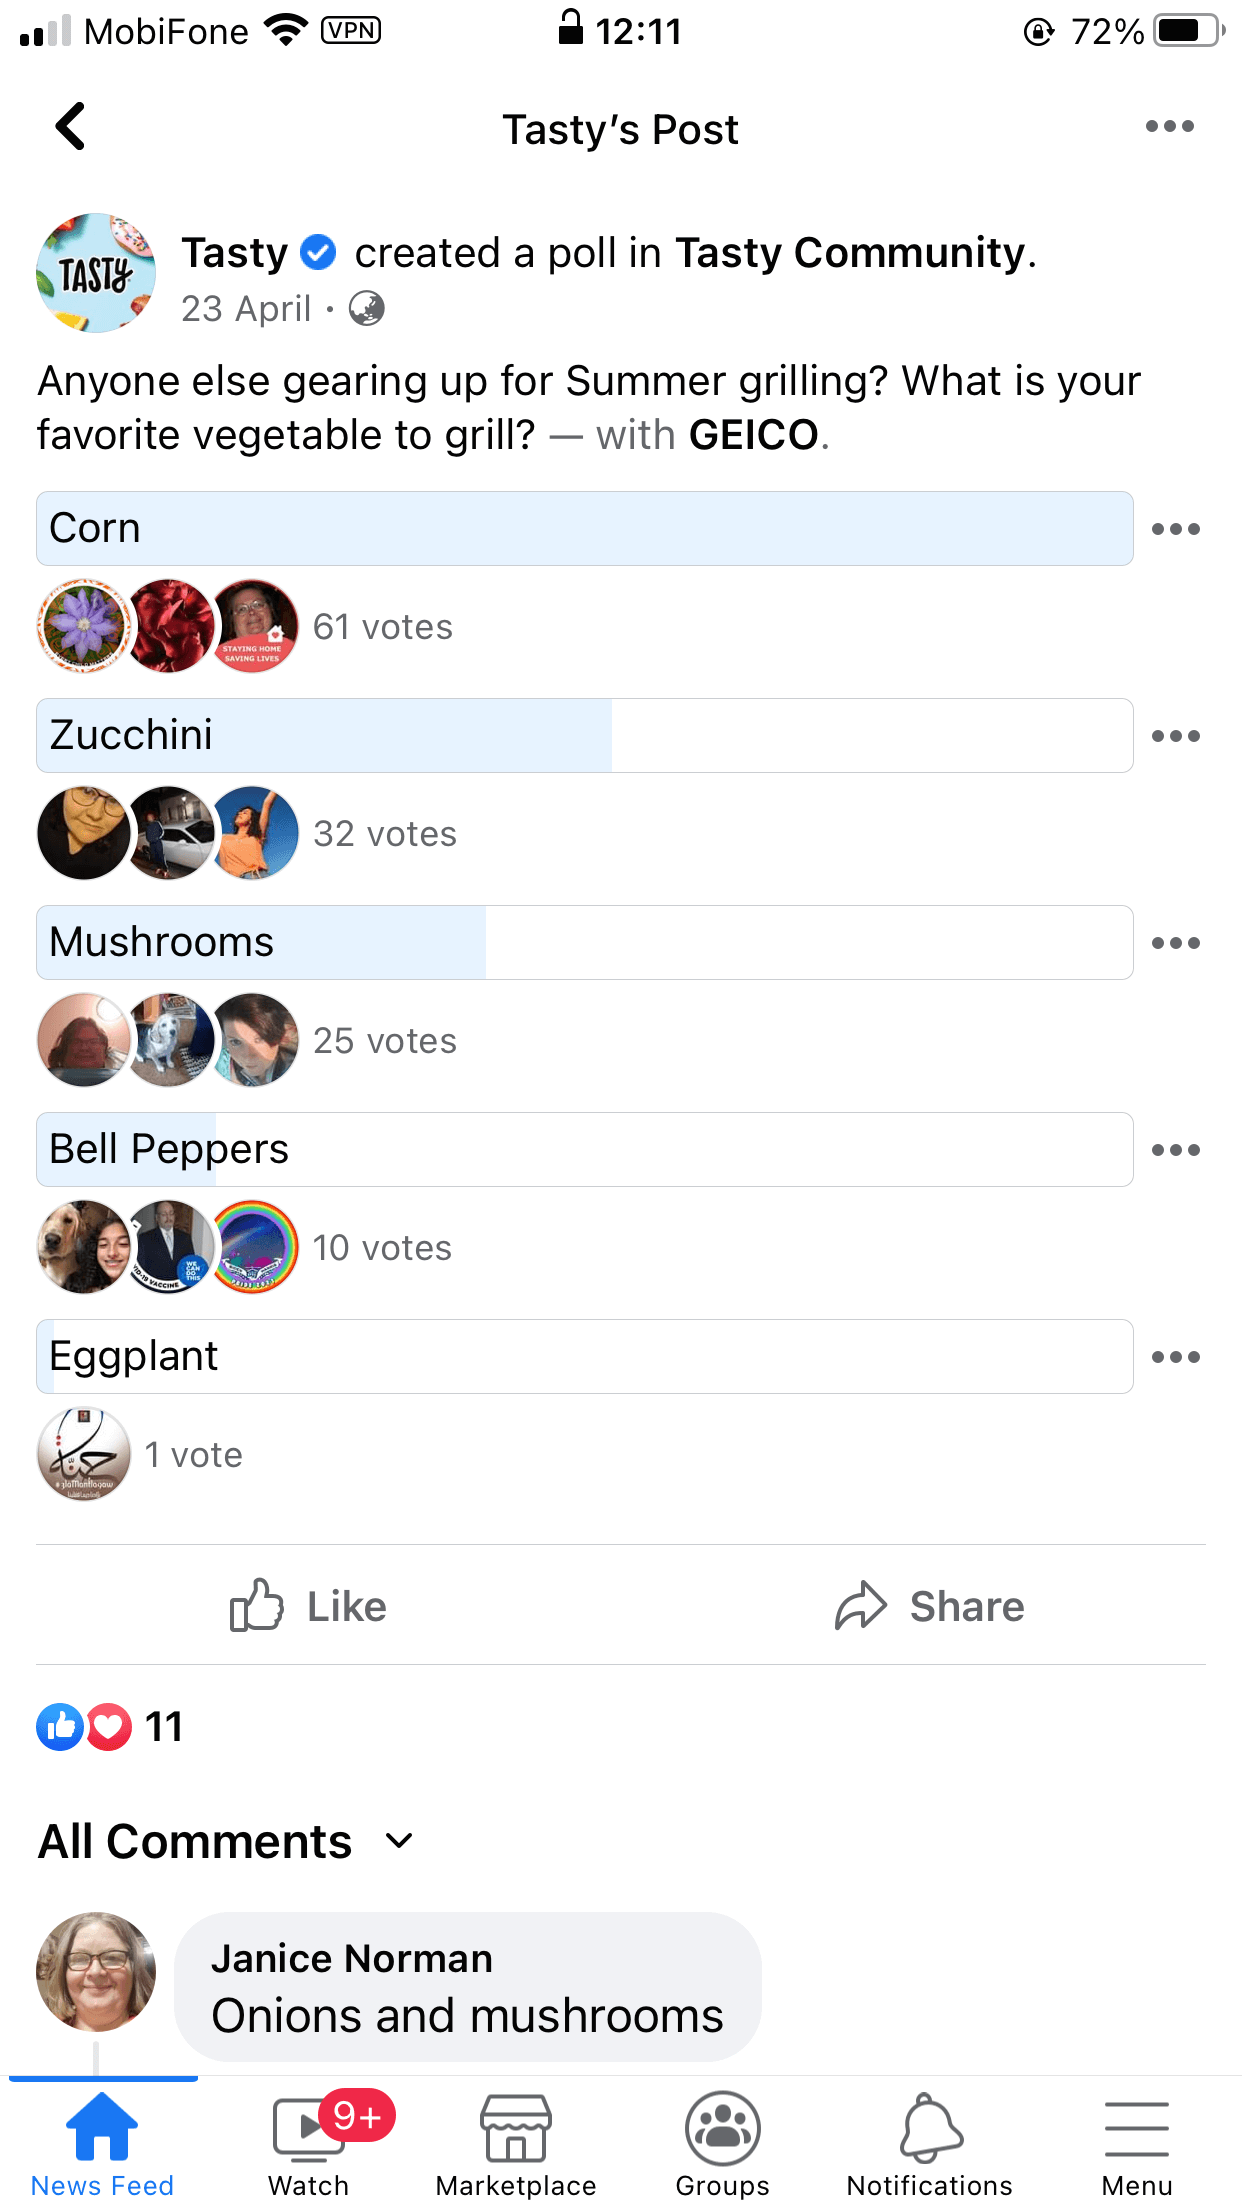
Dropping a poll every once in a while may help you gain deeper insights into your members and keep them engaged
Not to mention that polls can also help you keep your members engaged effortlessly but effectively.
#Tip 4: Keep out bots out of your Facebook group
If you set up a private and visible or secret over a public group, you have a chance to create an application form for those who want to join.
And you should do so because with a private Facebook group, we assume your main goal is to keep people highly committed and engaged.
For this application form, do not put in a bunch of conundrums or easy-peasy questions that anyone can answer.
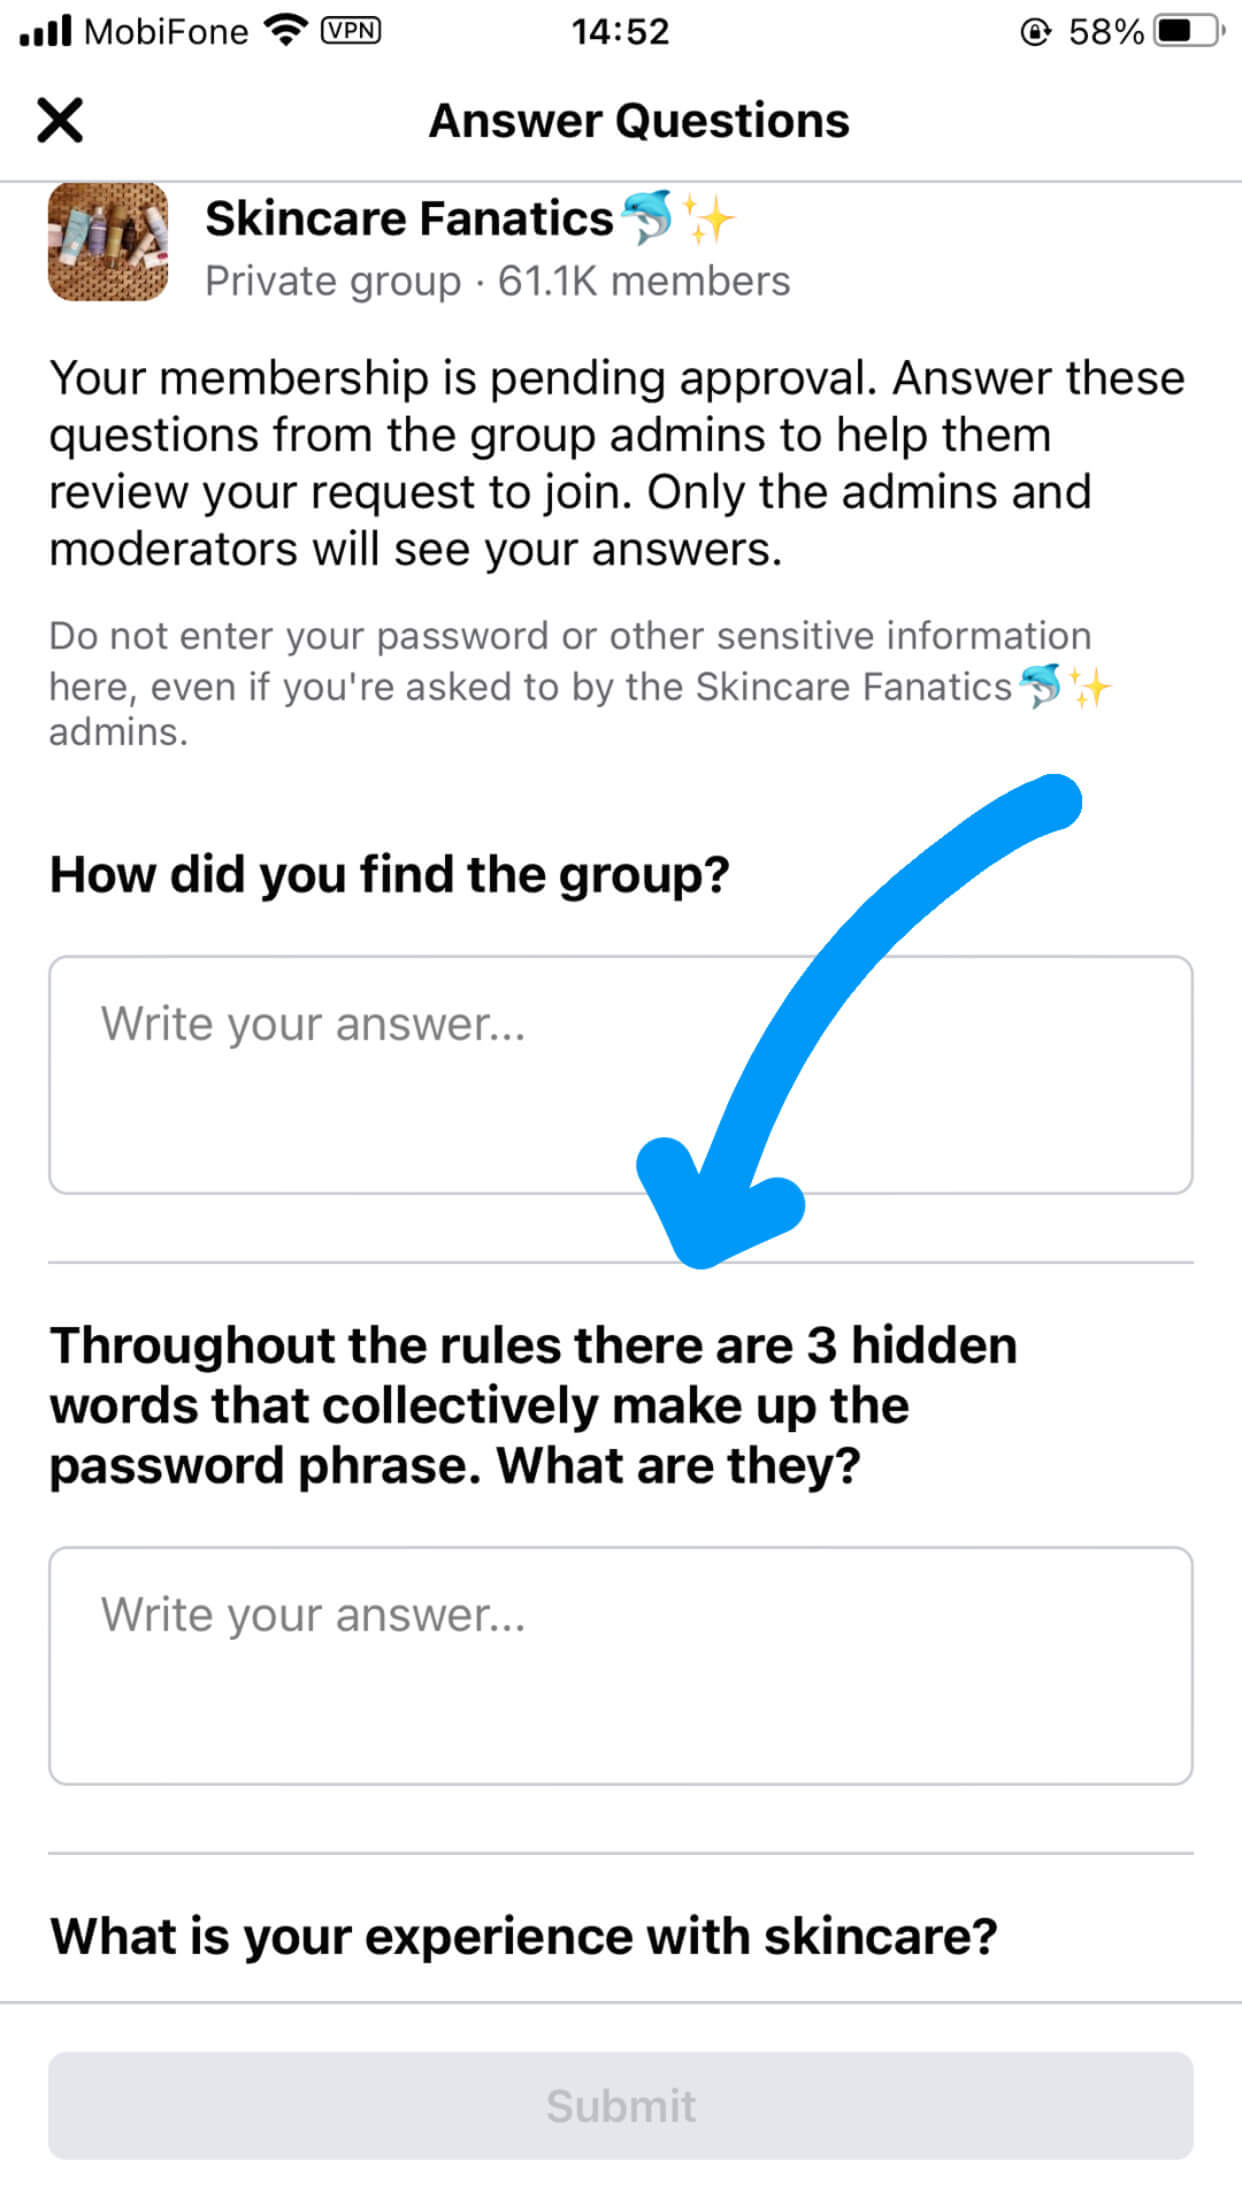
This will definitely filter out those who just want to join for fun
Here’s a proper set of questions from Skincare Fanatics, see the second question? It means if you want to join the “club”, you’ve read the rules carefully.
#Tip 5: Use Topics to Organize your group posts
If your group members discuss miscellaneous sub-topics, that’s a positive signal because you’ve built a successful group and your audiences feel comfortable sharing and engaging.
However, some can struggle to find the posts they want. That’s why you should use Topics to organize posts in your group. This will make your group more professional and make it easier for members to navigate to the topics they want to discuss.
You can encourage your members to use the hashtags or as an admin, here’s how to add topics to your group members’ posts:
- Navigate to your Group
- Head to the post you’d like to add a topic to.
- Click “more” in the top right of the post > select “Add post topic”
- Add a topic and Save
After you’ve done, the topics will appear like this on your members’ posts.
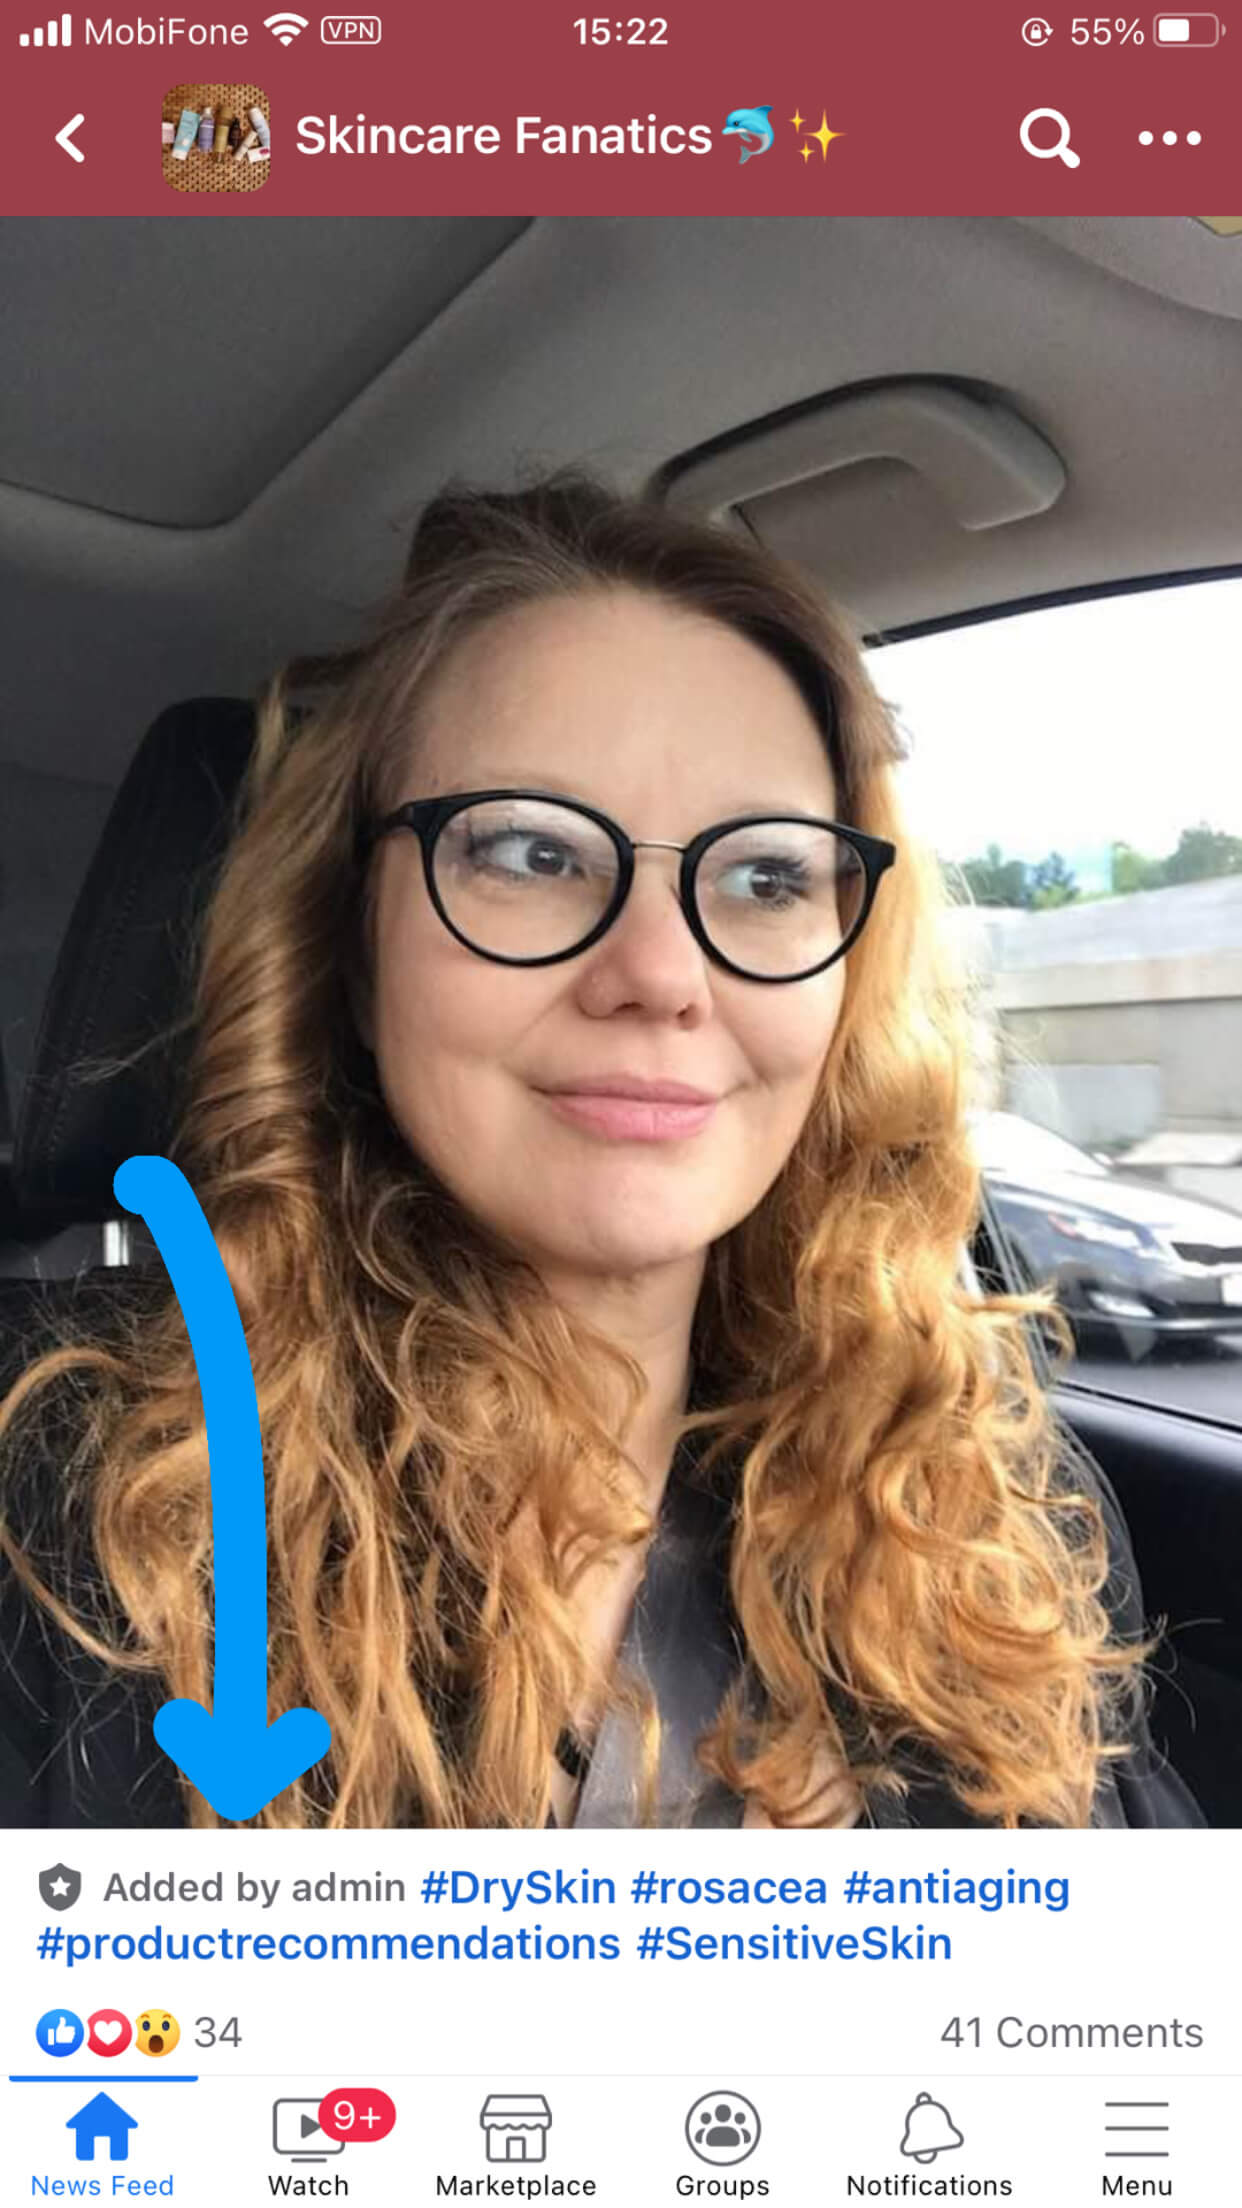
The topics you assign will be labeled “Added by admin”
Though this practice requires some effort, it’s worth putting in some attempts to make things easier for your group members.
Final thoughts
Facebook Group is old, but it’s always gold! If you have a presence on this huge social media platform. You can learn how to grow your Facebook Group and utilize it to create a more bonded relationship with your customers and build your social trust along the way.
It’s time to create and nurture your community! And we hope this article will help you to do so.


 socialshop
 socialpublish
 socialreply
 socialwidget