
Since online selling is getting more popular, Facebook Live Producer has been announced to bring more opportunities for merchants on this platform. And similar to Instagram Live, this feature can help you engage your community and bring potential customers to your brand.
Table of Contents
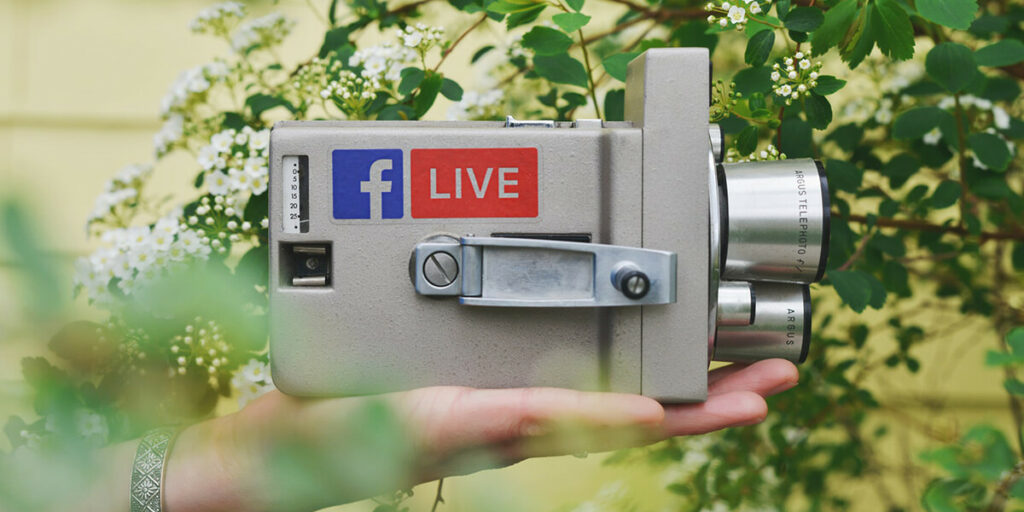
What is Facebook Live Producer?
Facebook Live is a feature from Facebook that allows users to use the camera on their computer or mobile devices to make a live broadcast in real-time. During the live stream, viewers can interact with merchants via the comment section for other important information.
This provides an interactive and fun way to keep your audience engaged while speaking directly with them.
Why you should use Facebook Live Producer for your business
Like Instagram Live, Facebook Live is a great way to connect with your audience and let them know more about your business. There are various ways for you to go live, from your profile, Page, Group to an event.
During a live stream, viewers can give likes, comments, and ask questions directly to brands in real-time. This will help build relationships between customers and brands better. Moreover, you will be able to get valuable feedback from your audience directly and quickly.
Live streaming helps engage your audience better
However, there are some minor differences between Instagram Live and Facebook Live. While Instagram Live videos usually have a 1-hour duration and last for 24 hours, Facebook Live allows its video’s duration up to 8 hours. Additionally, you can also save that video as a normal post in your account. As a result, businesses can build their brand much more efficiently when compared to live videos on Instagram.
More importantly, Facebook will notify your followers (or the ones who liked your page) whenever you broadcast a live video. This is truly an advantage for increasing your brand awareness and discoverability on the platform.
Since the appearance of Facebook Live, more and more brands start using this function for their business. And, it has already proved its effectiveness for all kinds of businesses. Therefore, it is hard to ignore a feature that can bring you lots of benefits.
How to use Facebook Live Producer for your business
All you need to do is having a Facebook account and stable network connection, you can broadcast from anywhere in the world.
Nevertheless, there are always things for you to consider to get a better live streaming experience with Facebook live. Therefore, you should check your video settings, making sure that the live stream will be of the highest quality before going live.
Test your microphone, video quality, network connection, and lighting
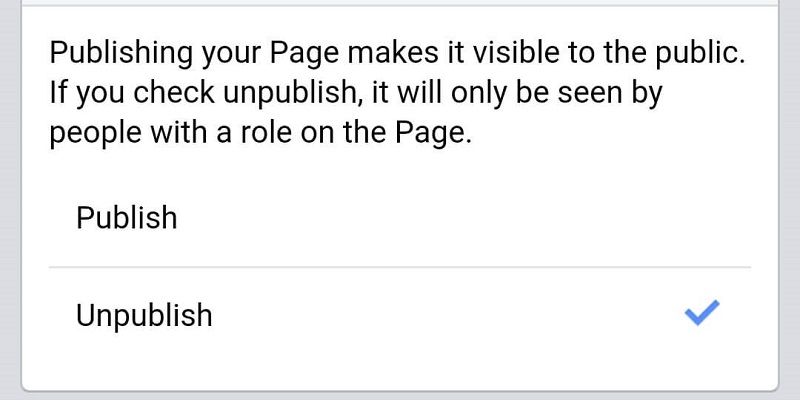
To get the best quality for your live stream videos, you’ll need to test these requirements: video quality, microphone, lighting, and internet. Therefore, you should change the settings to “Only me” if you don’t want anyone to see your testing posts.
However, if you are running your business via Facebook Page, you can’t set the privacy of your videos. In this case, you can turn your Page to “Unpublish” first and start testing. You can see the instructions on how to publish or unpublish your Page by the Facebook Help Center.
How is your video quality? Is there enough lighting? How clear is the audio in your live video? Are you experiencing any lag or frame distortion? These are questions that you should take notice of carefully to have a successful live broadcast.
Moreover, you will also be able to discover problems and make any adjustments needed for your videos. That’s why these live tests are important and worth considering.
TIP: If you find the live stream shaky or unstable, you should get a tripod to set up your phone and get better stabilization. You can also stack up some books and lay your phone against them for the same effect.
How to operate Facebook Live Producer on mobile
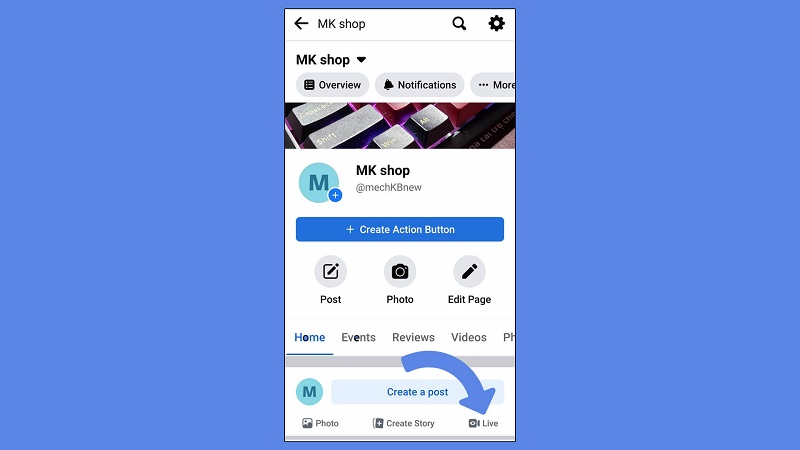
To make a live stream video on your phone, these are the simple steps that you should follow:
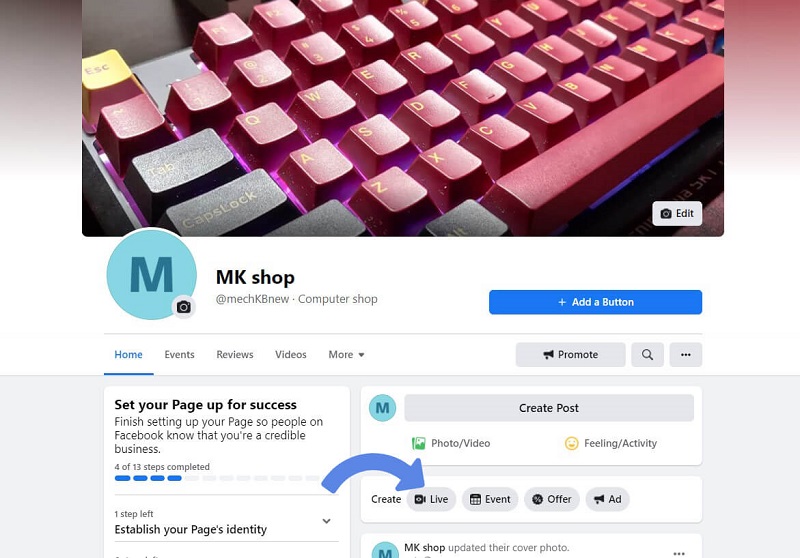
Step 1: Head to the Facebook Page that you want to go live and tap the “Live” button.
Step 2: Remember to add an engaging video description.
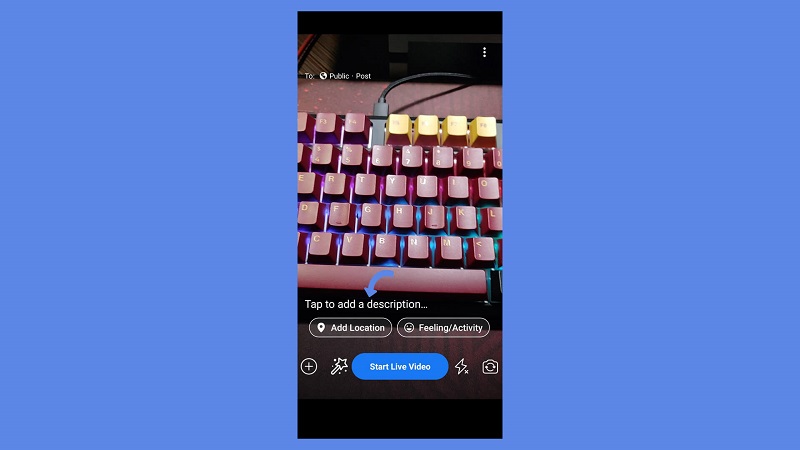
Add a good description to attract more viewers
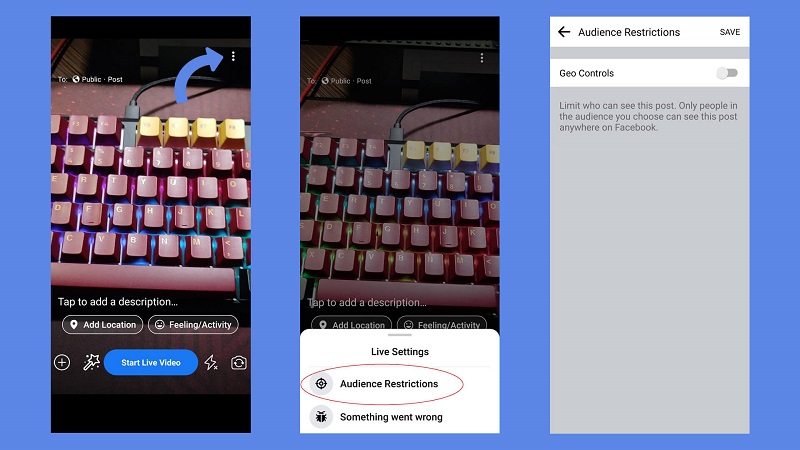
Step 3: When going live on mobile from your Facebook Page, this video will be public, meaning that every user can see it.
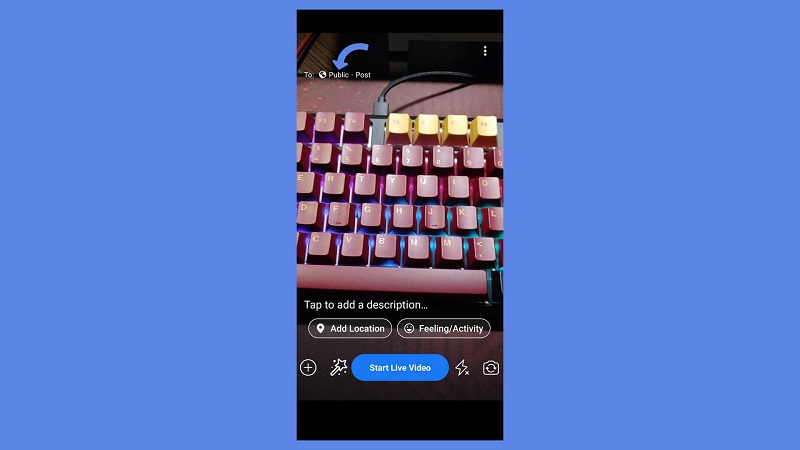
You can limit the viewers from a specific location by tapping the three dots on the top right corner. From here, you can access “Audience Restrictions.”
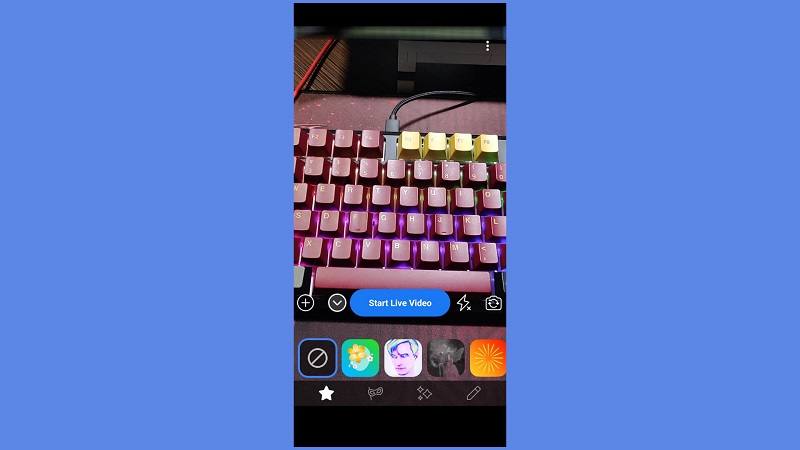
Step 4: Try out Facebook’s special effects.
![]()
Just tap the “star wand” icon on the bottom left and you will see some filters, effects, lenses, and a drawing tool.
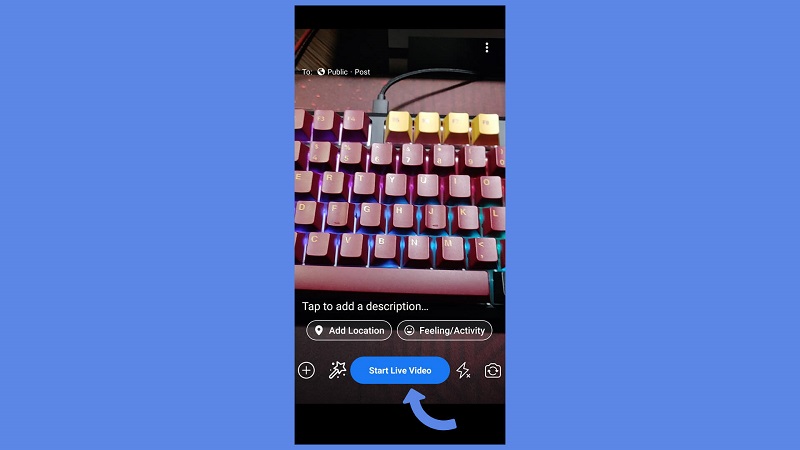
Step 5: When you are satisfied with how everything looks, you can now tap the “Start Live Video” button. Then, you will see a 3-second notification before going live from Facebook upon the moment you click.
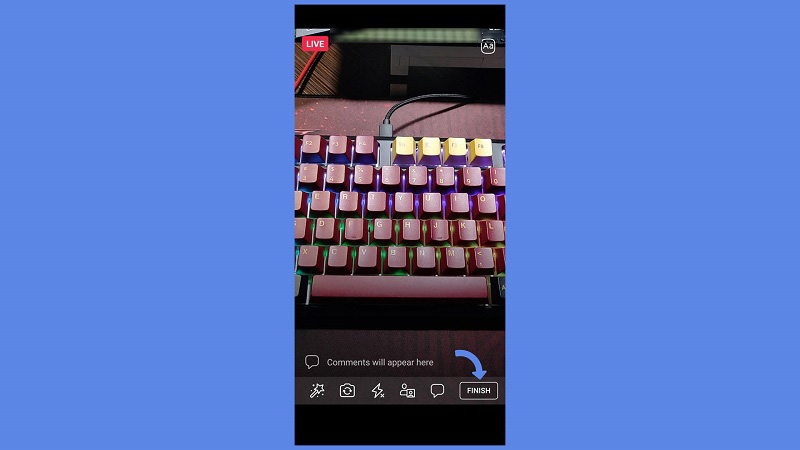
Step 6: During the live stream, there are some options for you to choose from at the bottom of your screen. And, you can decide to let viewers join the stream or write a comment, add effects, or switch to other camera views.

Once you are ready to end your Facebook Live, choose “Finish.”
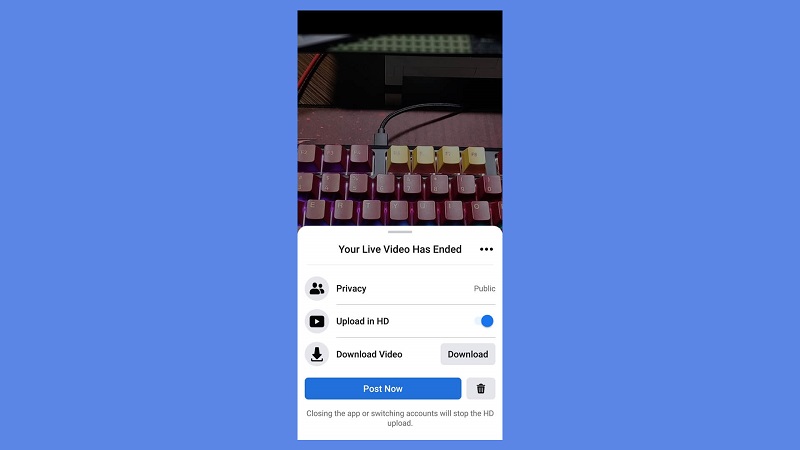
After that, you can decide to either delete the video or post its replay to your News Feed. However, it is always recommended to save the video to your camera roll. This will allow you to reuse the video somewhere else.
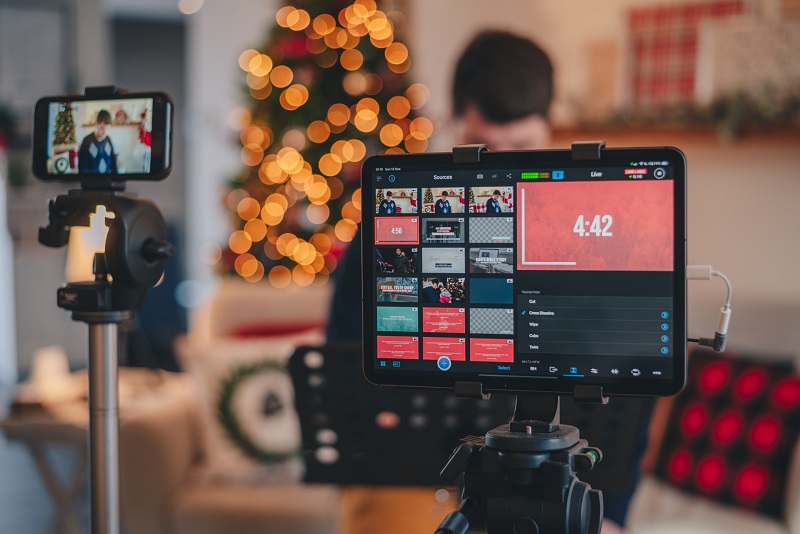
Guide to use Facebook Live Producer for business on web browsers (desktop users)
Besides mobile devices, you can also make a live stream from a desktop with Facebook Live panel discussions, events, or interviews. Moreover, Facebook’s Live Producer for desktop provides more professional settings for their users when compared to the mobile platform.
Step 1: Go to your Business Page on your desktop.
Step 2: Click the “Live” button.
Step 3: After that, you will be taken to the Facebook Live Producer.
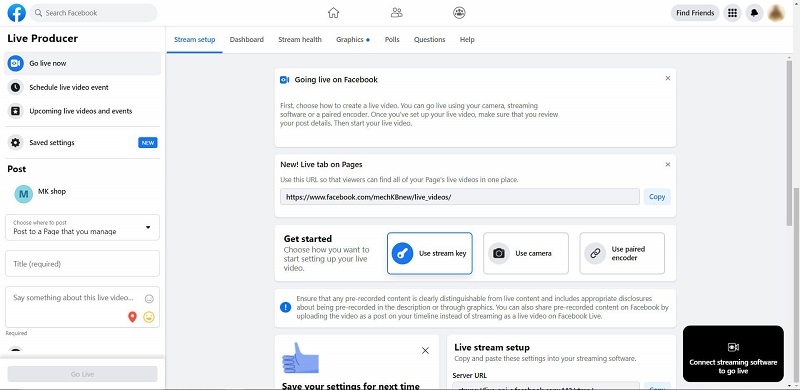
Facebook Live Producer Page
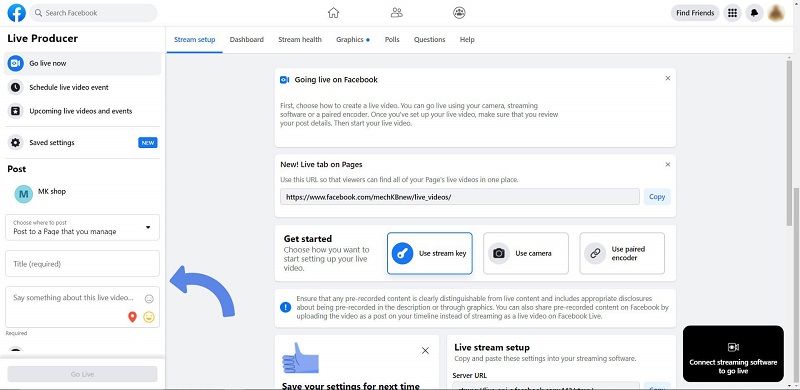
On this page, you will be able to add a title and write a description for your video. Additionally, you can also change your share and adjust your audience settings.
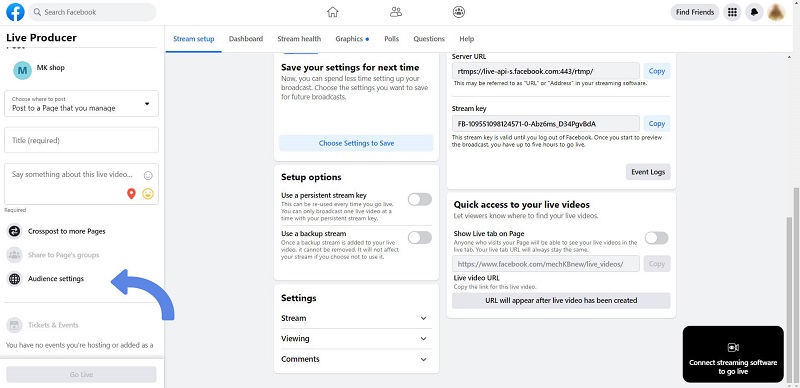
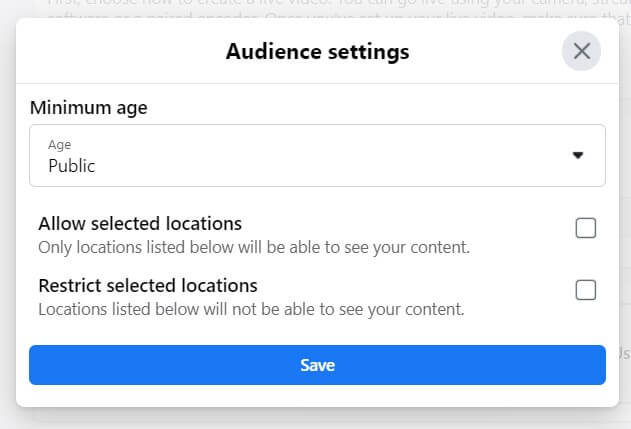
Adjust your audience settings
In this “Audience Settings” tab, you can decide who is your audience based on age and location.
Step 4: You can always add polls, questions, or links to your Facebook Live to increase engagement. These options are located at the top of the Live Producer dashboard.
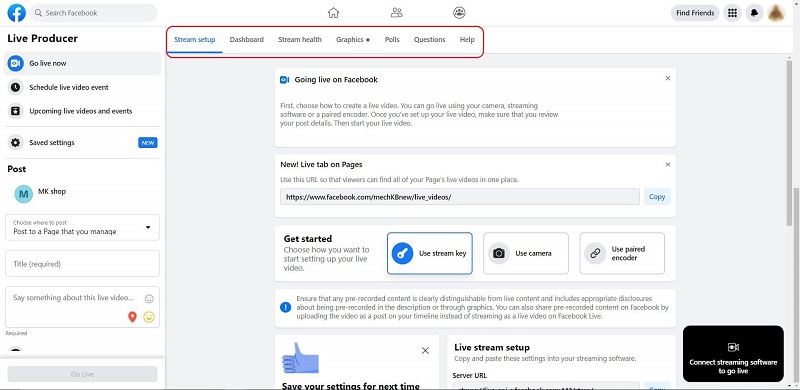
Step 5: It’s time you set up how you will go live on the web browser. You can decide to make a live stream by using a stream key, your desktop camera, or a paired encoder.
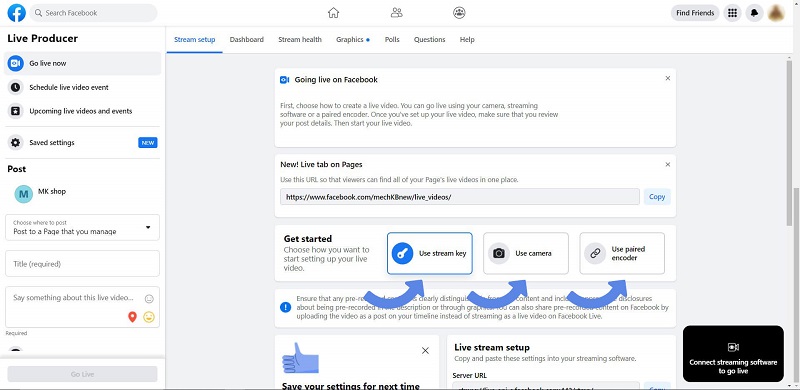
Choose how you want to make your live stream
Final words
Facebook Live Producer is a cool feature that hasn’t been fully deployed by many businesses yet. Therefore, this is a great opportunity for you to take advantage of it and implement this feature in your brand.
It will surely get your audience’s attention, build brand awareness, and encourage viewers to become customers for your online business.


 socialshop
 socialpublish
 socialreply
 socialwidget